- Overview
- Getting Started Guide
- UserGuide
-
References
-
ABEJA Platform CLI
- CONFIG COMMAND
- DATALAKE COMMAND
- DATASET COMMAND
- TRAINING COMMAND
-
MODEL COMMAND
- check-endpoint-image
- check-endpoint-json
- create-deployment
- create-endpoint
- create-model
- create-service
- create-trigger
- create-version
- delete-deployment
- delete-endpoint
- delete-model
- delete-service
- delete-version
- describe-deployments
- describe-endpoints
- describe-models
- describe-service-logs
- describe-services
- describe-versions
- download-versions
- run-local
- run-local-server
- start-service
- stop-service
- submit-run
- update-endpoint
- startapp command
- SECRET COMMAND
- SECRET VERSION COMMAND
-
ABEJA Platform CLI
- FAQ
- Appendix
Create a work
What is work?
Work is a management unit within a project that is created tied to a single data source (GCS and S3 folders, data lakes, etc.).
Individual tasks can be imported, so tasks can be grouped and managed within a project.
It can also be used to manage the scope of permission, as individual annotators can be assigned to tasks.
Multiple works can be created for a single project.

You can assign workers, add target data, and output the results for each work. And workers assigned to a project will automatically be assigned to all work under the project.
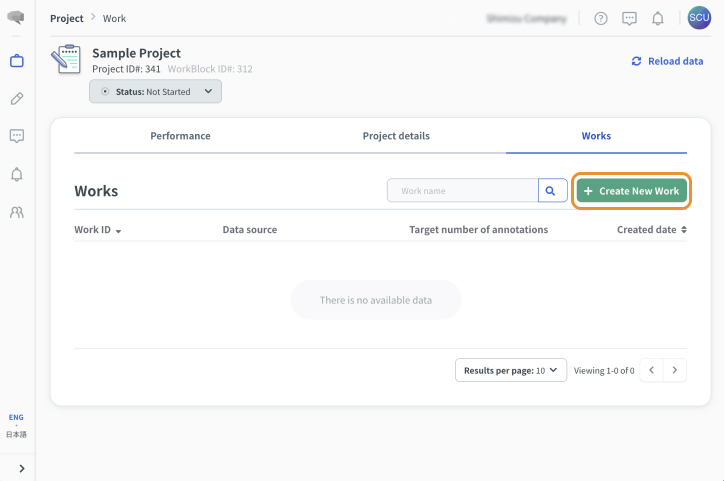
Open the work creation screen.
On the work creation screen, you can create a work with following steps .
- Select the project for which you want to create the work.
- Select the “Work” tab on the project page.
- Click “Create New Work” button.
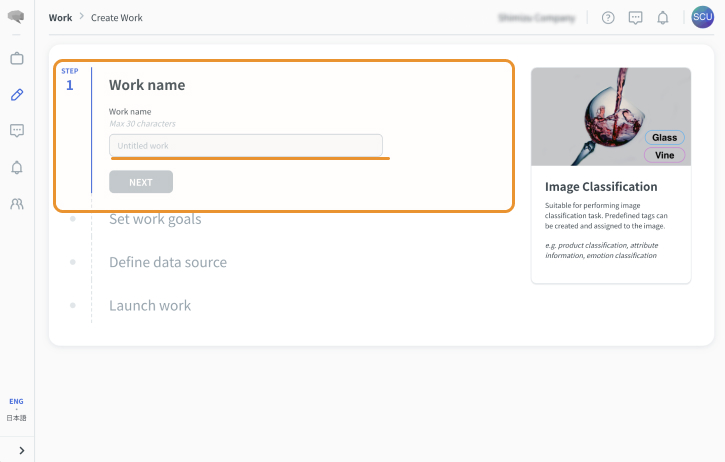
Set the work name
Enter any work name and click Next.
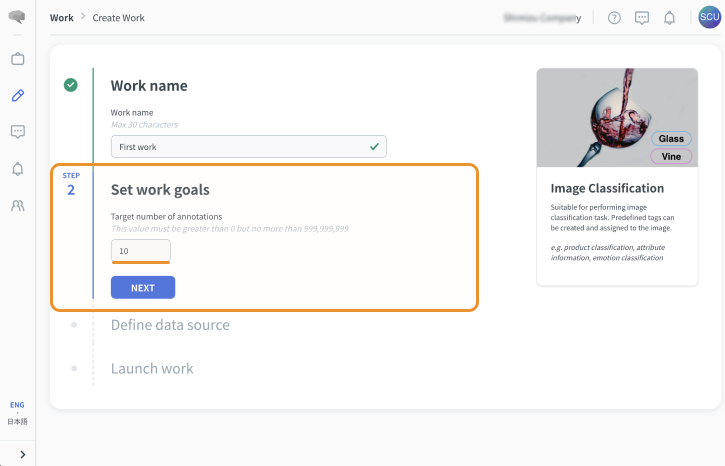
Setting Goal Point
Set a target number of annotation tasks.
Attaching Data
Select the data to be annotated.
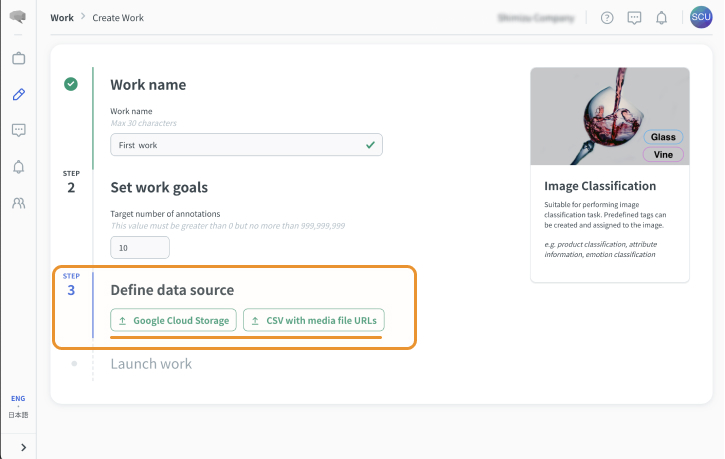
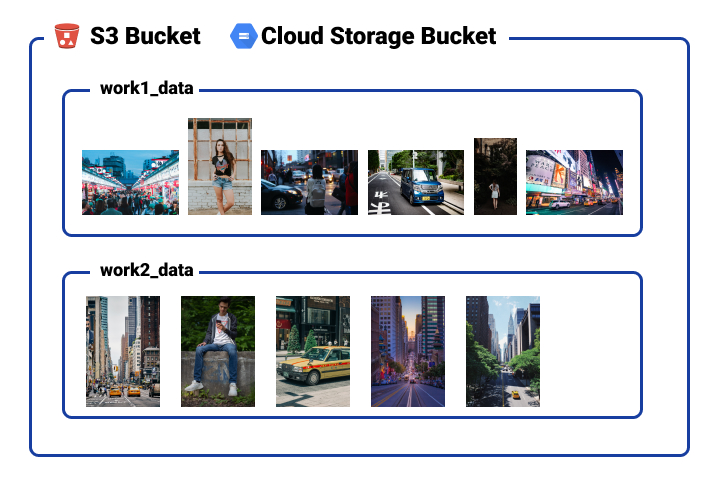
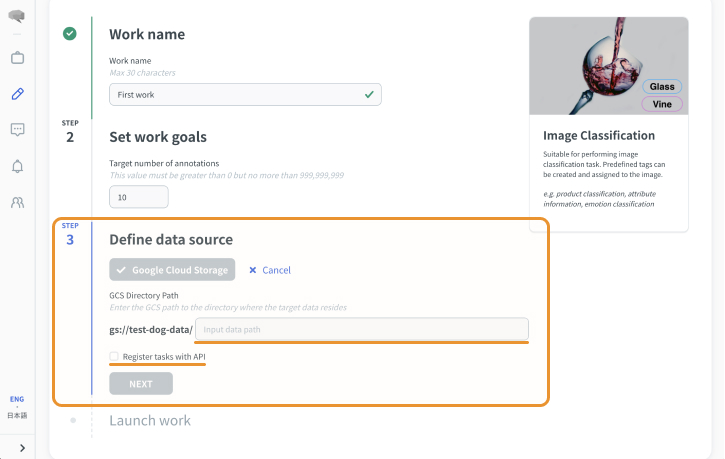
A: Cloud Storage
- Enter URI of target data source under the path you specified on project creation screen
- If you register tasks via API, enable the checkbox. (When API task creation is enabled, you can not create tasks via import job)
- Click “Next”
B: CSV with media file URLs
- Click “Next”
There are steps after you create a work. See create tasks page.
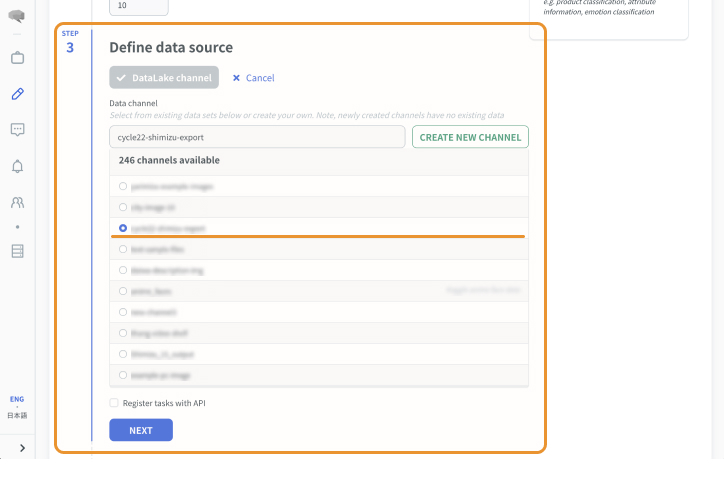
C: Datalake
- Select a data lake channel.
- Select the data lake channel to be annotated from the list of available channels.
- Activate the checkbox to create a task via the API.
- Select Next.
Submit
Click “Save and create work” button.
If you enable “Sync data right now”, the data will start to be imported automatically.
