- Overview
- Getting Started Guide
- UserGuide
-
References
-
ABEJA Platform CLI
- CONFIG COMMAND
- DATALAKE COMMAND
- DATASET COMMAND
- TRAINING COMMAND
-
MODEL COMMAND
- check-endpoint-image
- check-endpoint-json
- create-deployment
- create-endpoint
- create-model
- create-service
- create-trigger
- create-version
- delete-deployment
- delete-endpoint
- delete-model
- delete-service
- delete-version
- describe-deployments
- describe-endpoints
- describe-models
- describe-service-logs
- describe-services
- describe-versions
- download-versions
- run-local
- run-local-server
- start-service
- stop-service
- submit-run
- update-endpoint
- startapp command
- SECRET COMMAND
- SECRET VERSION COMMAND
-
ABEJA Platform CLI
- FAQ
- Appendix
Create Web API
Introduction
This section introduces how to deploy a registered model on the Platform as a Web API using the ABEJA Platform GUI.
Create a Web API for inference
The model registered in ABEJA Platform will be deployed as a Web API. In ABEJA Platform, WebAPI is called HTTP service. You can deploy a machine learning model as a WebAPI simply by specifying the model version, instance type, and number of instances.
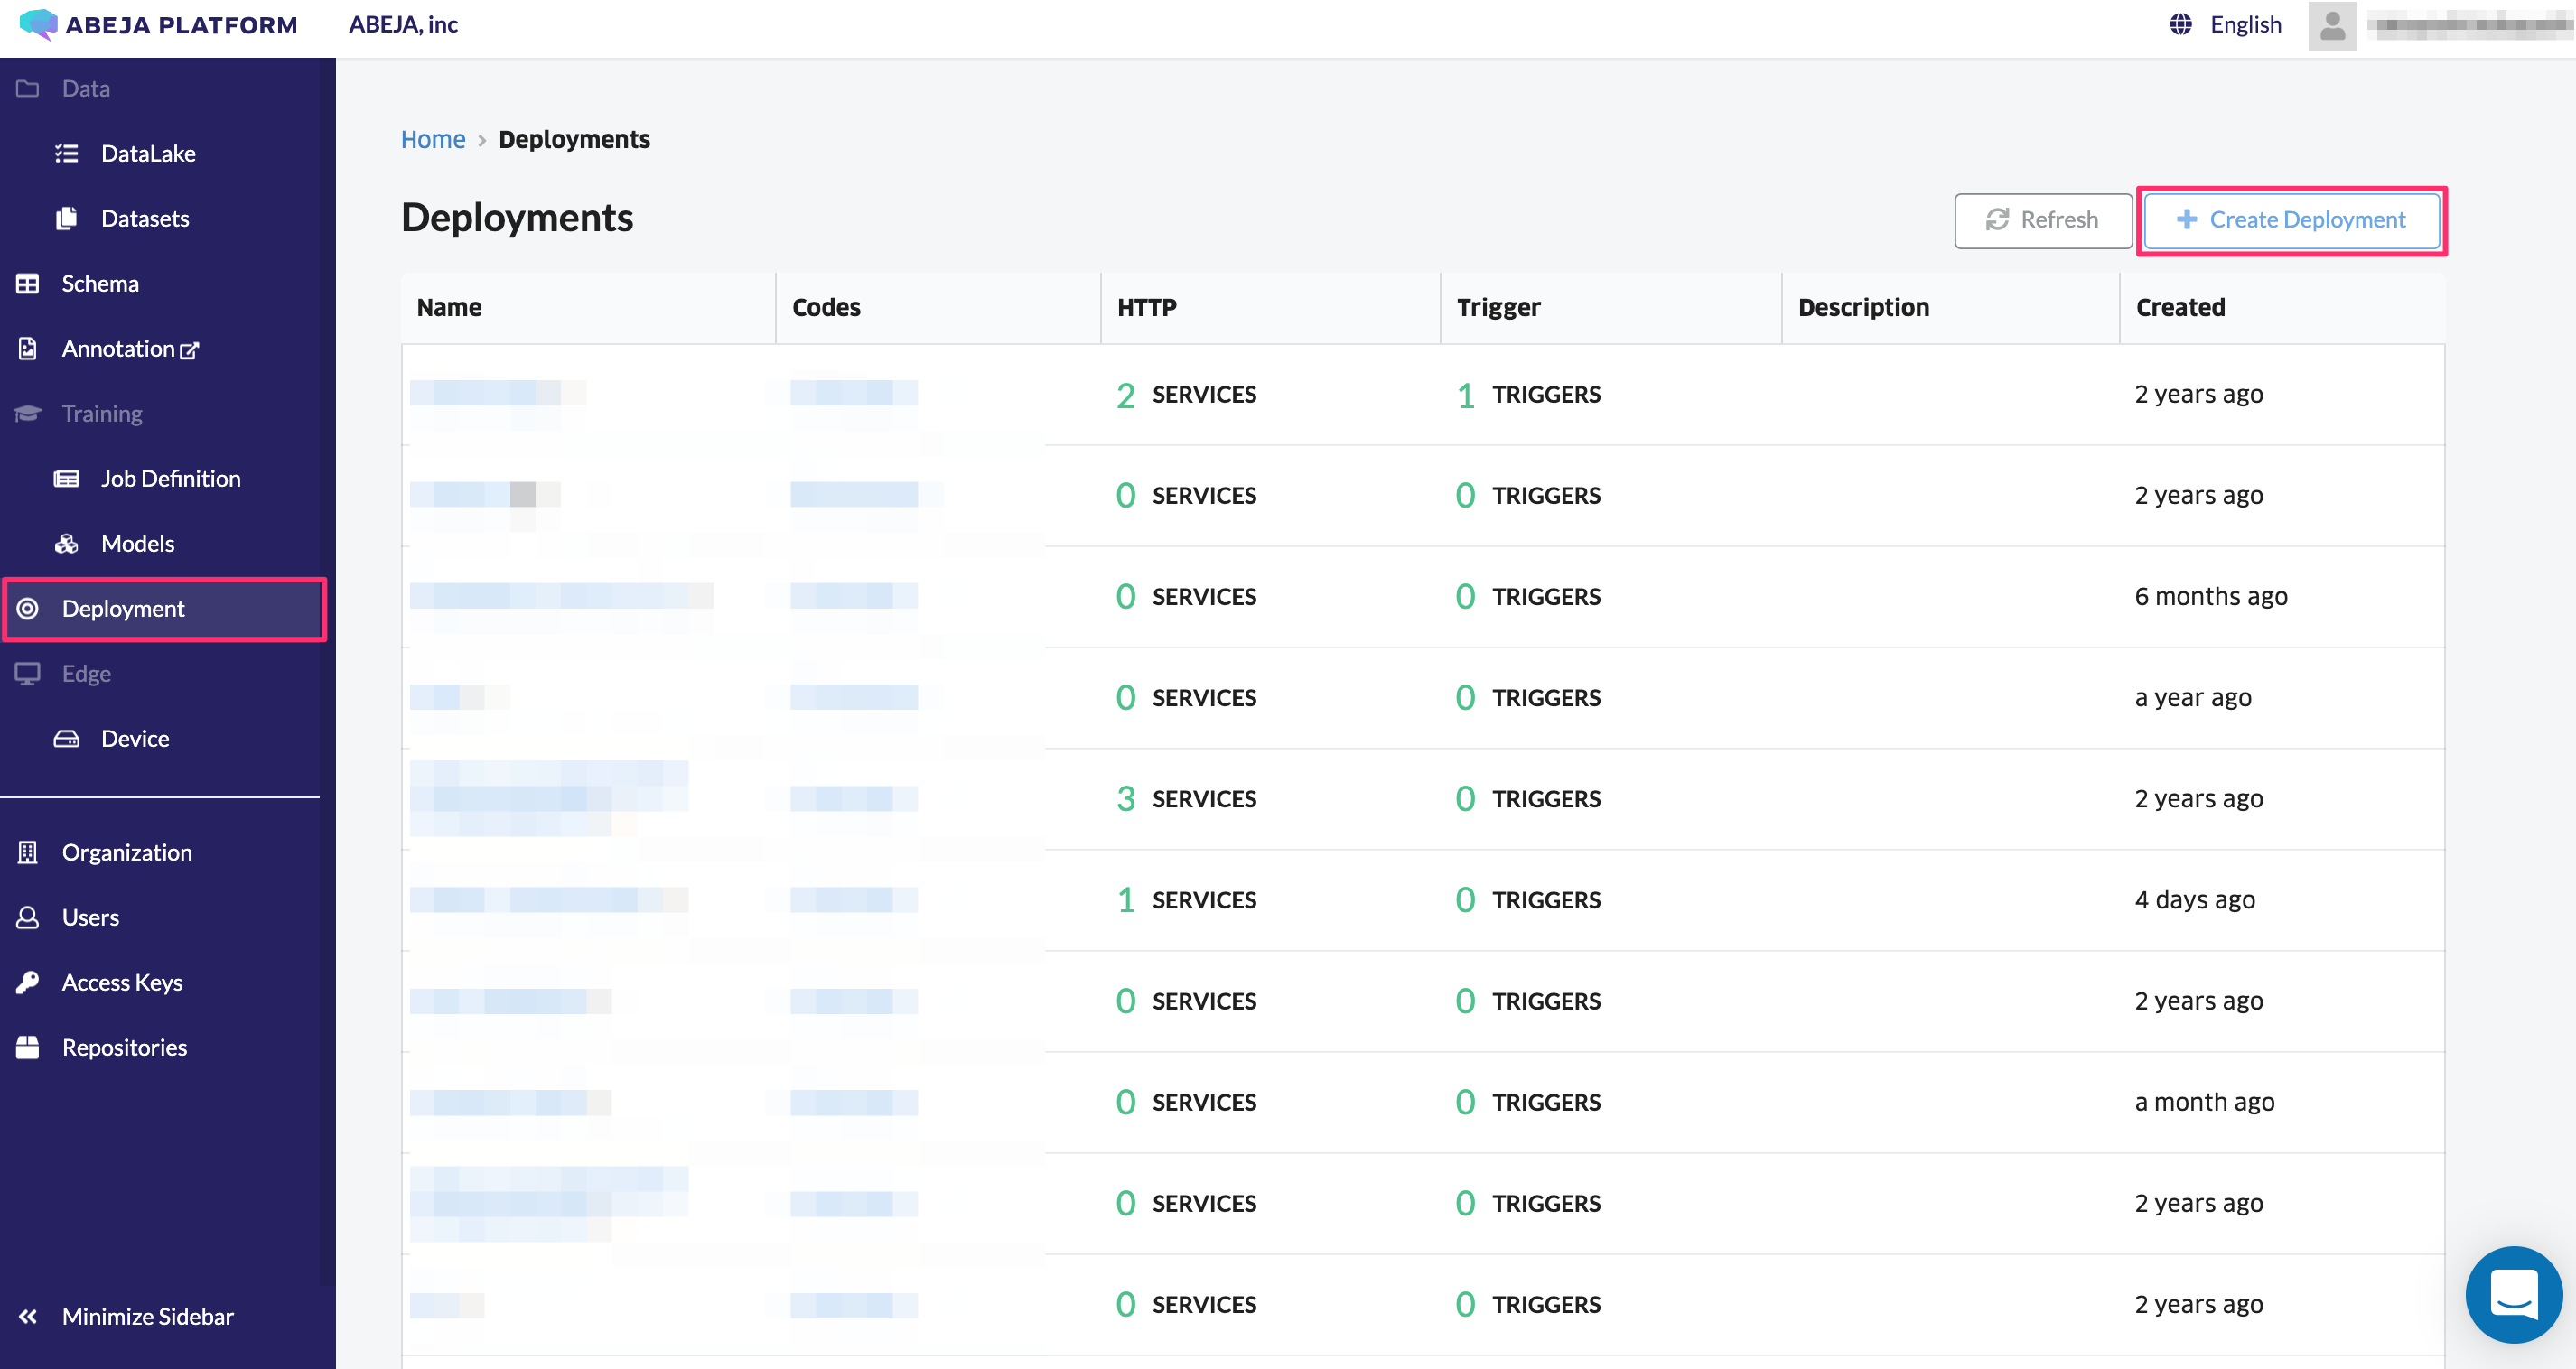
Create a deployment
Click “Deployment” in the left menu. Click the “Create Deployment” button displayed in the upper right corner of the screen.
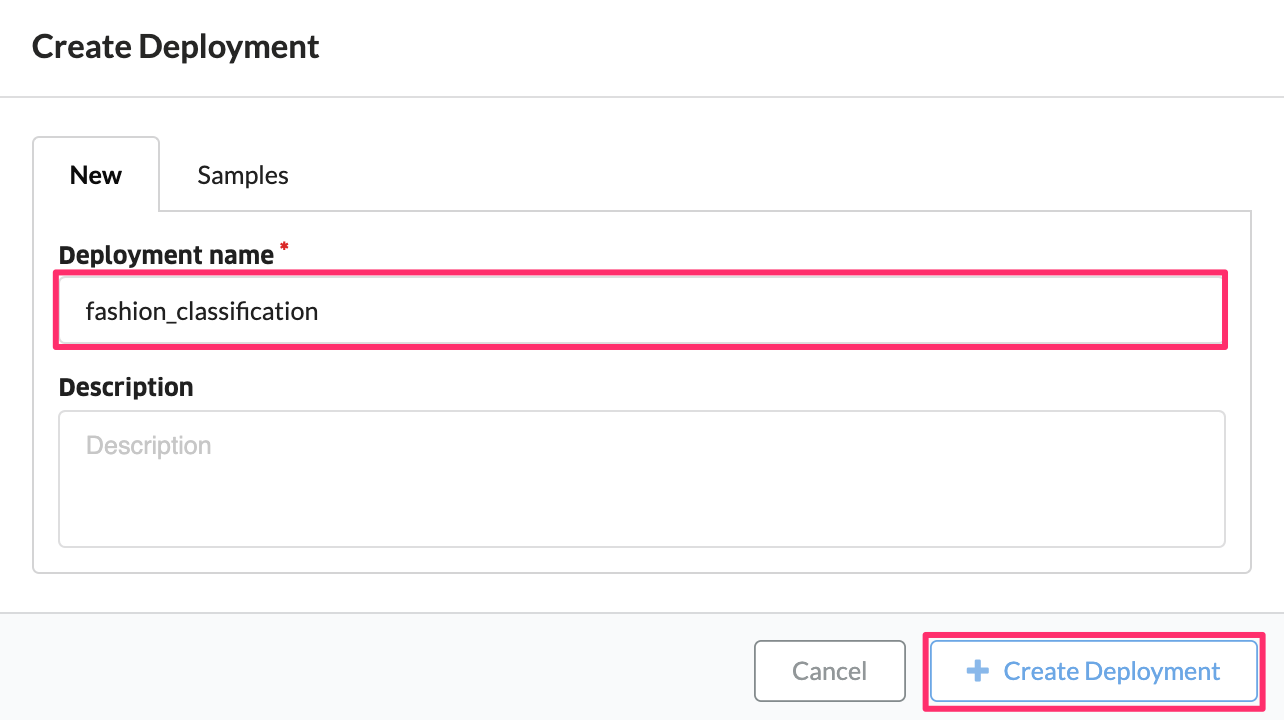
Set the following values in the input form and click “Create Deployment” to create the deployment.
| Item | Value | Remark |
|---|---|---|
| Deployment Name | Any value | - |
| Description | No input required | - |
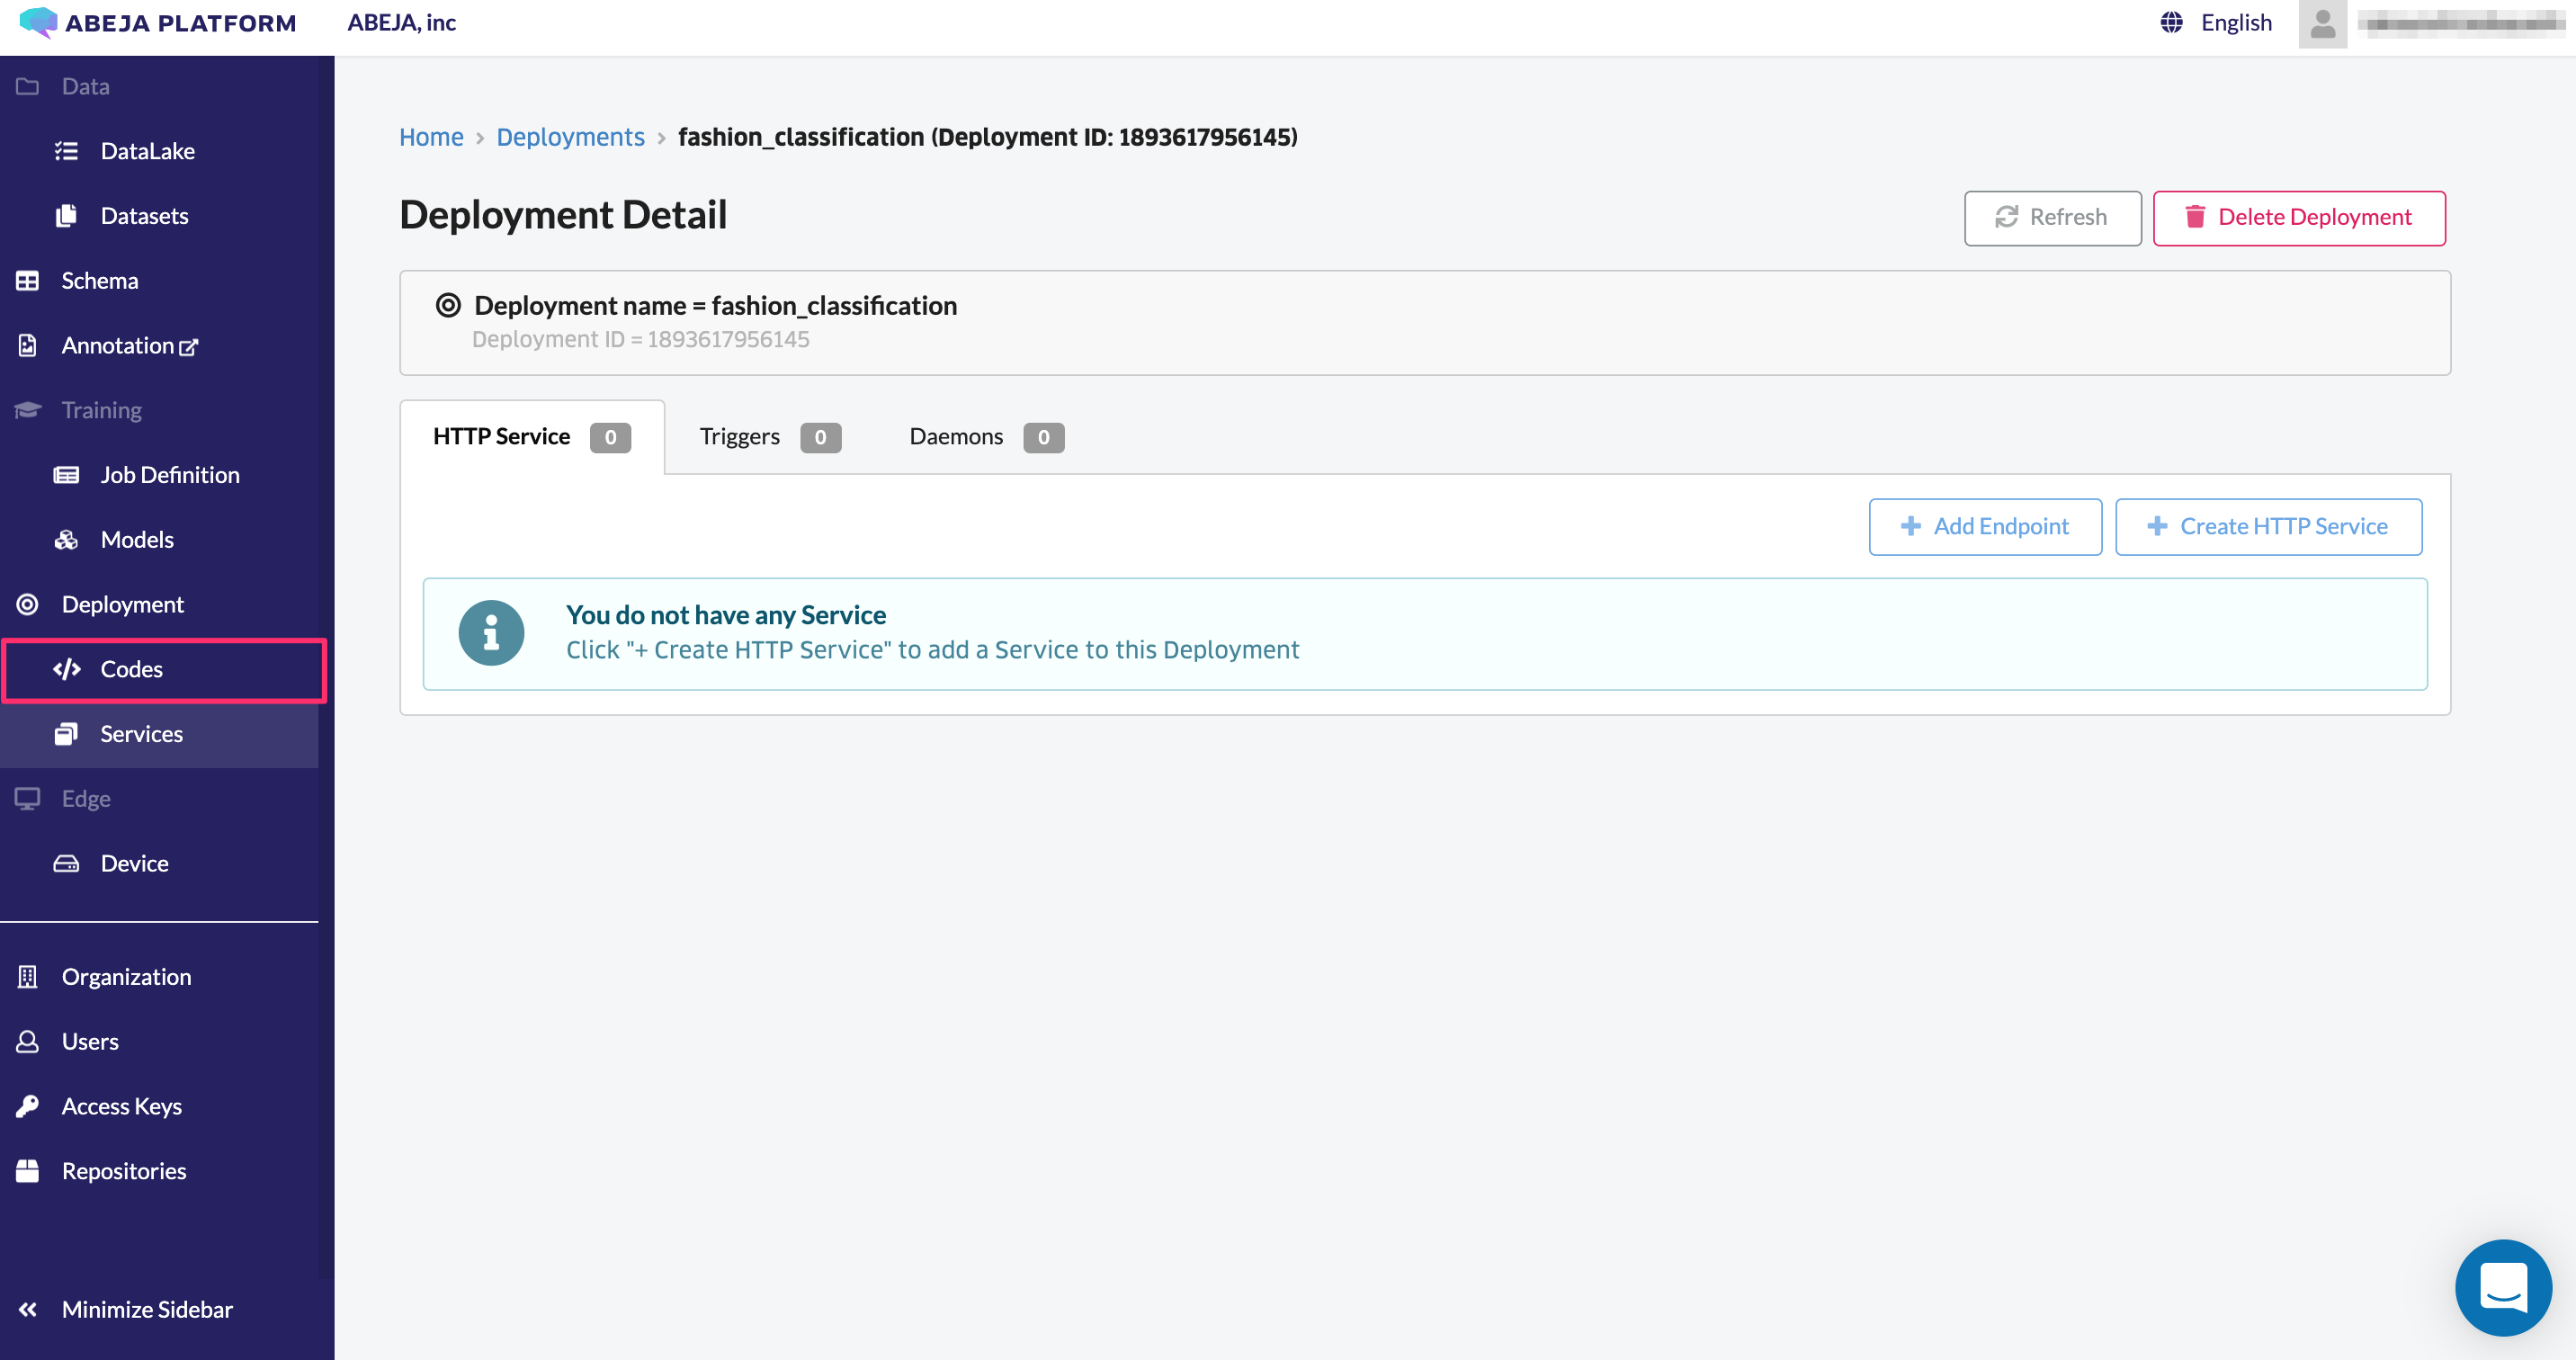
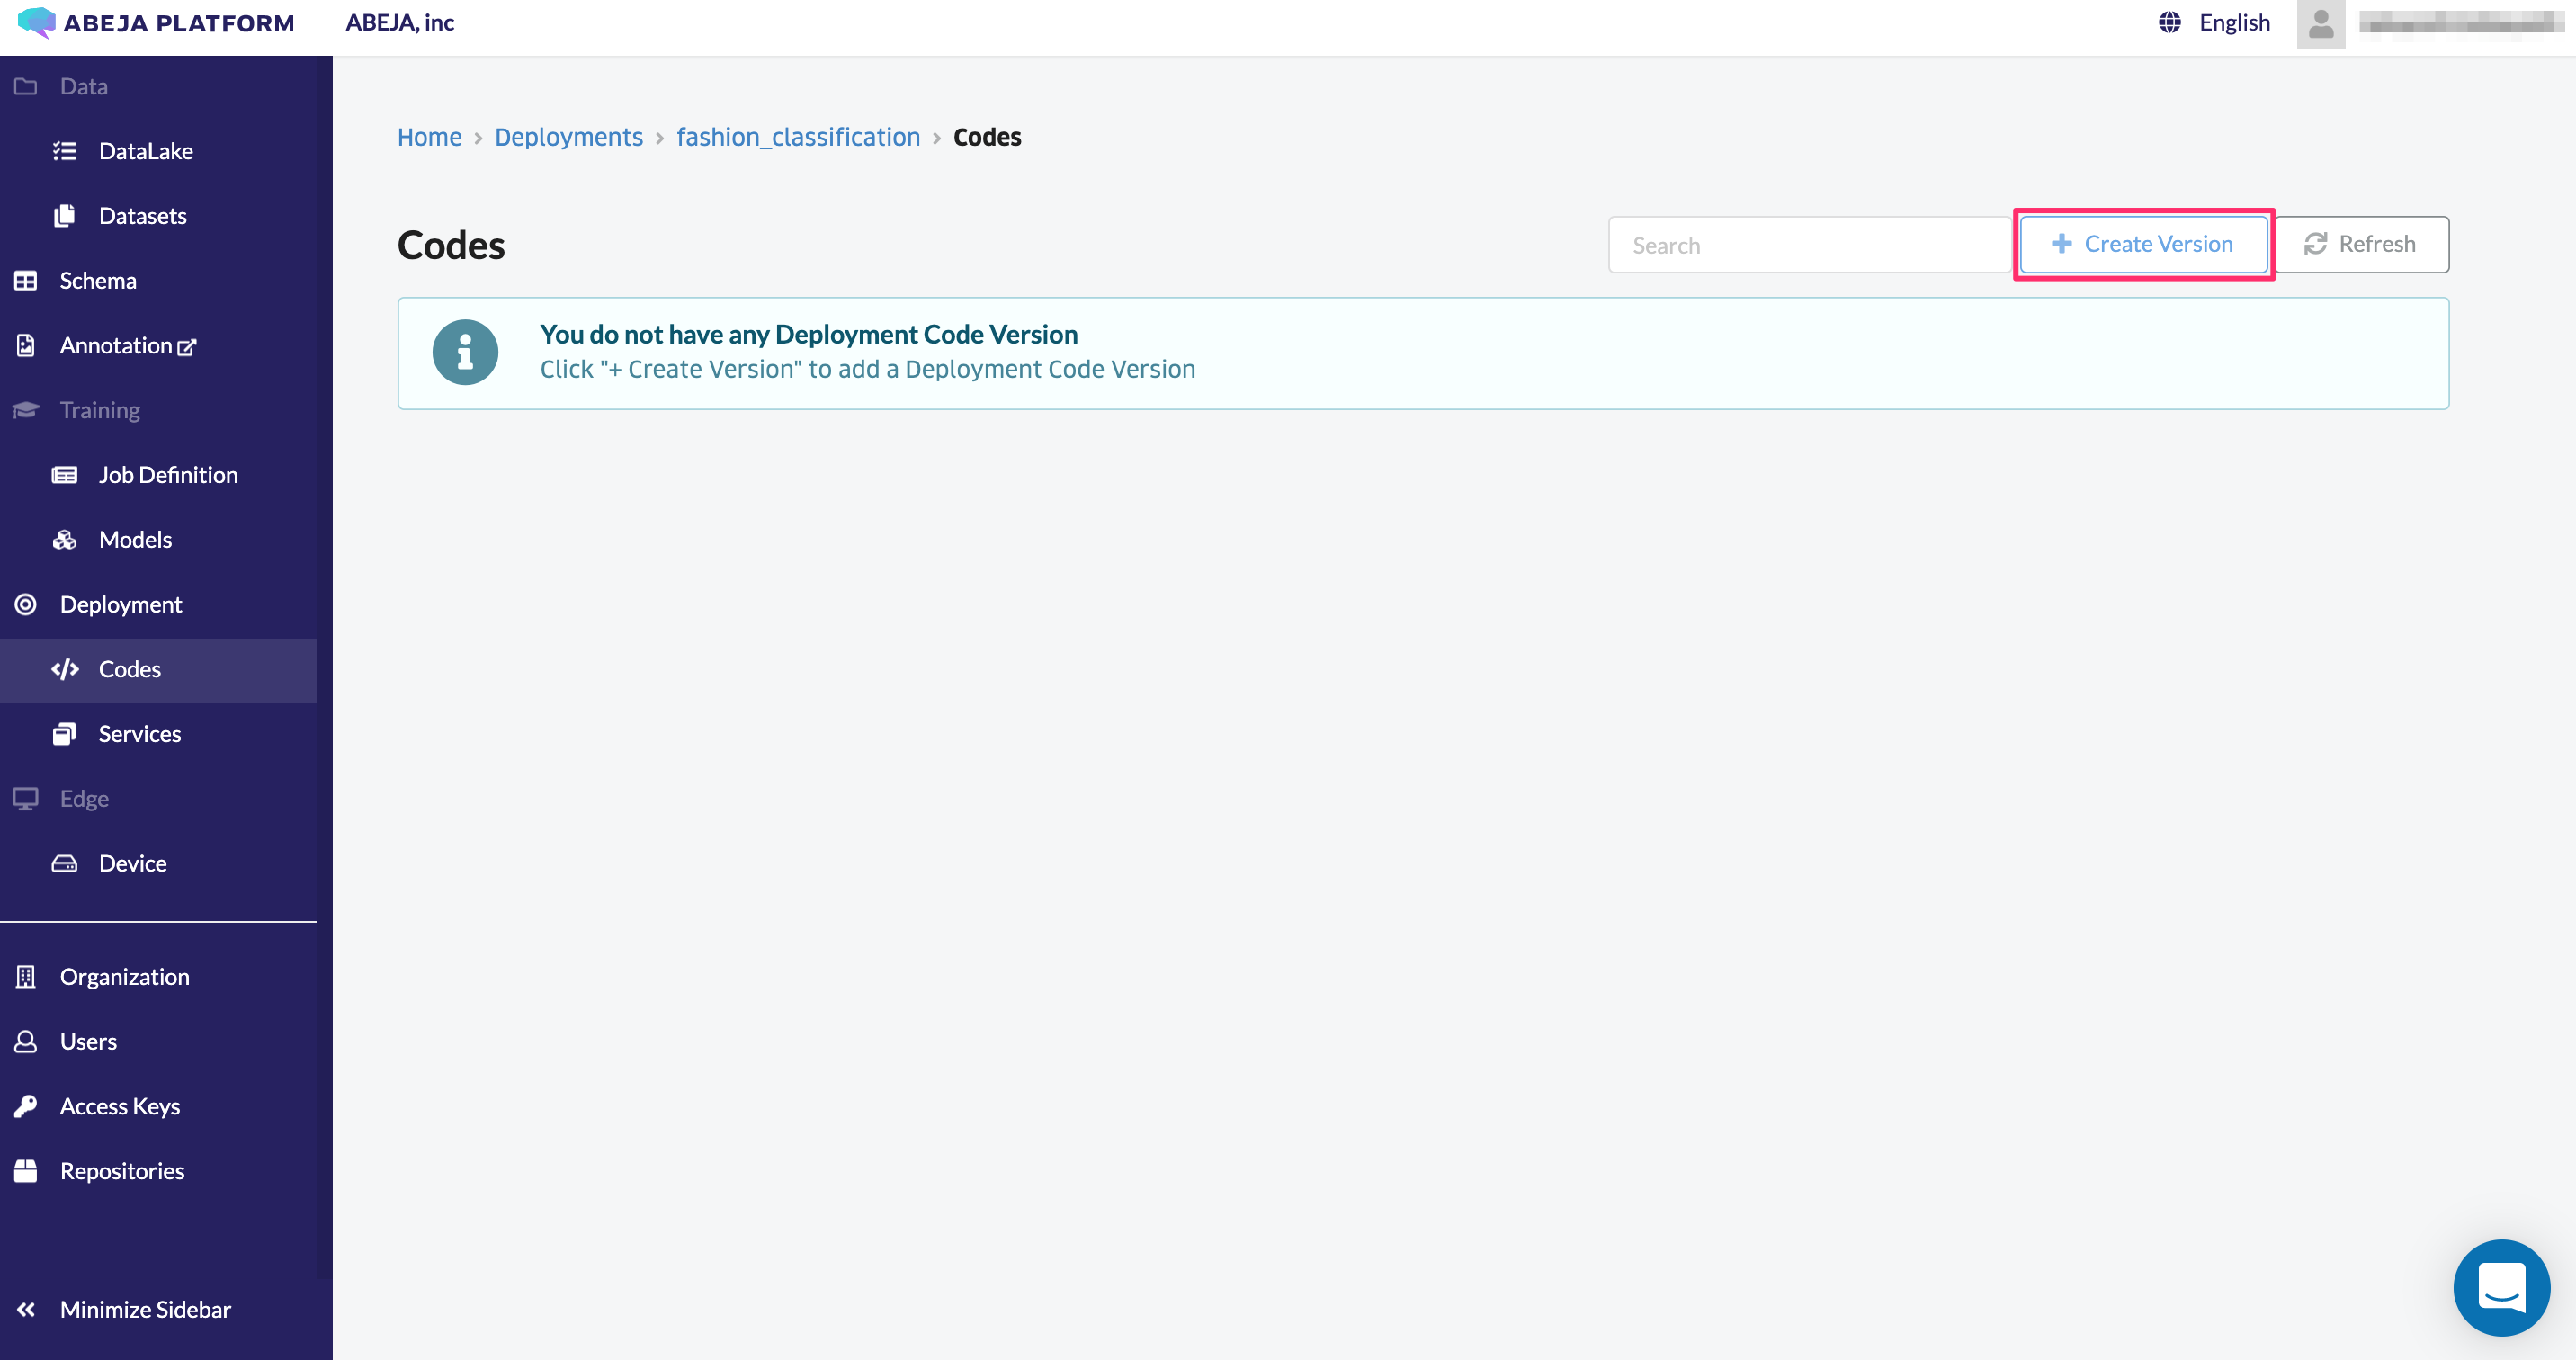
Create and manage inference codes
Click “Codes” in the left menu.
Create an inference code from “Create Version”.
To create an inference code, enter the following items and click “Create”.
| Item | Value | Remark |
|---|---|---|
| Source Code | - | |
| Inference code in Zip format and upload / template selection | ||
| Code Version | 1.0.0 | Enter a managed version of the inference code |
| Runtime | abeja-inc/all-cpu:19.04 | Select a Docker image to perform inference |
| Model Handler | predict:handler | Specify Handler to execute inference code |
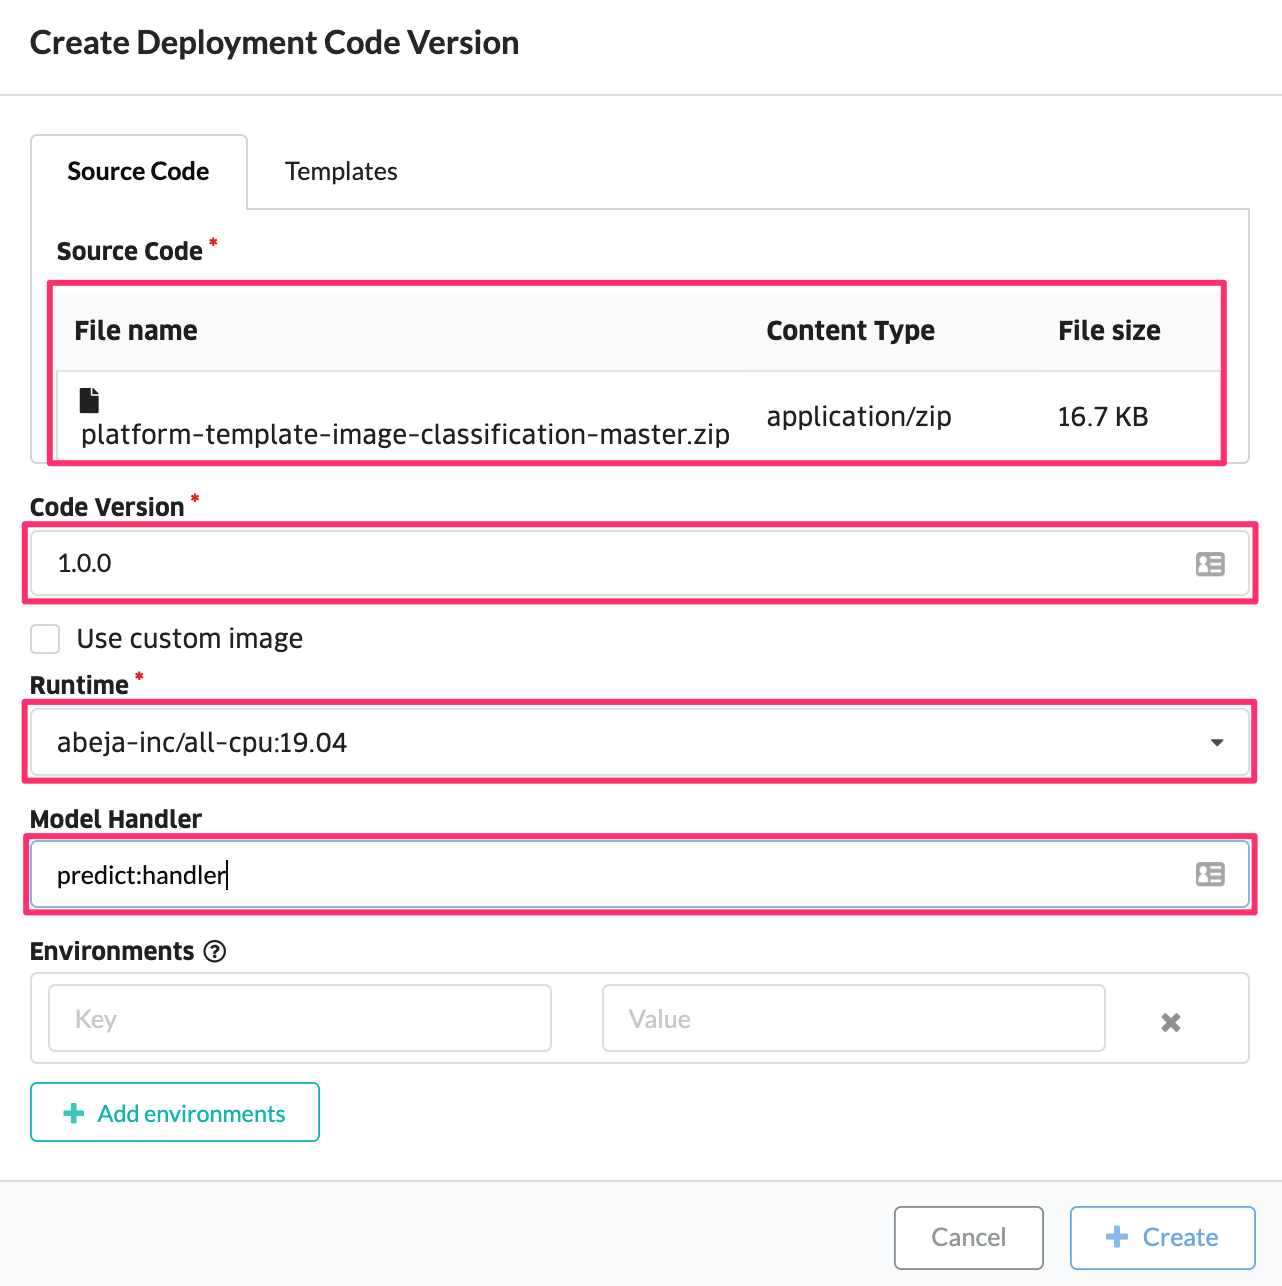
The code is now created and can be managed in a list.

Create an HTTP service
Finally, using the model and inference code, create an HTTP service (Web API).
Click “Services” in the left menu.
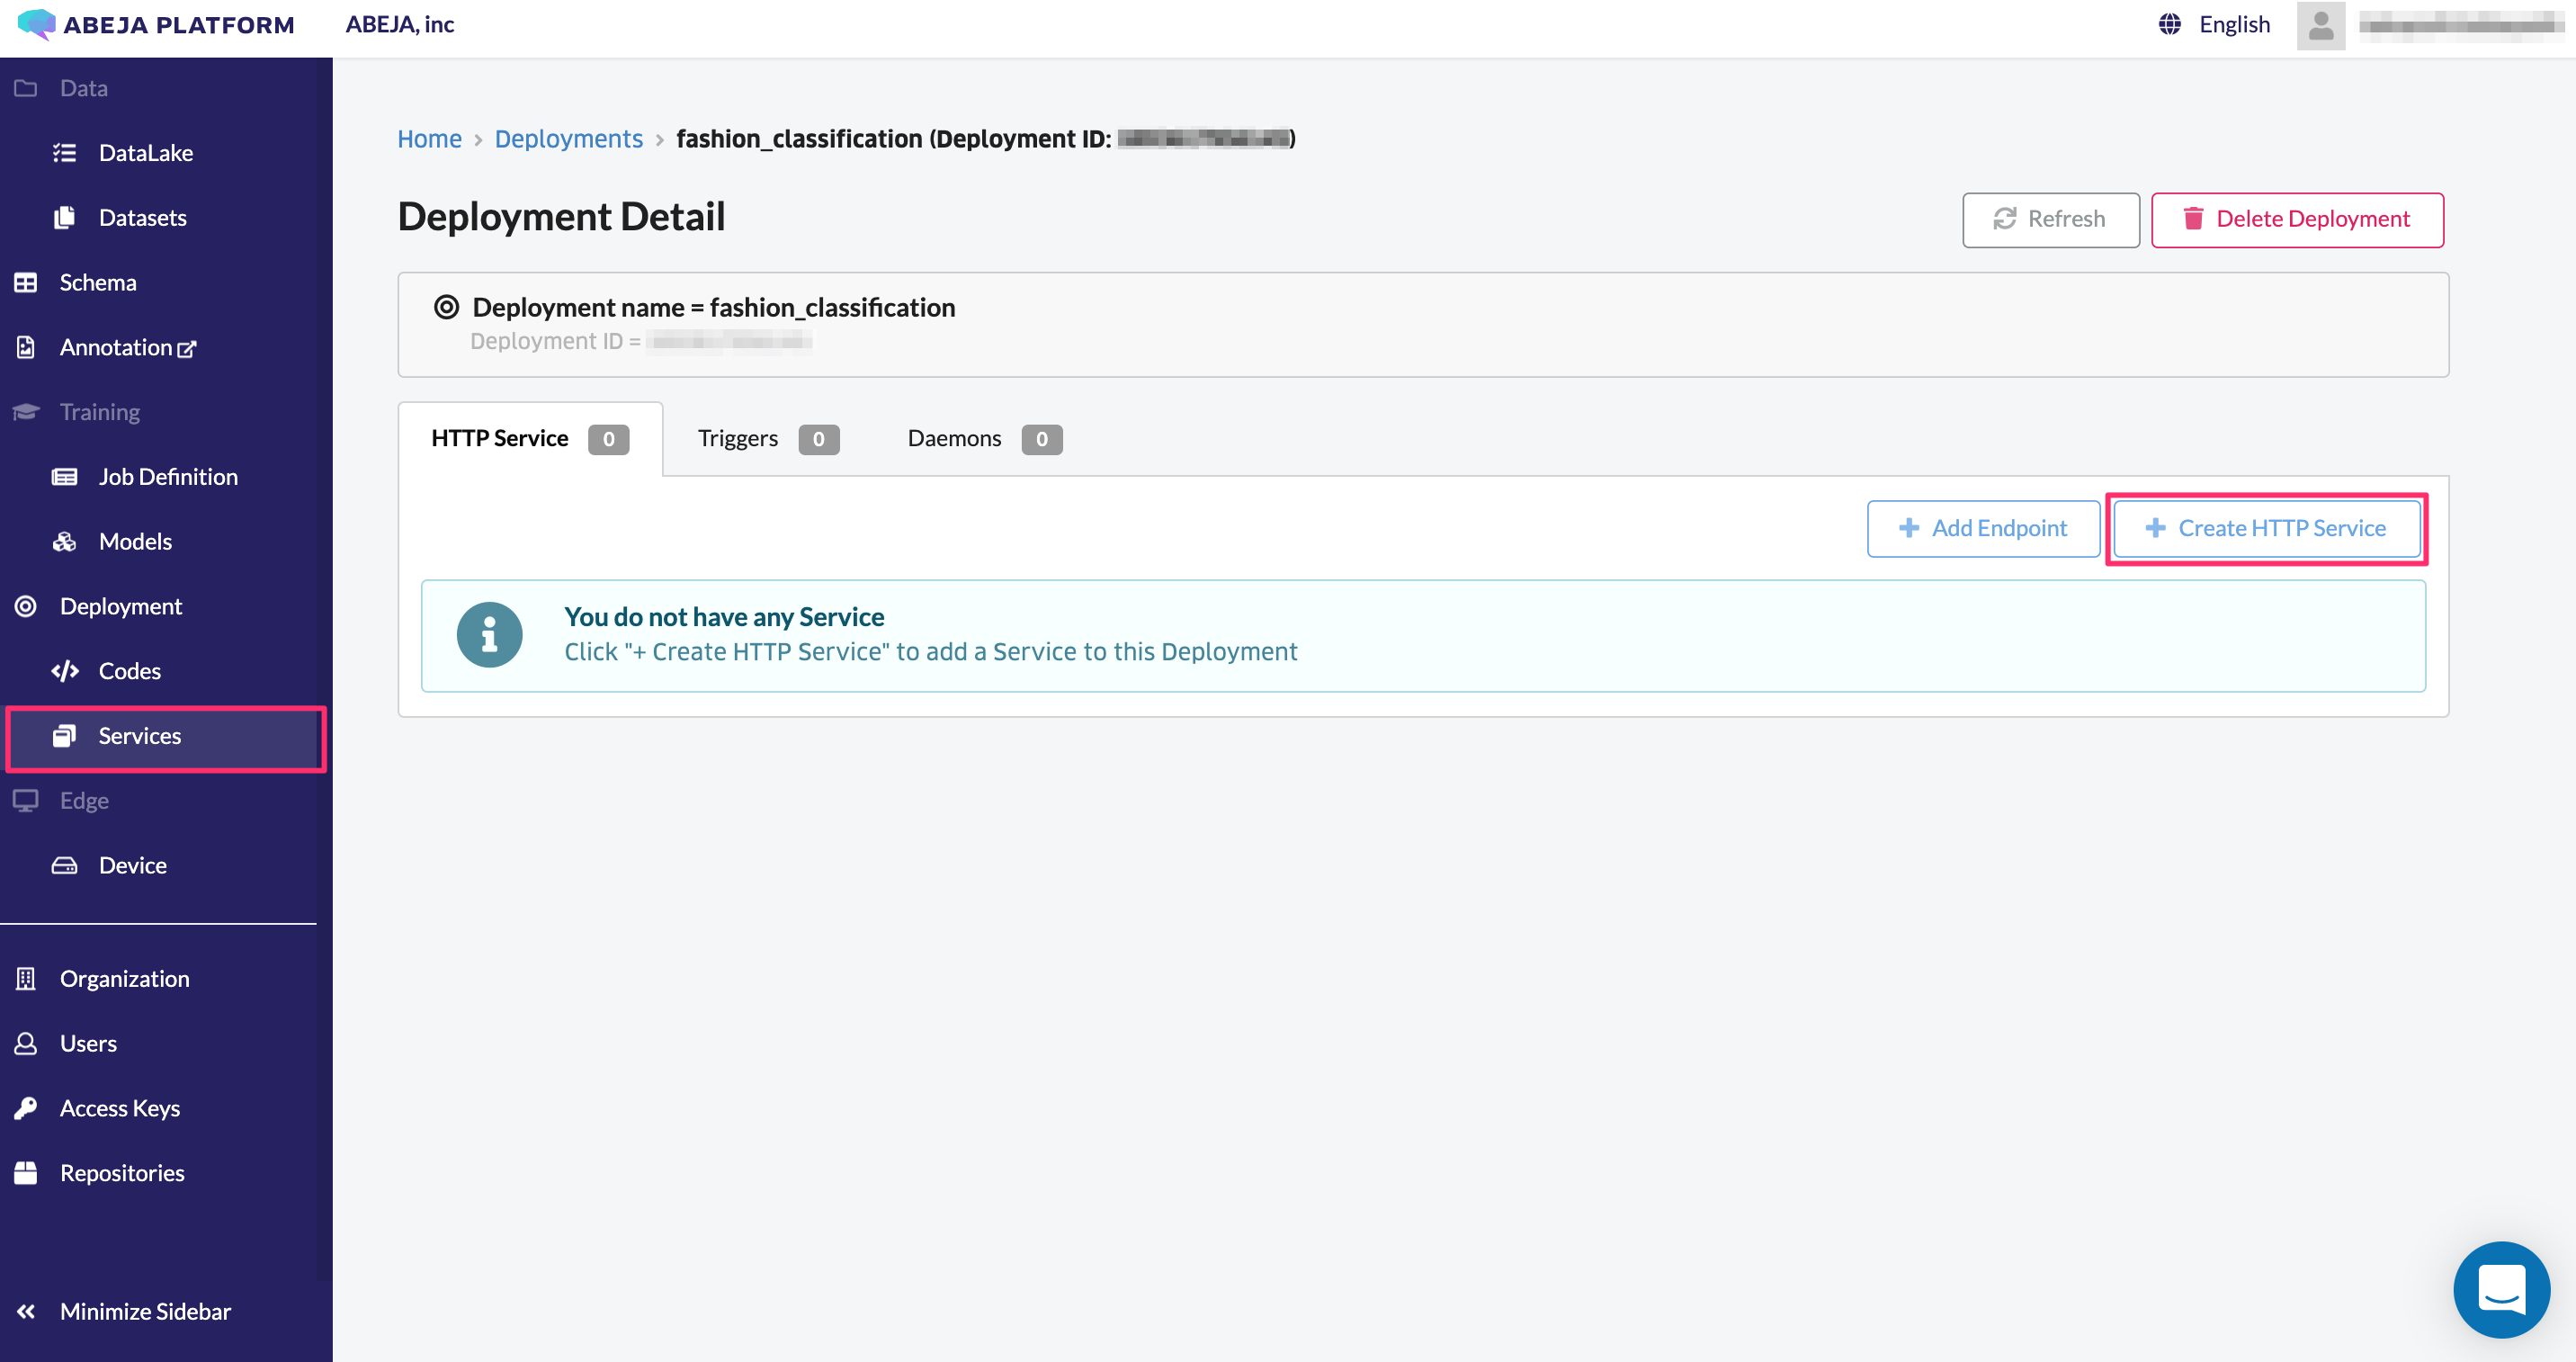
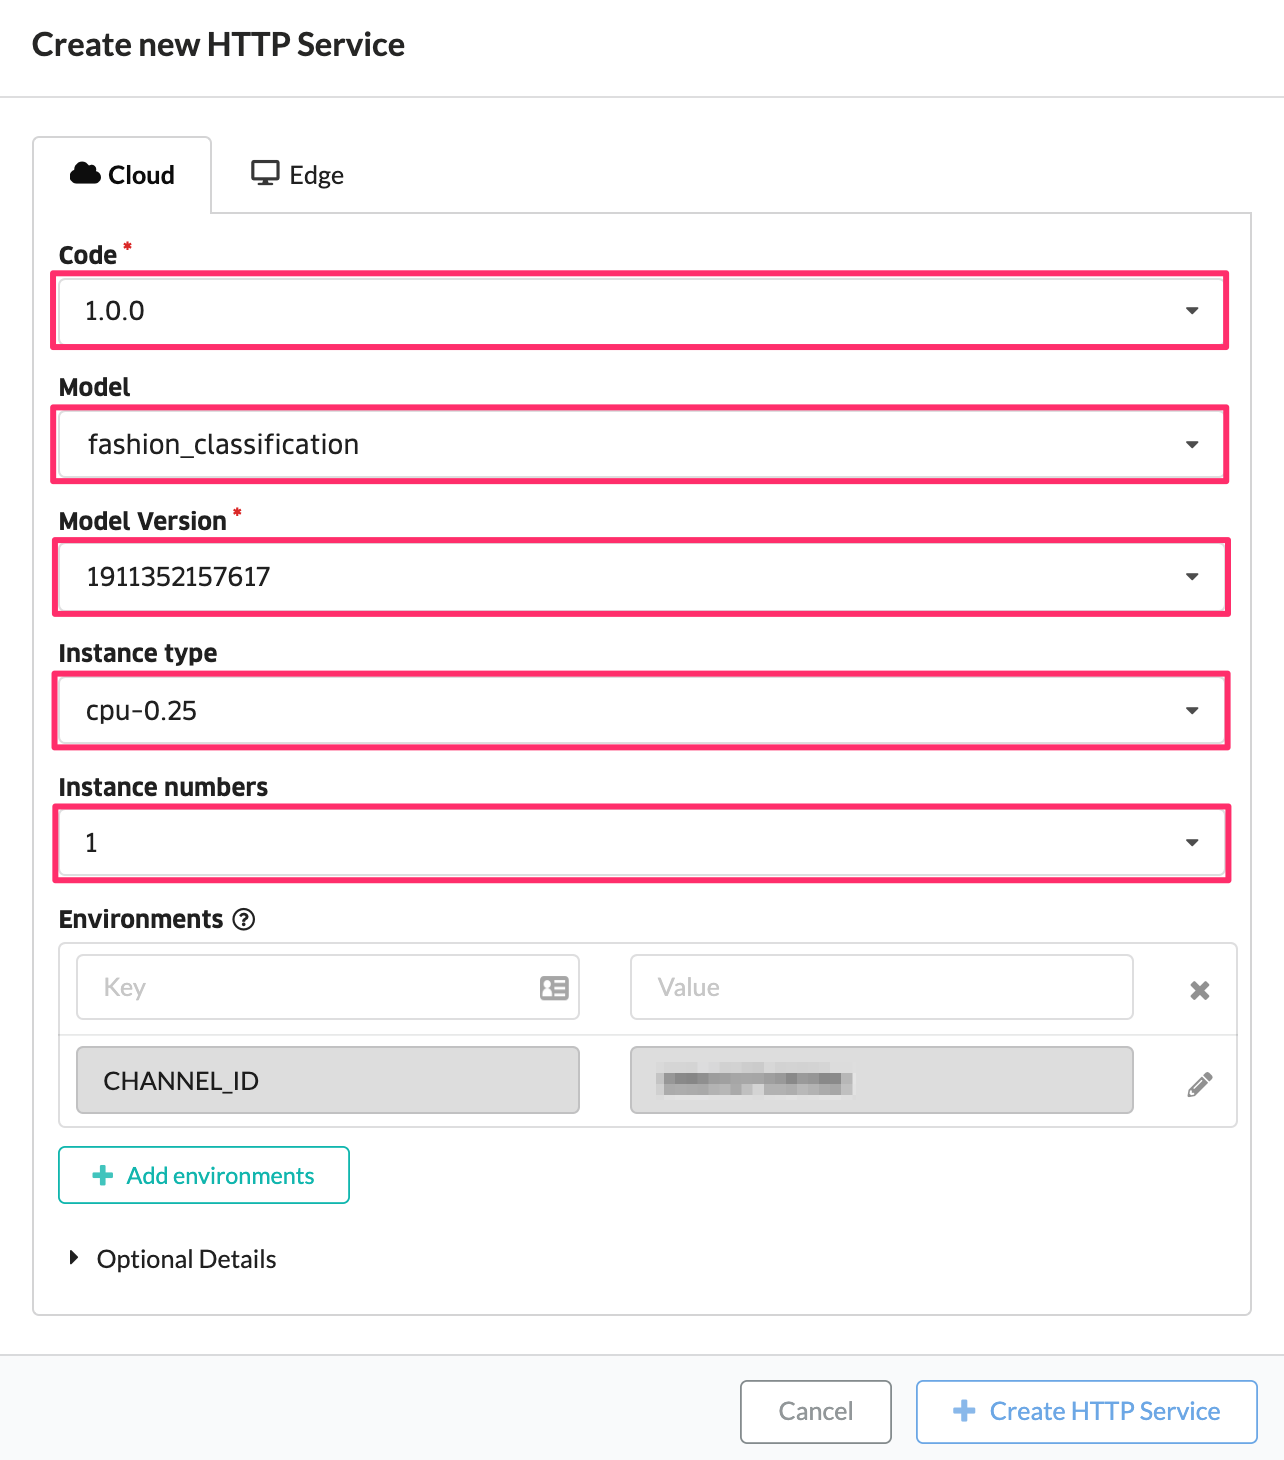
To create an HTTP service, enter the following items and click Create HTTP Service.
| Item | Value | Remark |
|---|---|---|
| Code | 1.0.0 | Specify the version of inference code managed by Deployment |
| Model | fashion_classification | Specify the model |
| Model Version | XXXXXXXXXXXX | Specify the training job ID to be used |
| Instance Type | cpu-0.25 | HTTP service specifications |
| Instance Number | 1 | Number of instances |
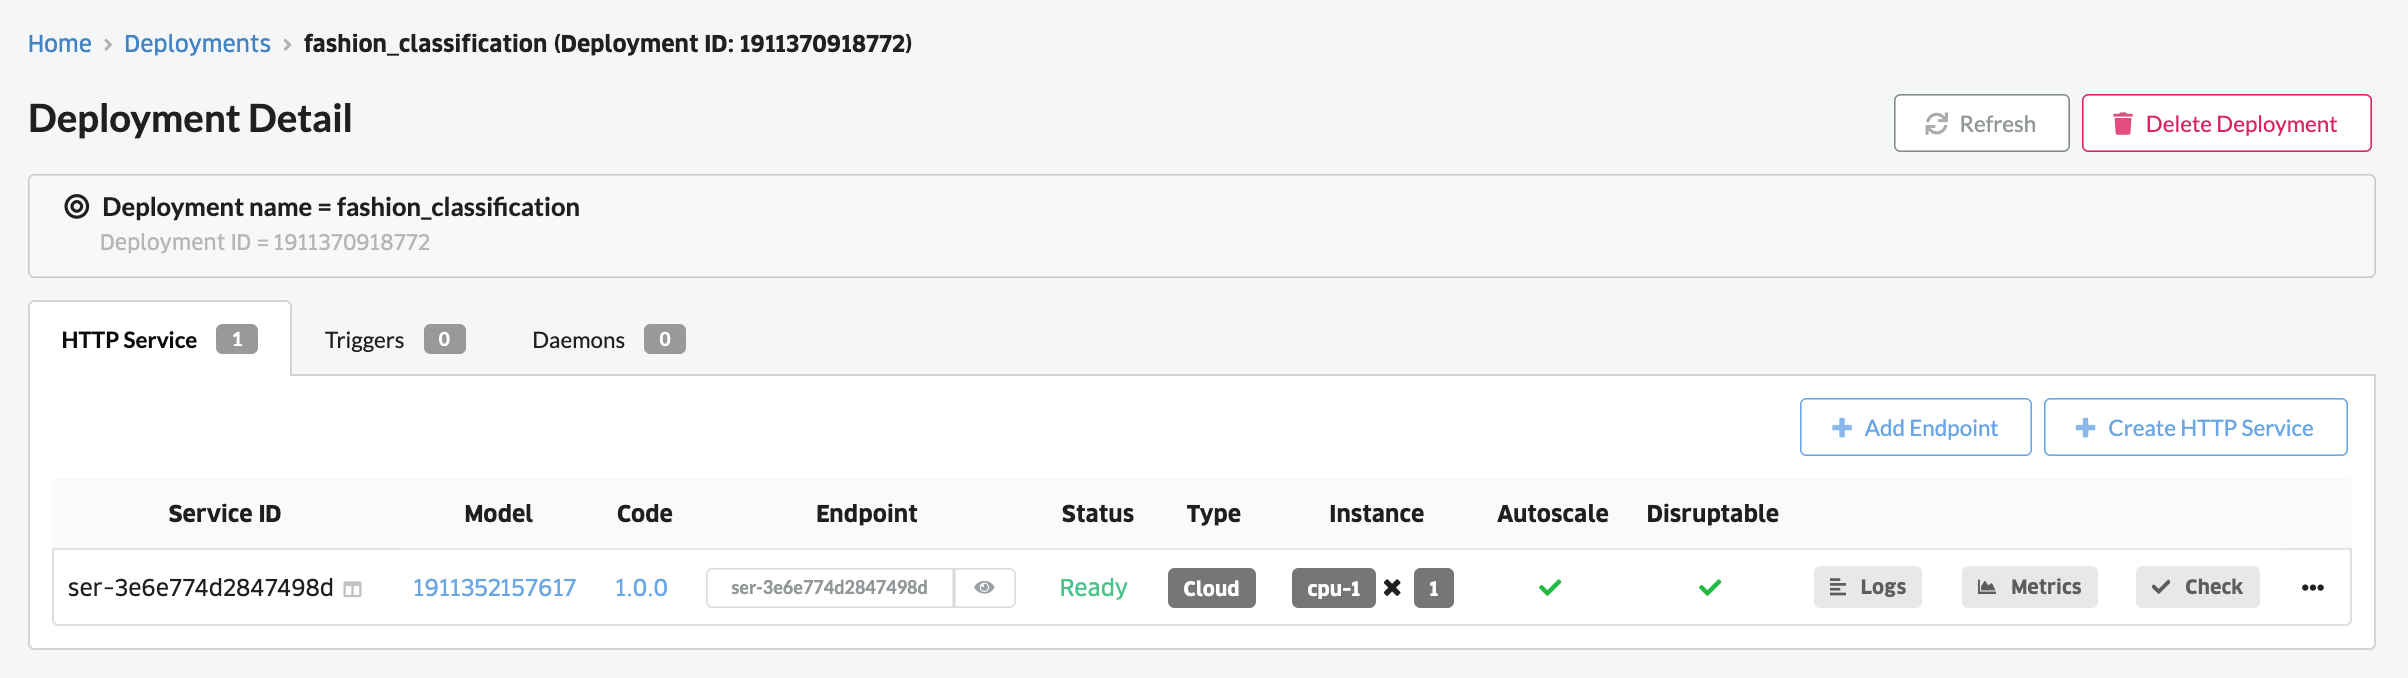
After creation, the following screen is displayed. The “Status” item is “In Progress” immediately after creation. “Status” is automatically updated. If it is not updated, click “Refresh” at the top of the screen.
After a few minutes, make sure that the HTTP Service you created becomes “Ready”.
Create an alias
You can create any alias for the Web API endpoint. Aliases can be used to easily and safely switch Web APIs that send requests.
First, select Add Endpoint and set an alias name.
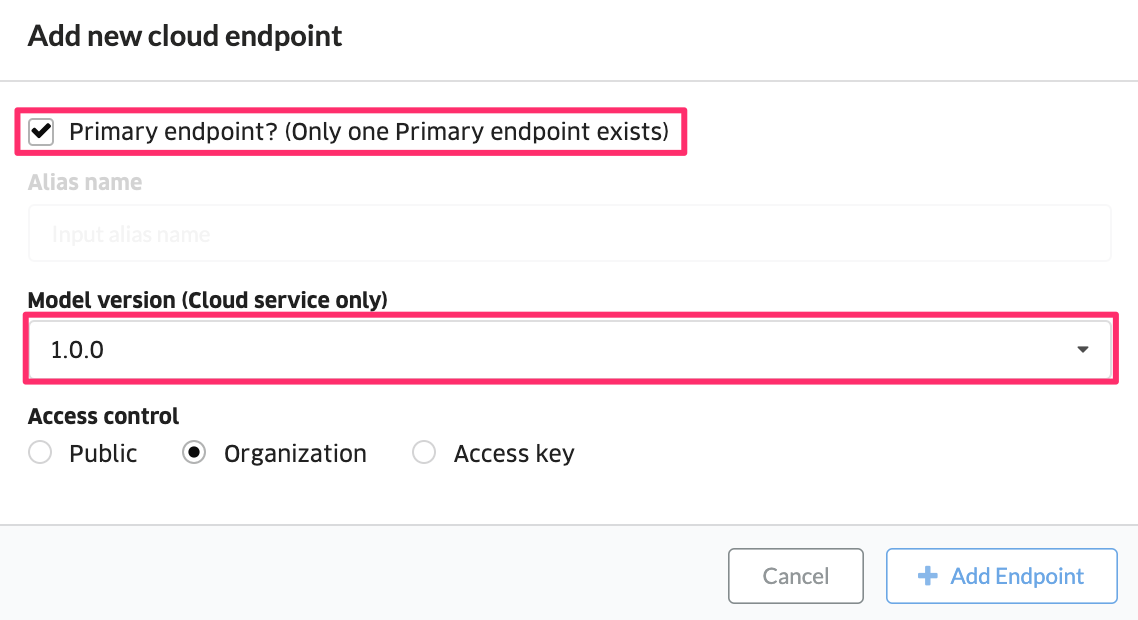
Set the following values in the input form and click “Add Endpoint” to create an alias.
| Item | Value |
|---|---|
| Primary endpoint? | Set the checkbox to ON |
| Alias name | No input required. It becomes invalid when the above check box is turned ON. |
| Model version (Cloud service only) | Created model version |
| Access control | Public ・ Organization・ Access key |
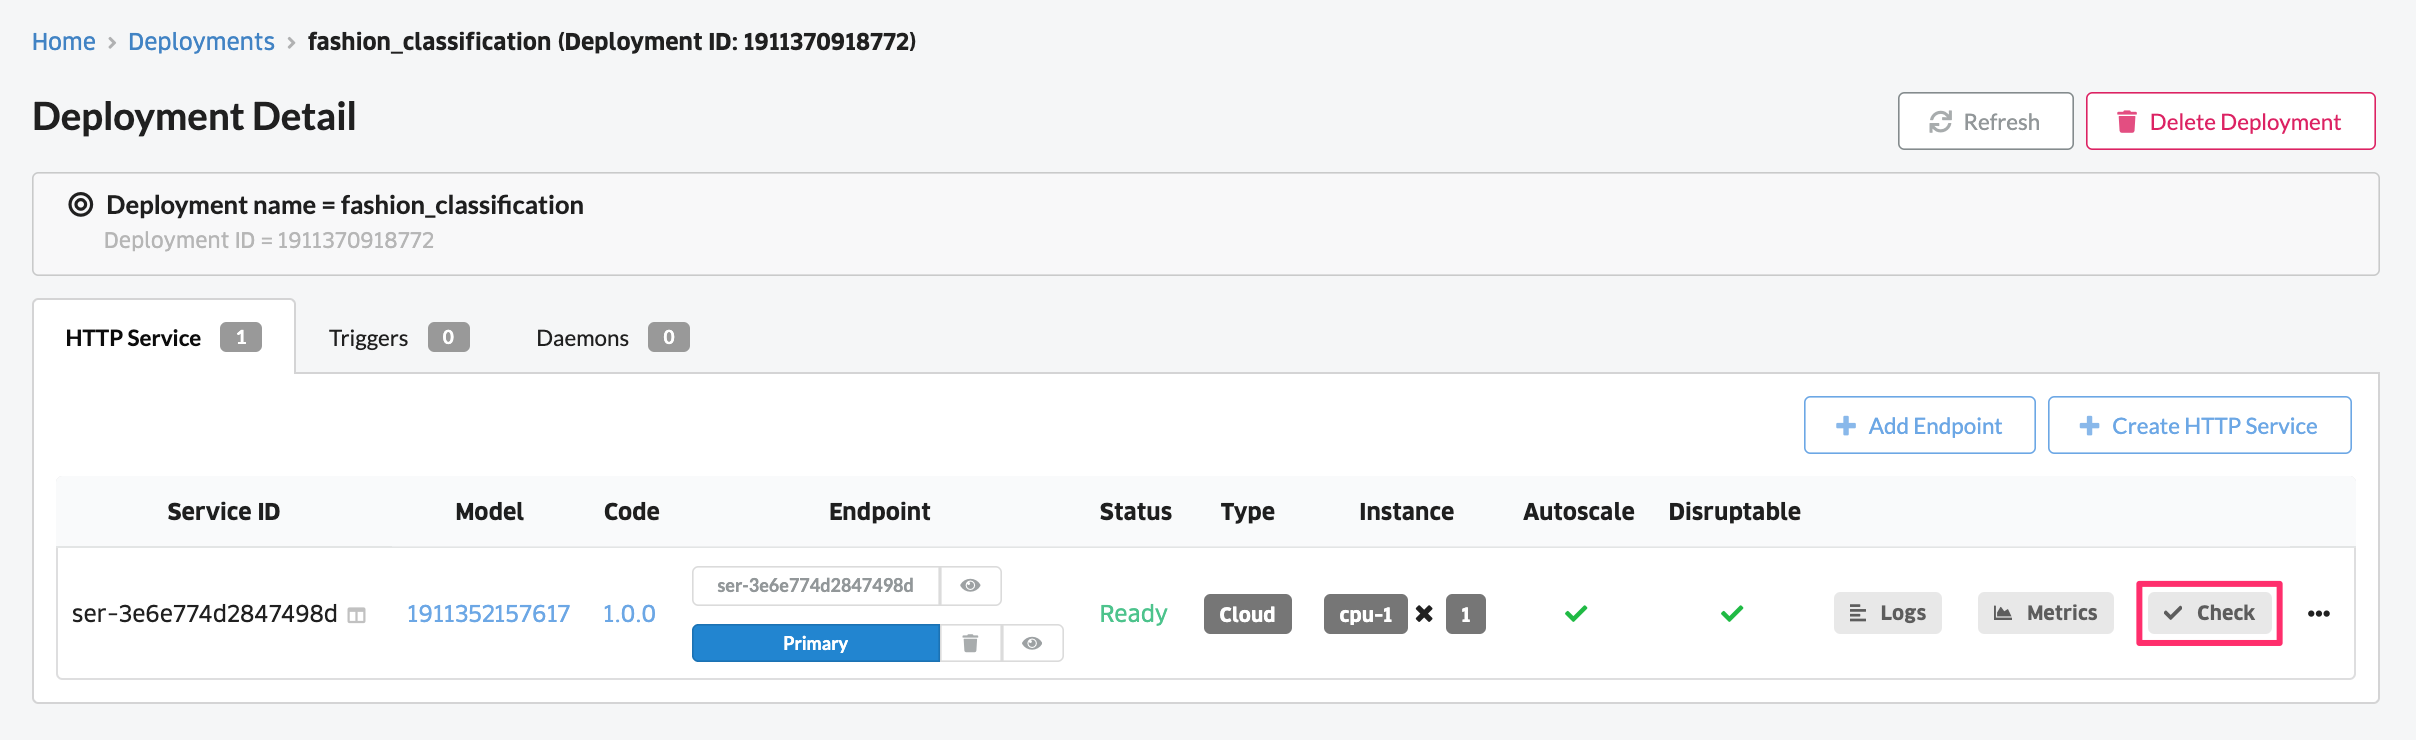
If it is set to `primary endopoint`, it can be called in the following format as a unique endpoint in the deployment. __https://{ORGANIZATION_NAME}.api.abeja.io/deployments/{DEPLOYMENT_ID}__
Check the operation of the created Web API
Next, check the operation of the deployed Web API.
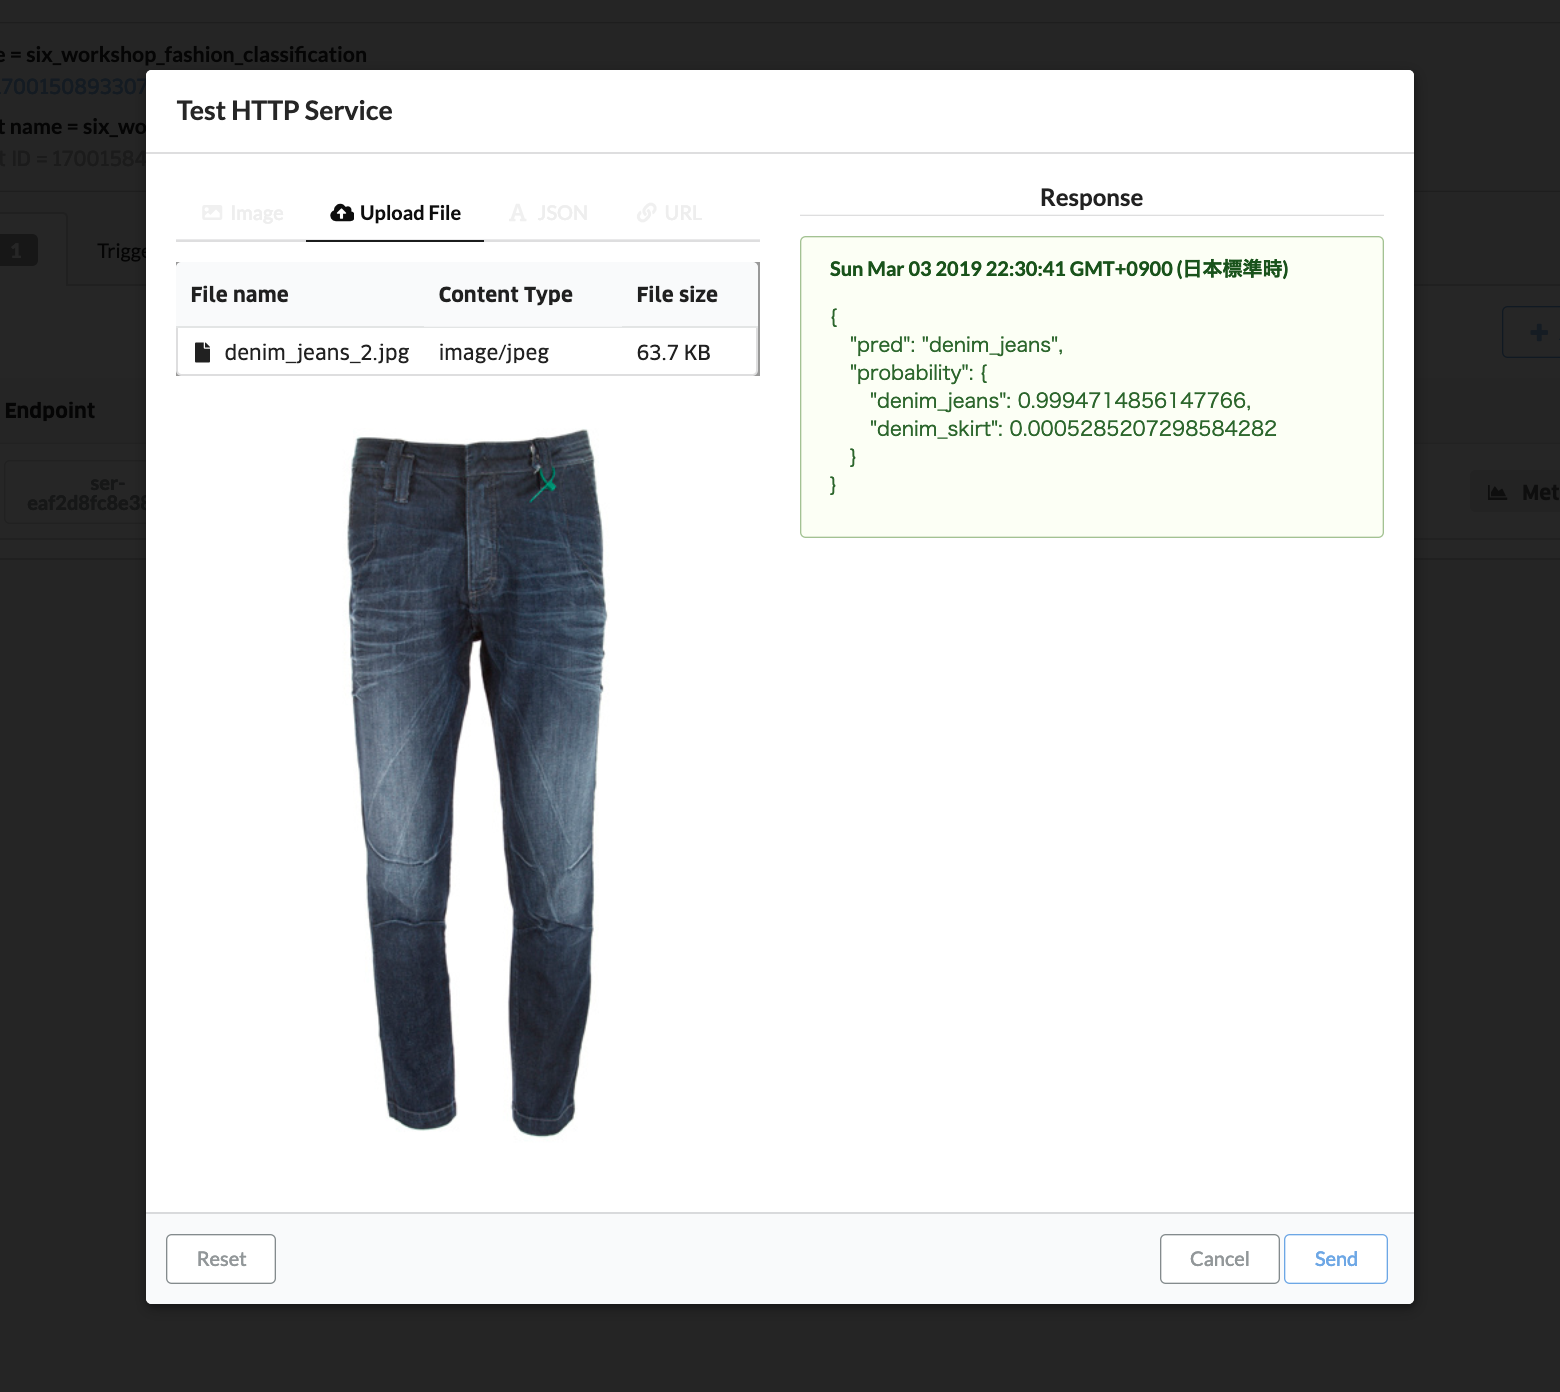
Enter data for the model and check the output results
Click the “Check” button for the created HTTP service.
If you select the “Upload File” tab, you can upload the image on the PC to the HTTP service and check the operation.
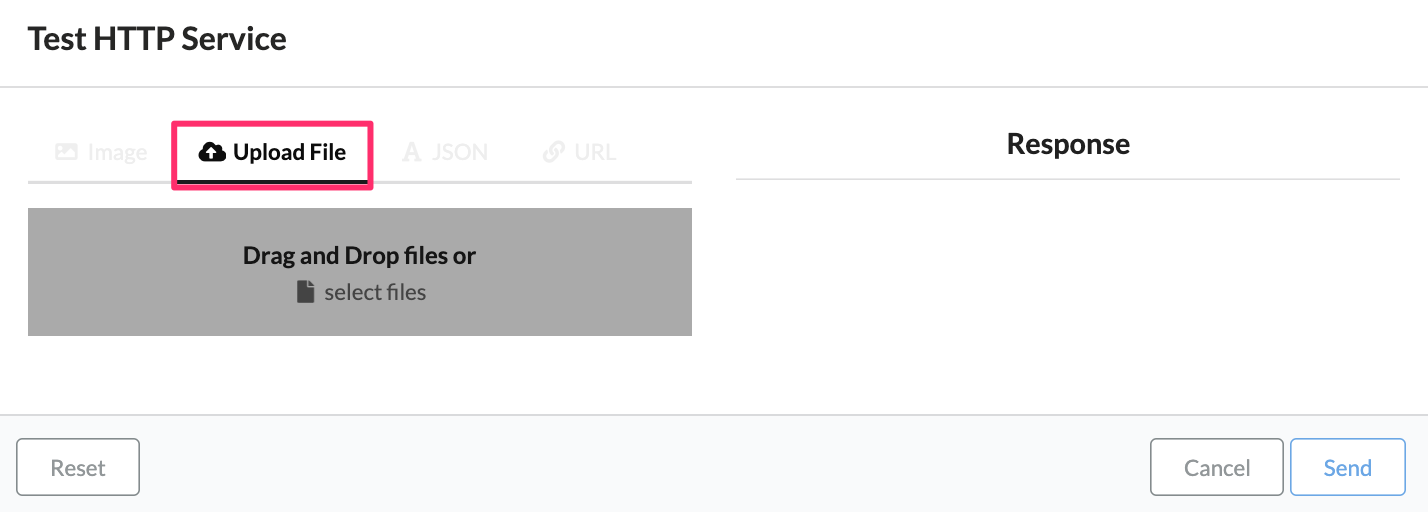
Drag and drop any image included in the zip file downloaded in Create Model and click the “Send” button to check the inference result.