- Overview
- Getting Started Guide
- UserGuide
-
References
-
ABEJA Platform CLI
- CONFIG COMMAND
- DATALAKE COMMAND
- DATASET COMMAND
- TRAINING COMMAND
-
MODEL COMMAND
- check-endpoint-image
- check-endpoint-json
- create-deployment
- create-endpoint
- create-model
- create-service
- create-trigger
- create-version
- delete-deployment
- delete-endpoint
- delete-model
- delete-service
- delete-version
- describe-deployments
- describe-endpoints
- describe-models
- describe-service-logs
- describe-services
- describe-versions
- download-versions
- run-local
- run-local-server
- start-service
- stop-service
- submit-run
- update-endpoint
- startapp command
- SECRET COMMAND
- SECRET VERSION COMMAND
-
ABEJA Platform CLI
- FAQ
- Appendix
(Old)Project create guide
Intoduction
This page explains the project creation required for annotation work.
Creation procedure
When creating a project, register the project information via 5 STEPs.
- Data storage
- Select annotation type
- Annotation details
- Project information input
- Confirmation of input information
Data storage
Data is stored in the management console of ABEJAPlatform. Please refer to Data Upload Procedure.
Select annotation type
Click “Create new project” from Summary TOP screen on the annotation management screen.

Move to the annotation type selection screen. Select the template you want to implement from the image annotation type.
Please refer to Annotation Template Type for details of each annotation template.
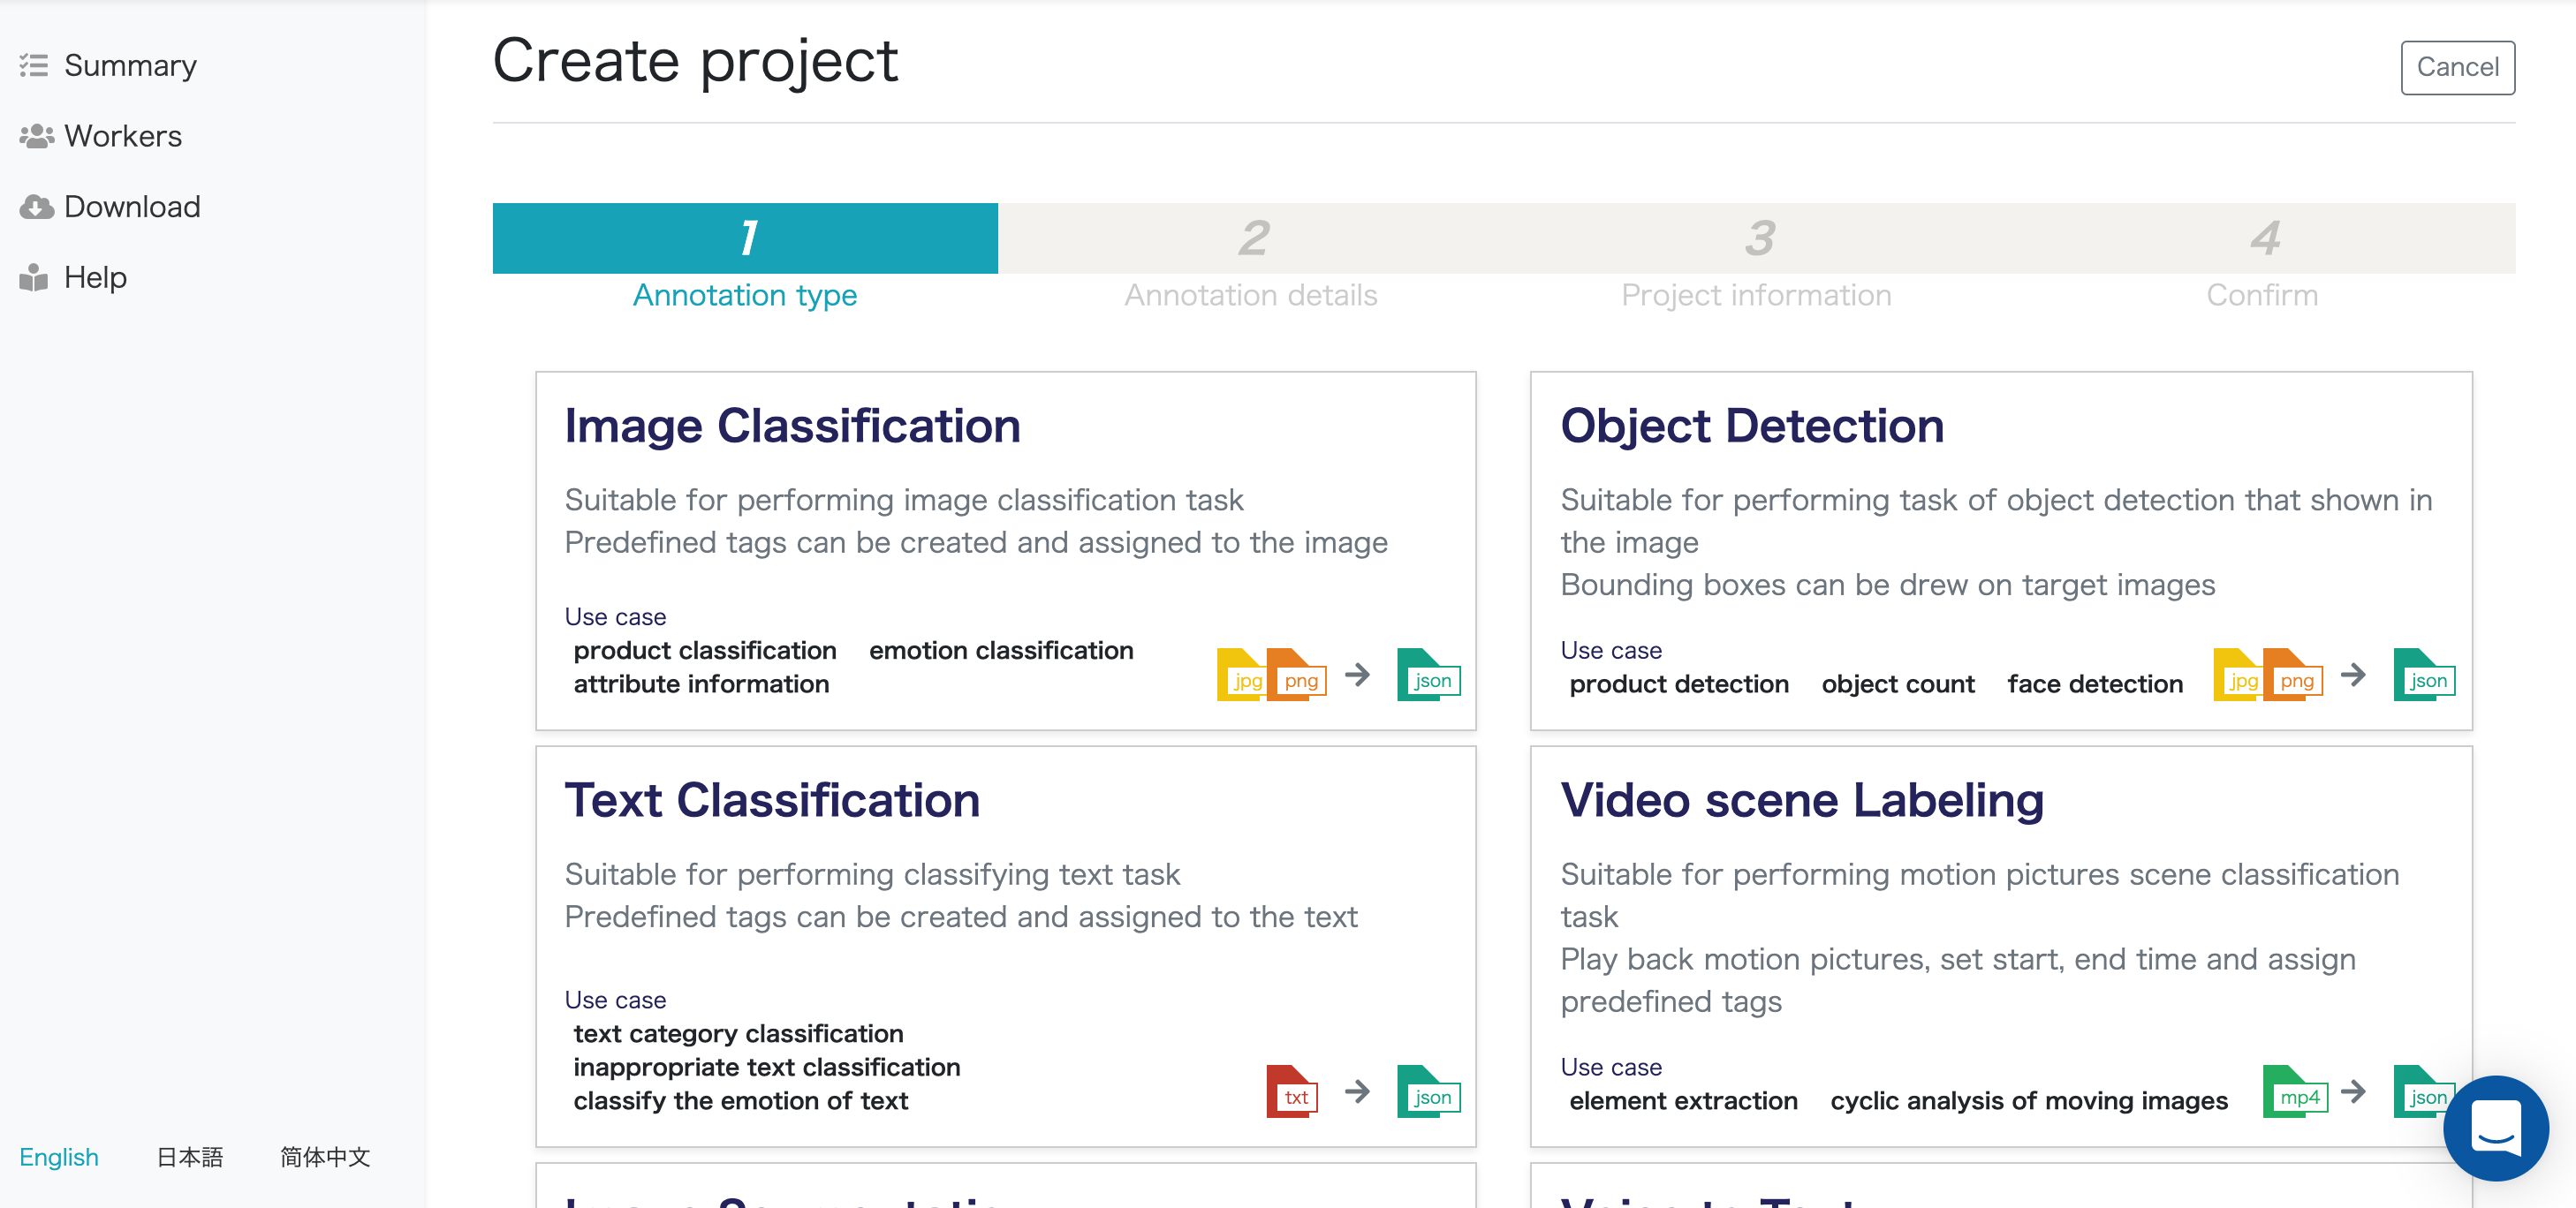
Click the “Next” button on the bottom right.
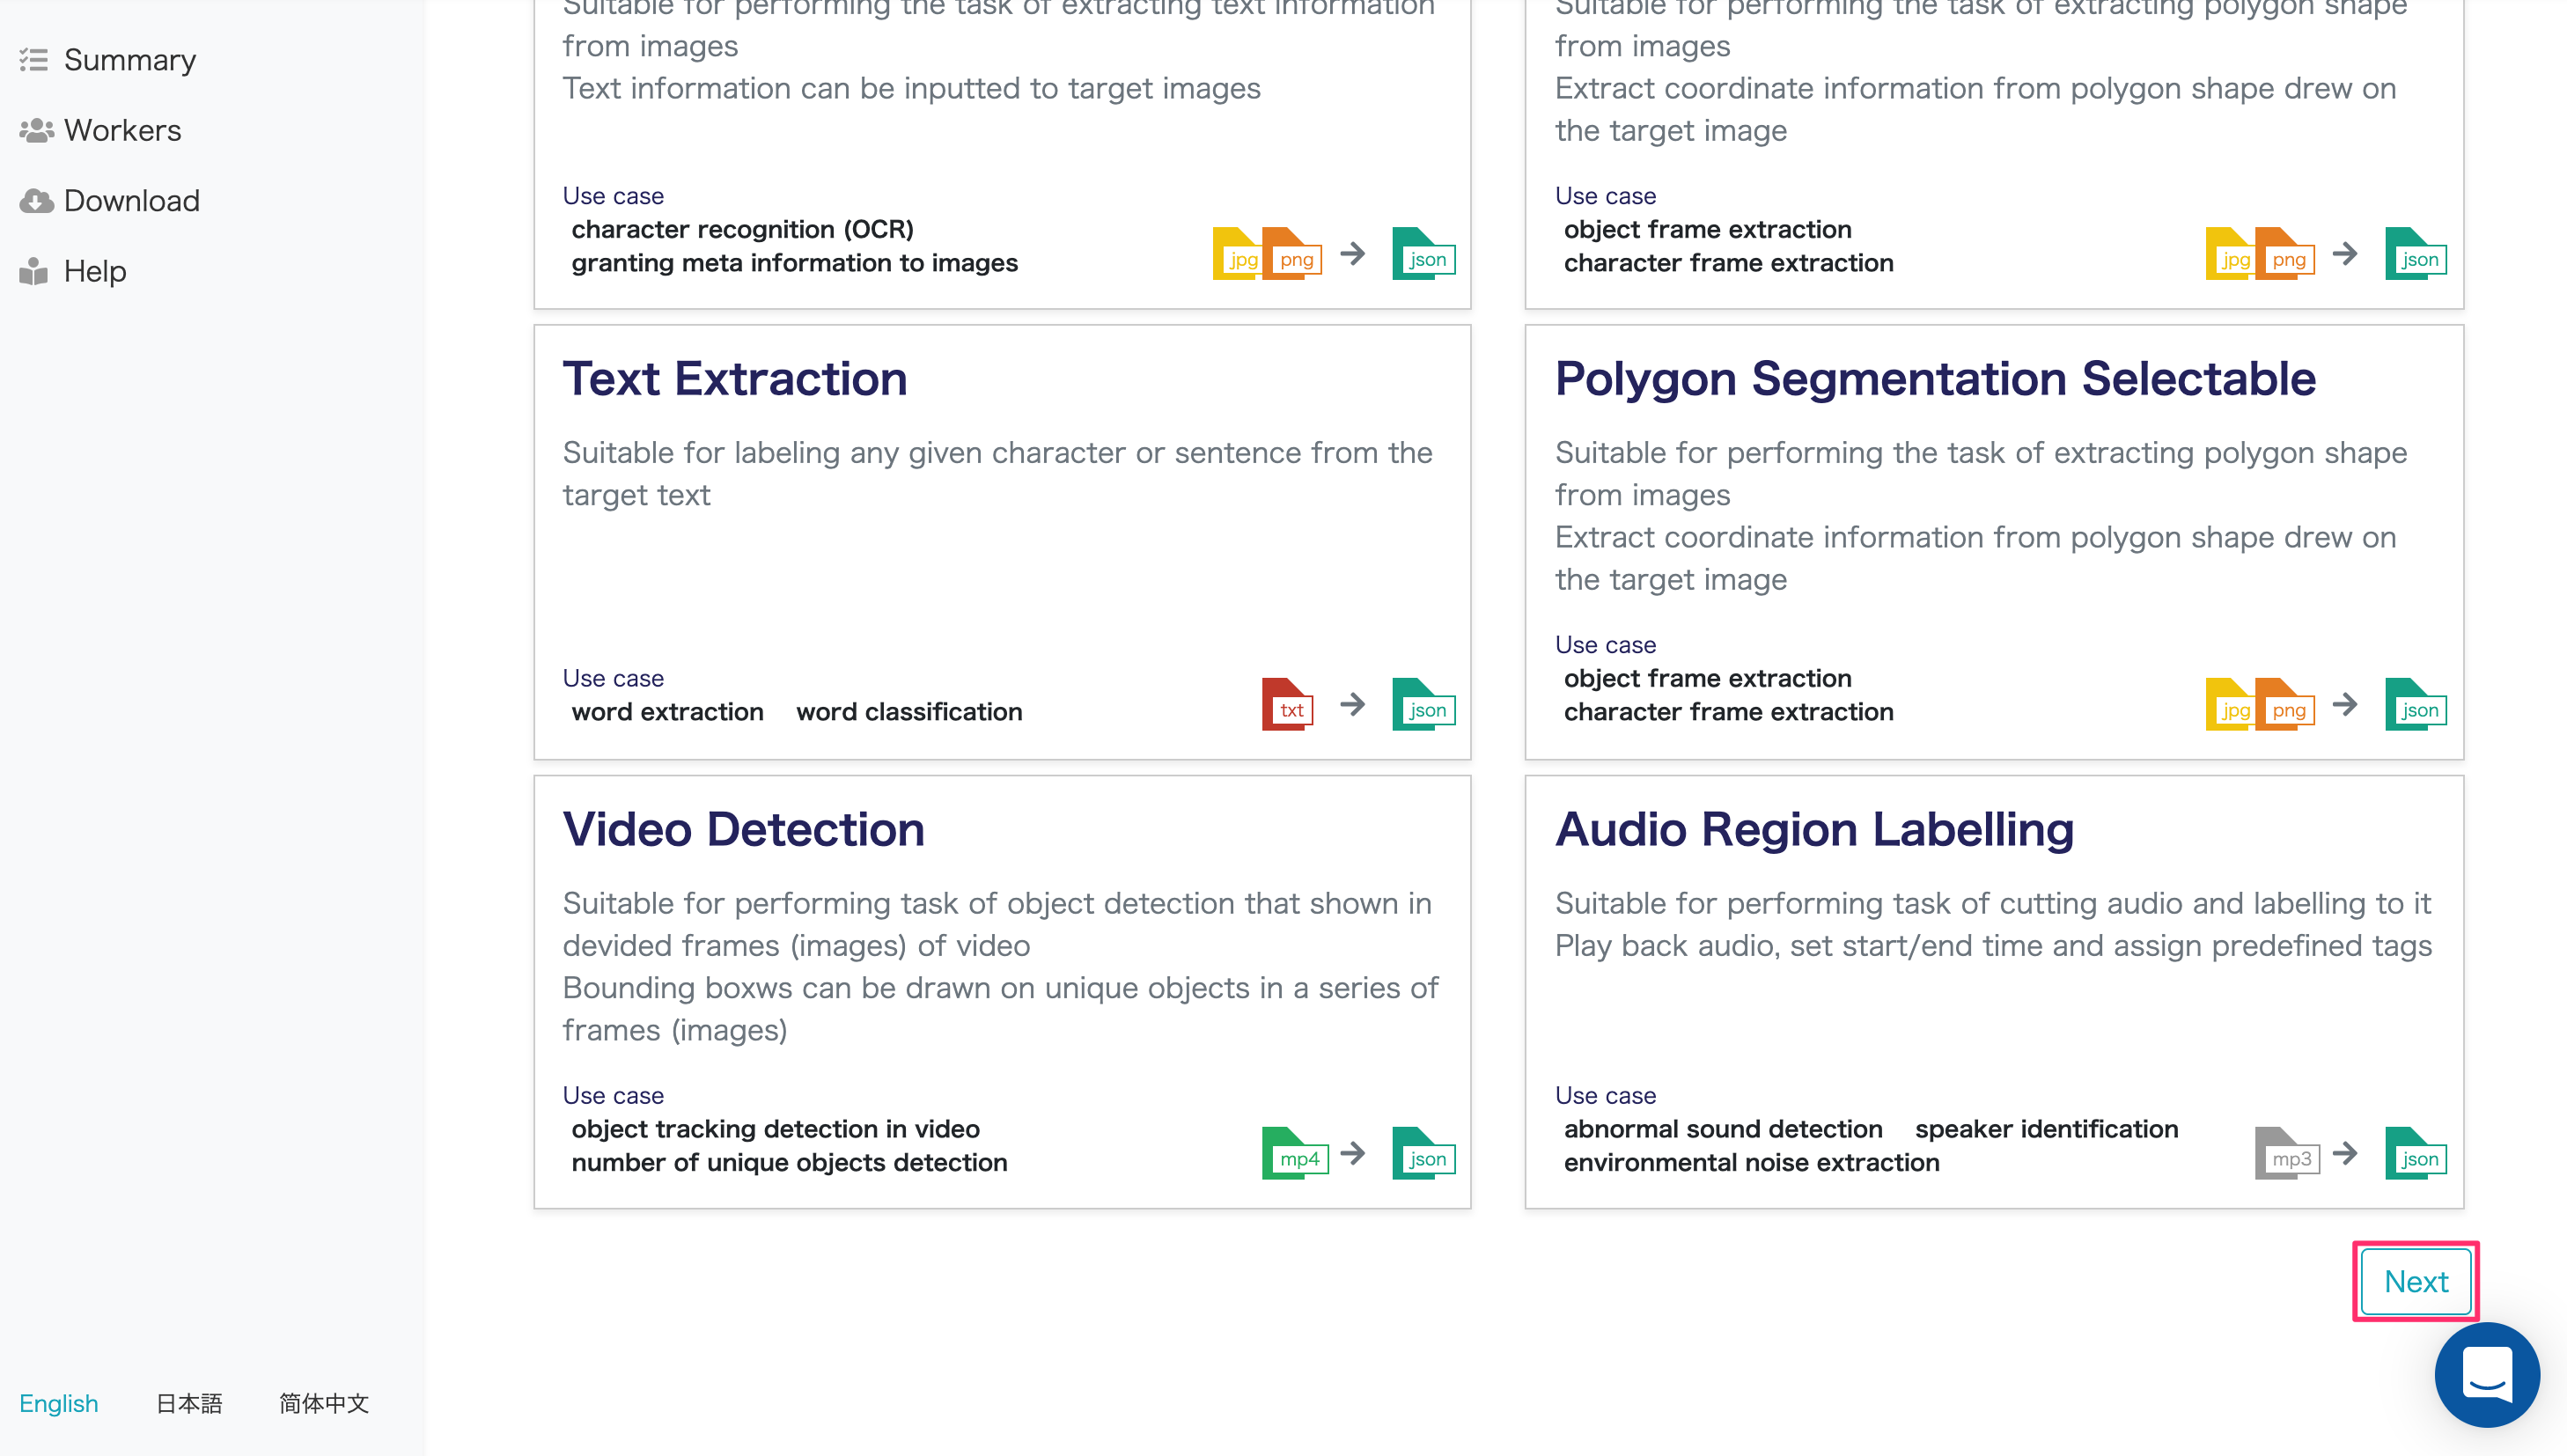
Move to the annotation details screen.
Annotation details
To set the schema, click the “Annotation by selection method” part in the middle of the screen. A sample schema is displayed.
Schema information cannot be changed later. Please be careful when registering.
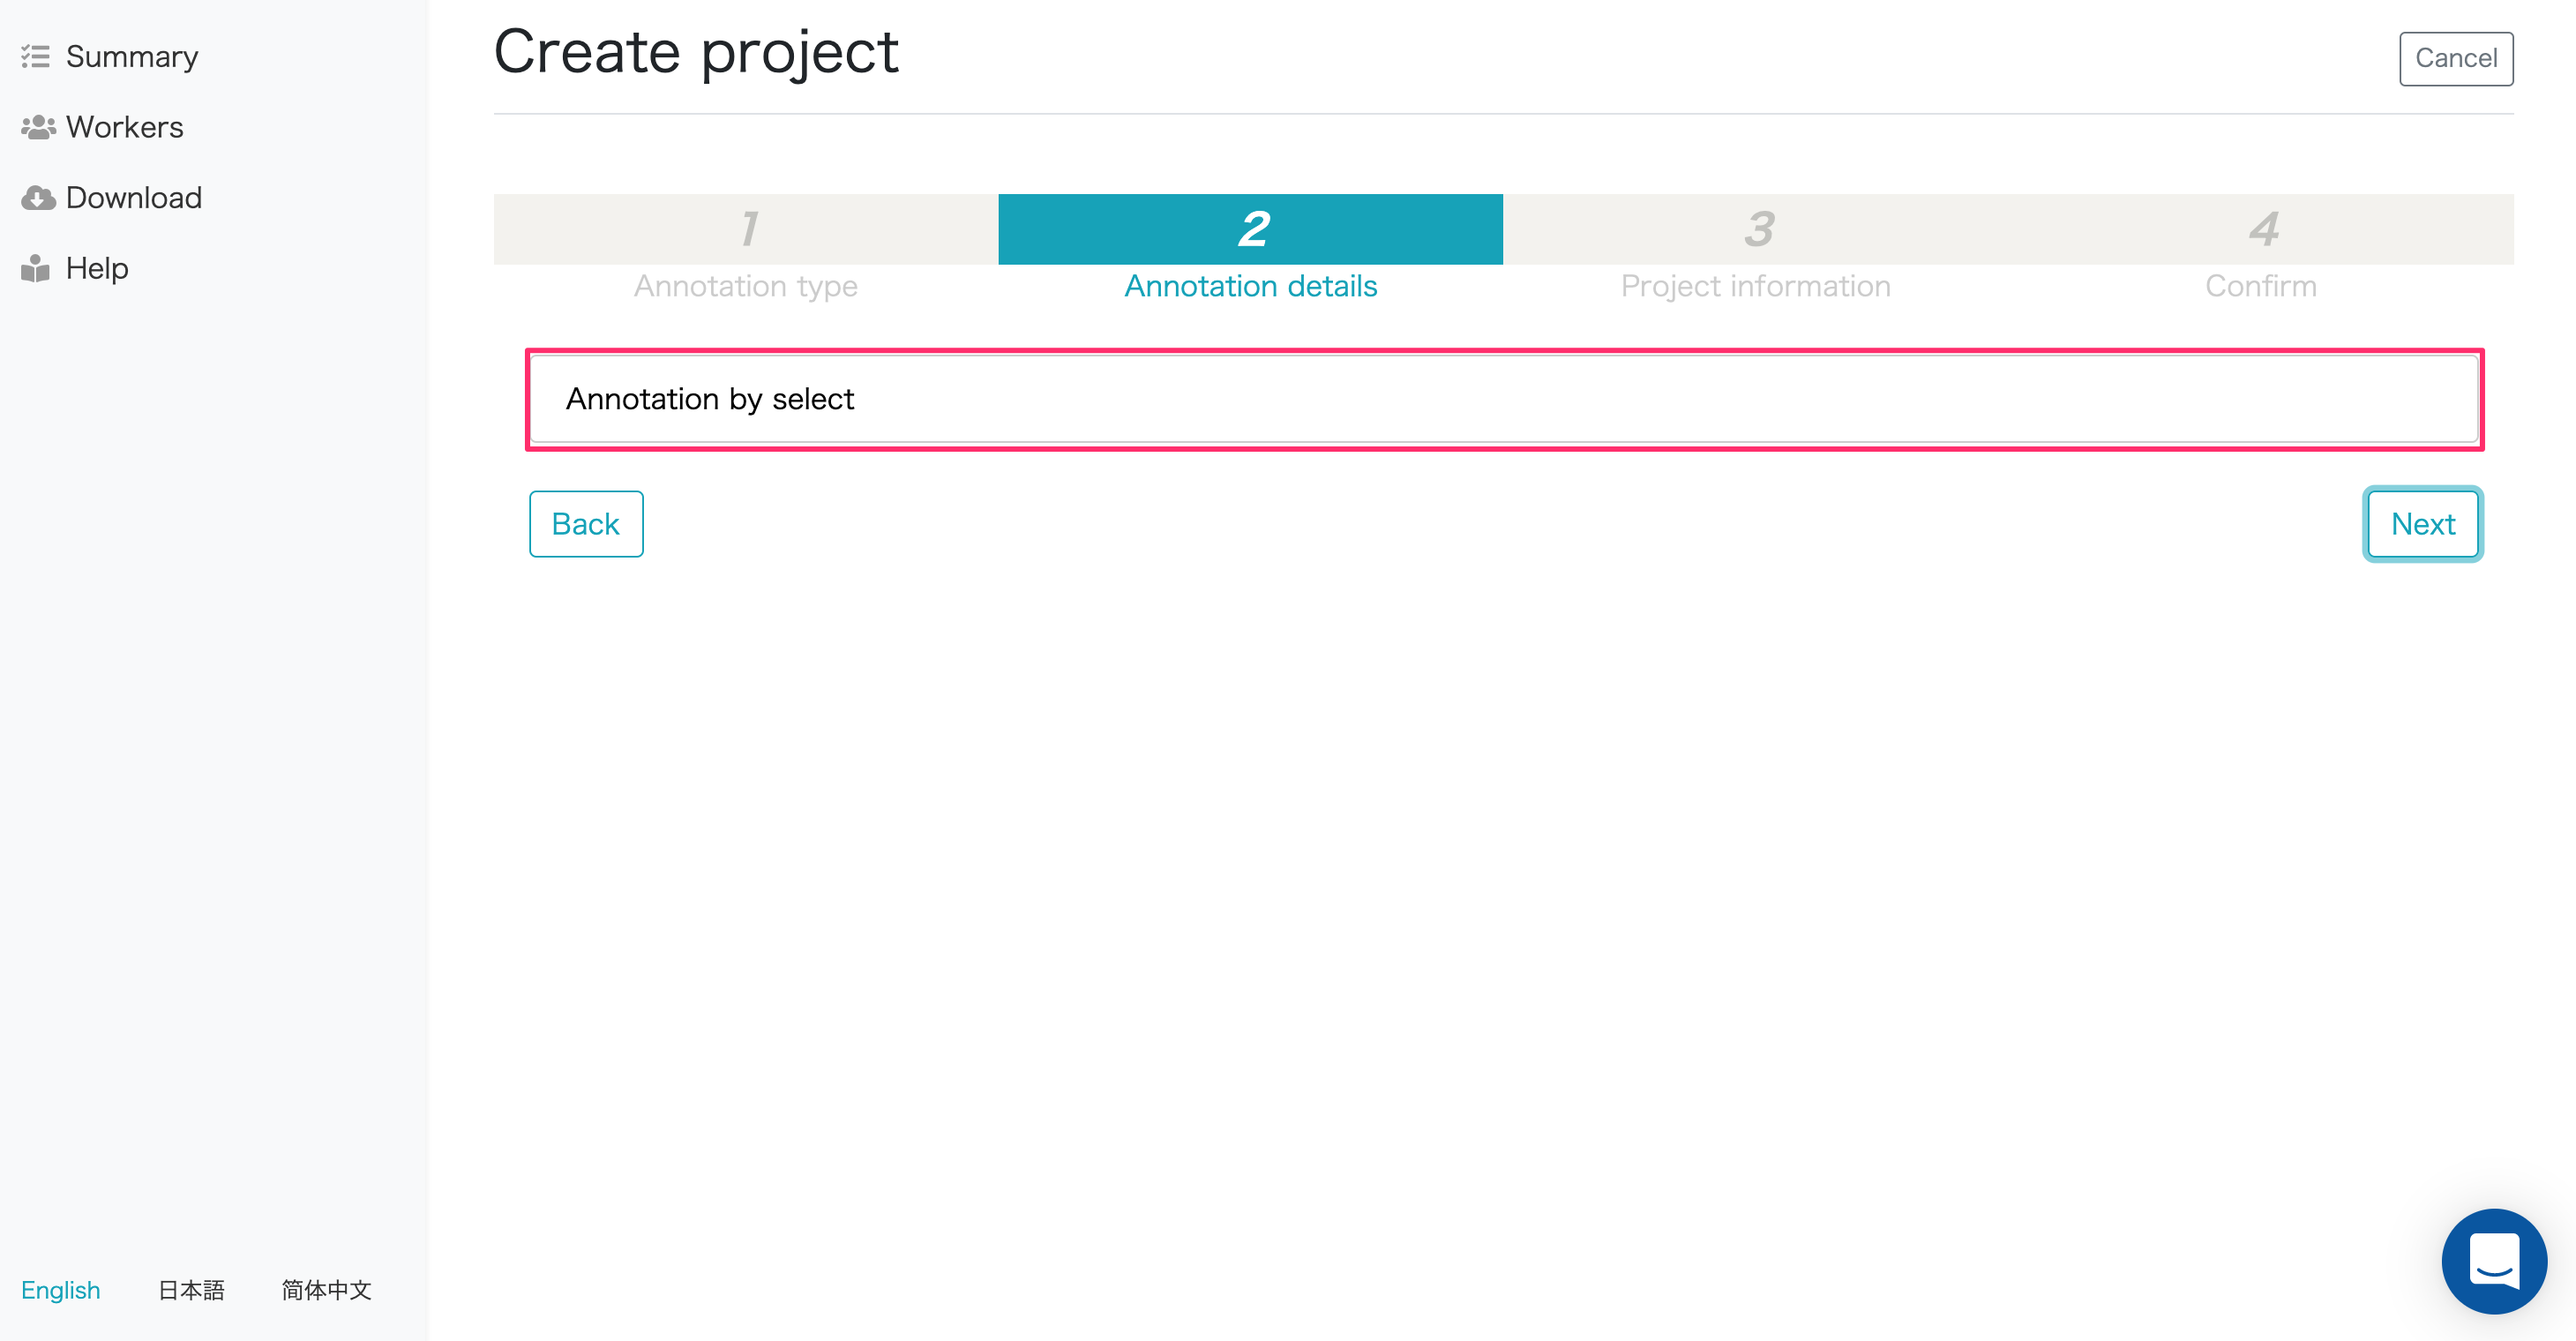
When adding/modifying a category, you can add / modify by selecting “Add Category”.
To add a label, you can add it by selecting “Add Label”. Select “Delete” to delete.

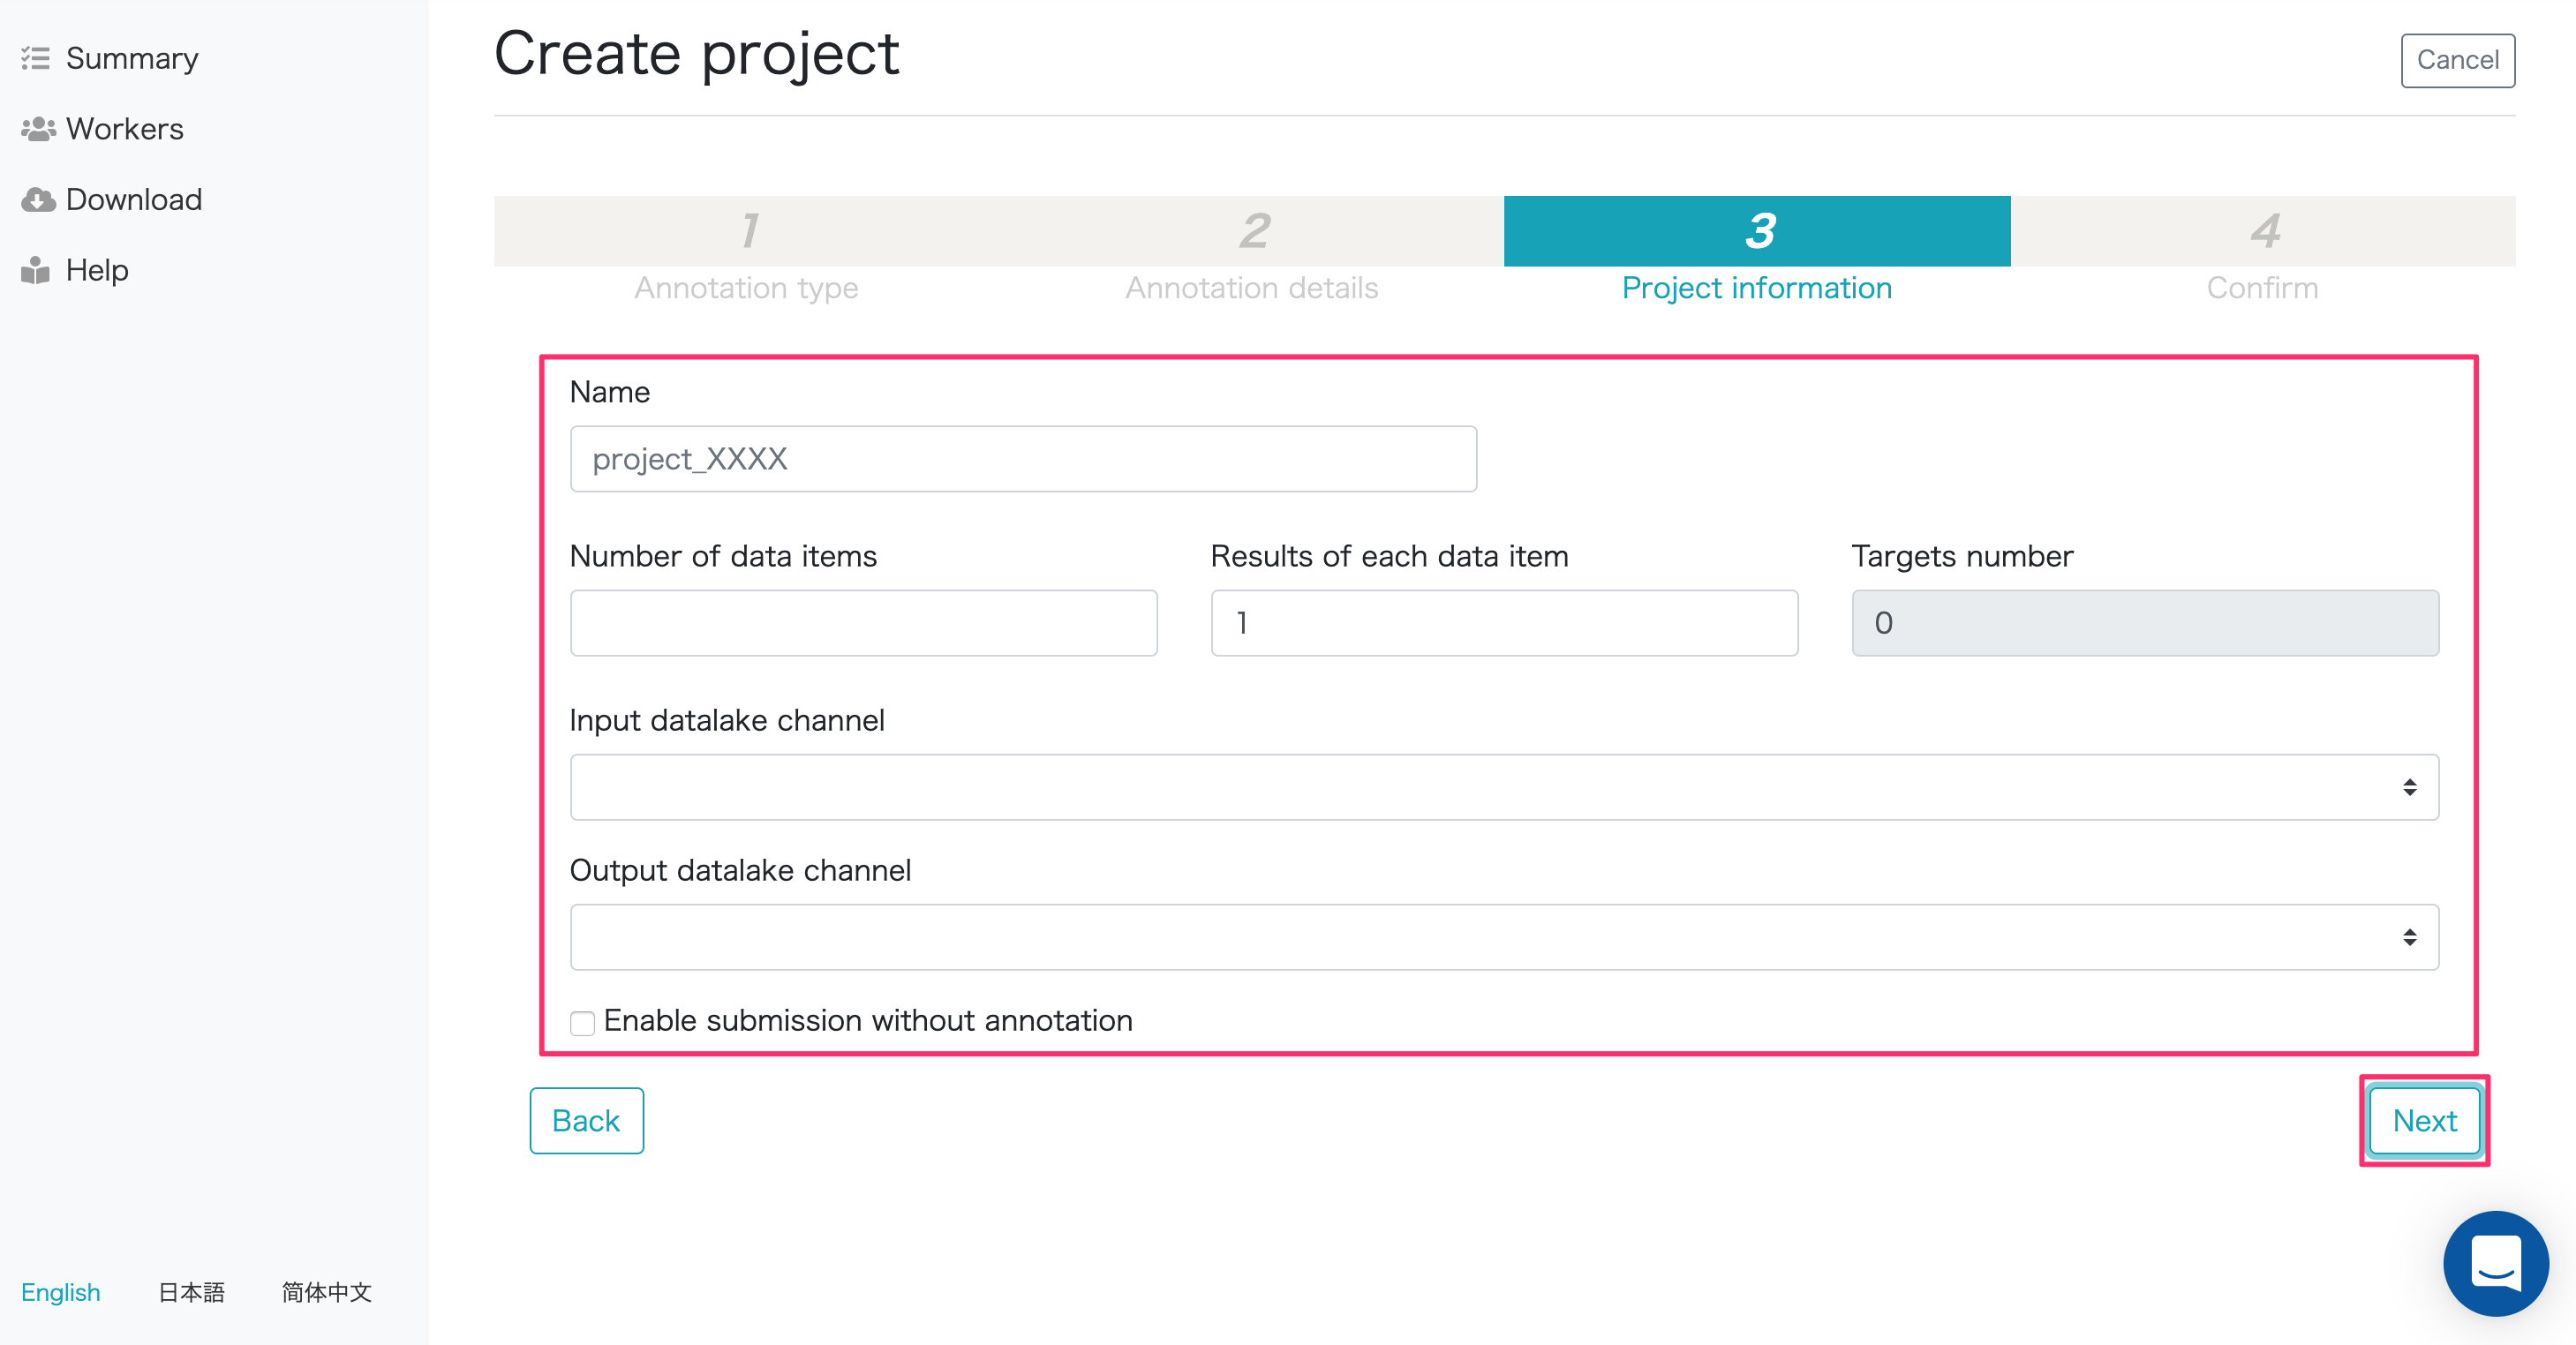
Project information input
On the project information screen, enter information about the project to be created. The information to be entered is as follows.
| Item | Description |
|---|---|
| Name | Project name for creating learning data |
| Number of data items | Number of data required for training data creation |
| Results of each data item | Enter the number of annotations per data. Set to 1 if one person’s annotation is sufficient for one data (task). If an annotation by multiple people is required for one data, set a value between 2 and 100. |
| Targets number | “Number of data items” x “Results of each data item” |
| Input datalake channel | Select the channel of the created datalake |
| Output datalake channel (Only Image Segmentation) | Select the DataLake Channel to send the segmentation result data (BMP image) from the list. |
| Enable submission without annotation | Check this to learn results that do not contain labels. After the project is created, it cannot be modified. |
※ If "Results of each data item" is set to 2 or more, the number of annotations (number of annotators) that need to be supported per data is required for the number of settings, resulting in duplicate data.
Confirmation of input information
The confirmation screen performs the final confirmation of the name and specified data entered in the project creation.
If there is no problem, please click “Save” button.
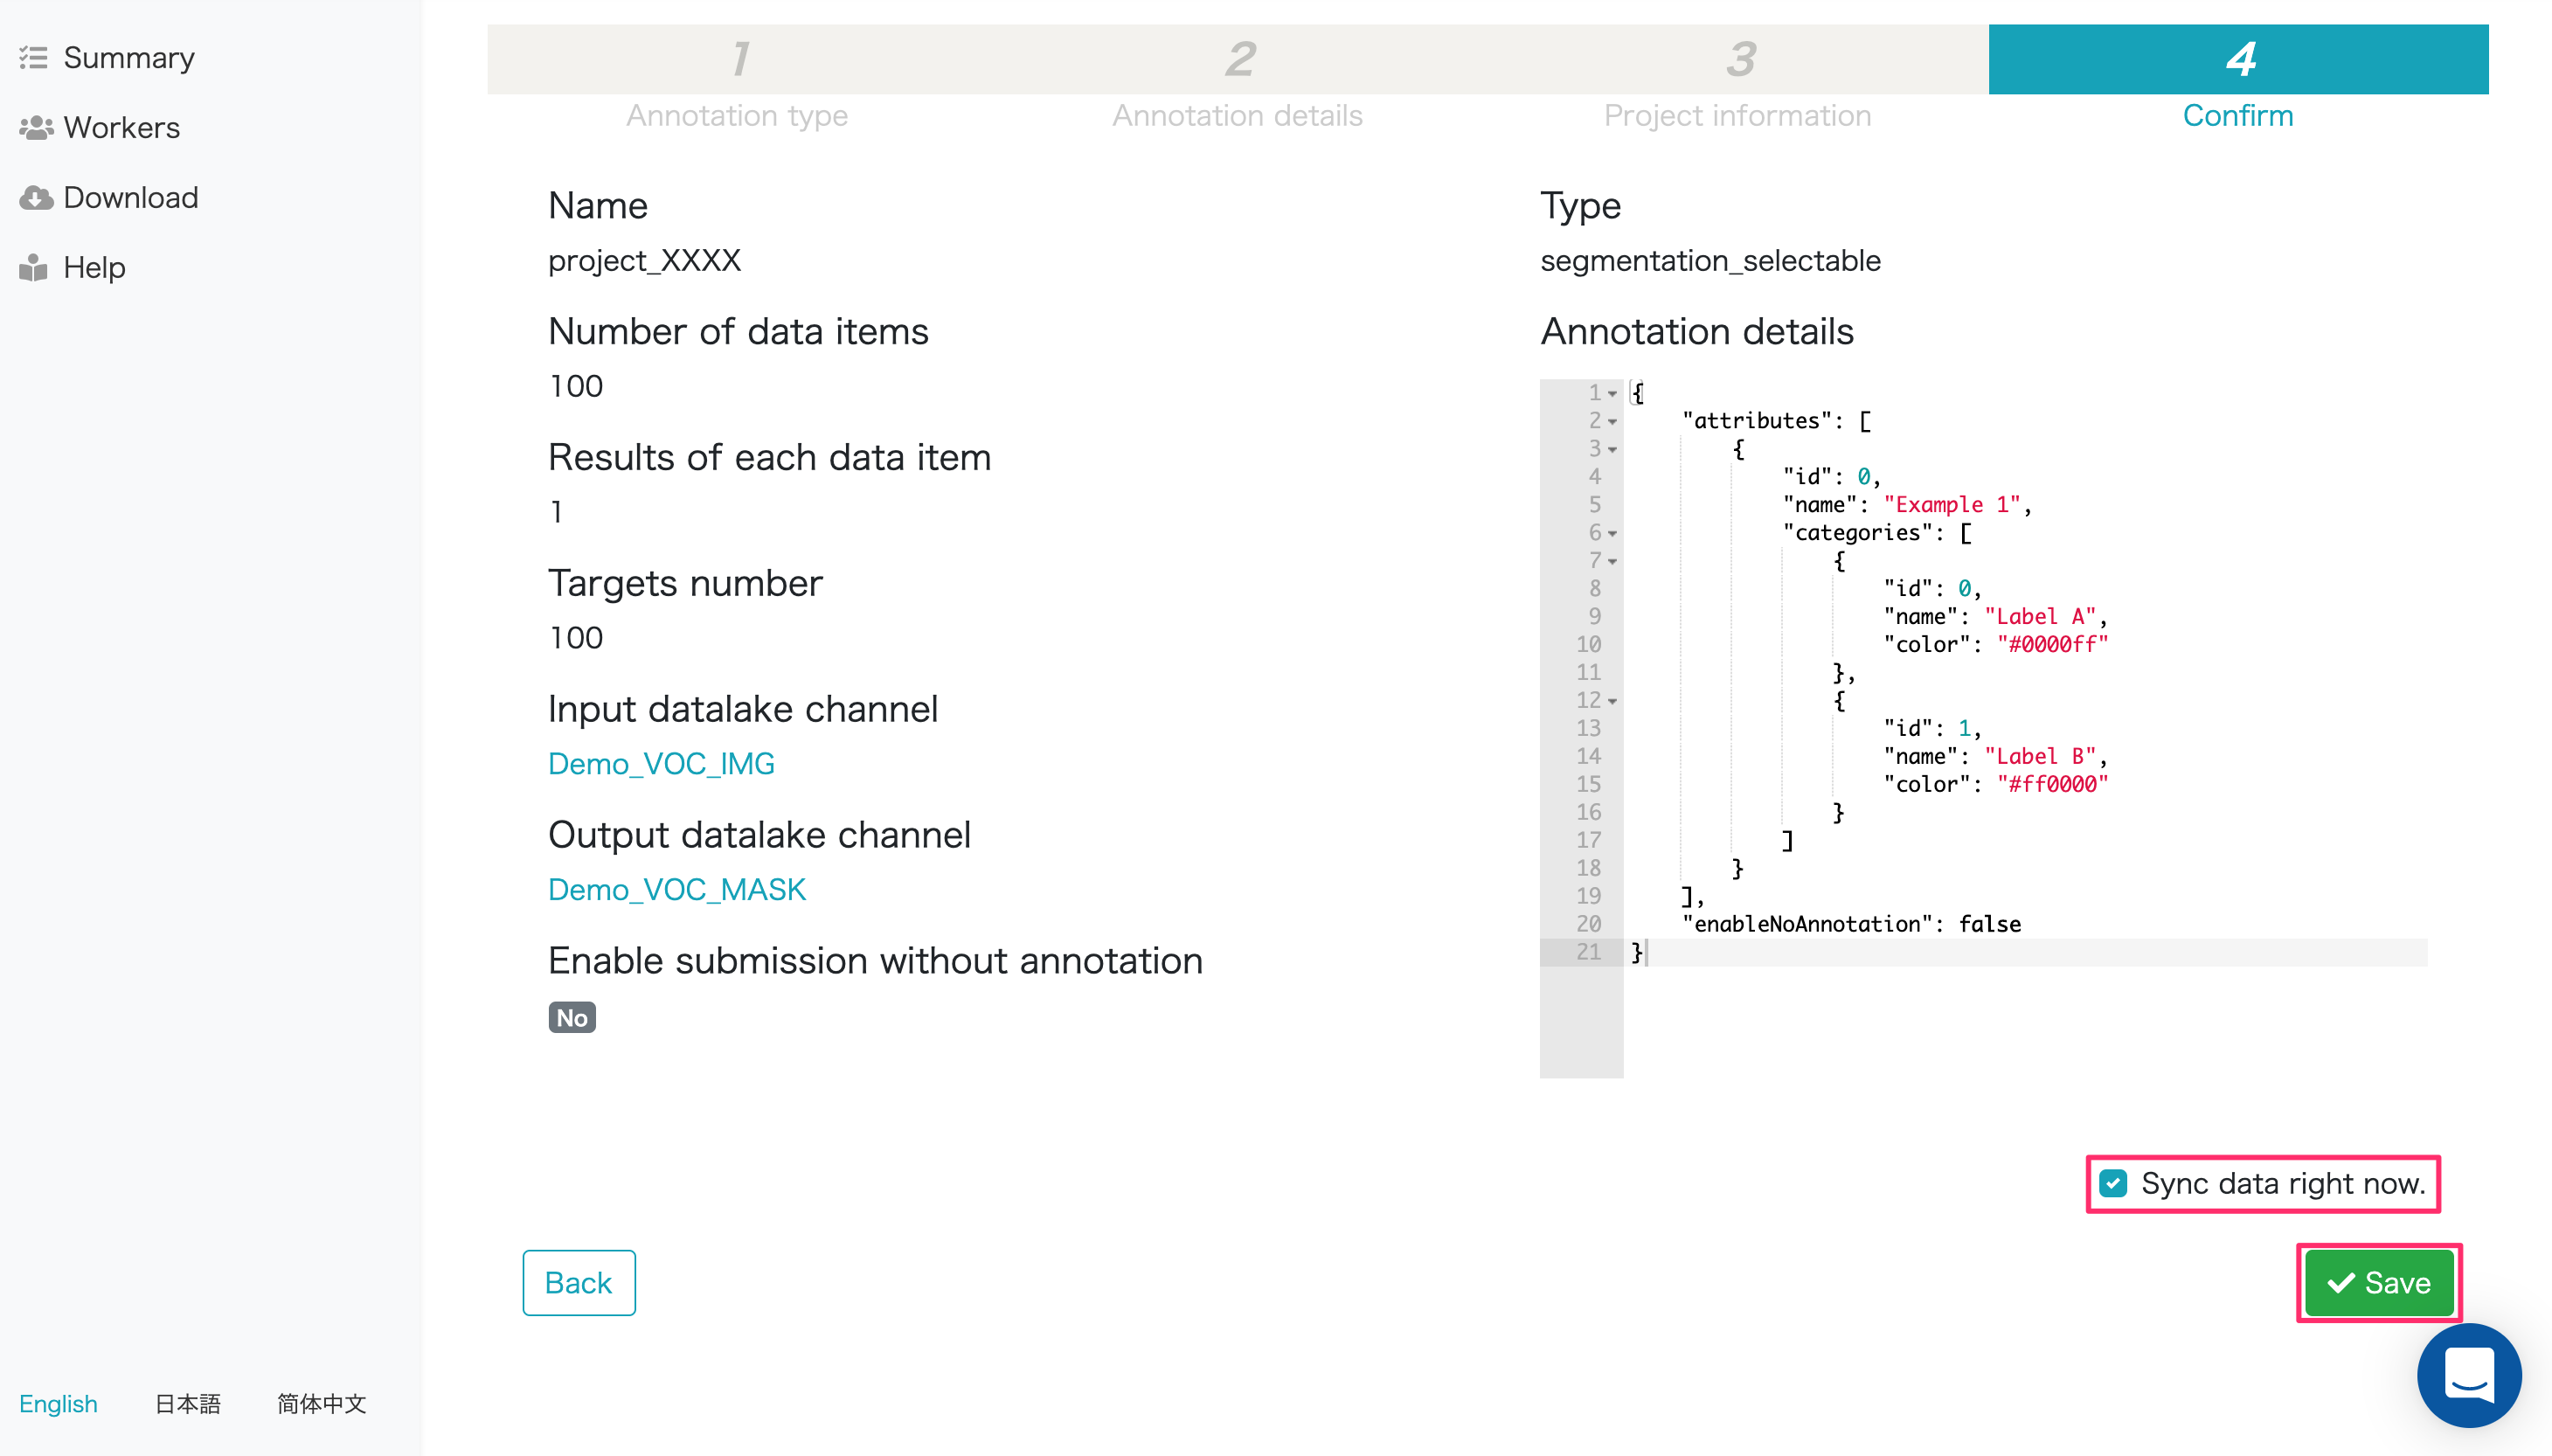
If you want to create a task immediately at the same time as creating the project, check the “Sync data right now.” Check “Save” the project Click the button.
After creating the project, the task is generated by “Sync Data” from the gear icon of the target project. Click here for details.