- Overview
- Getting Started Guide
- UserGuide
-
References
-
ABEJA Platform CLI
- CONFIG COMMAND
- DATALAKE COMMAND
- DATASET COMMAND
- TRAINING COMMAND
-
MODEL COMMAND
- check-endpoint-image
- check-endpoint-json
- create-deployment
- create-endpoint
- create-model
- create-service
- create-trigger
- create-version
- delete-deployment
- delete-endpoint
- delete-model
- delete-service
- delete-version
- describe-deployments
- describe-endpoints
- describe-models
- describe-service-logs
- describe-services
- describe-versions
- download-versions
- run-local
- run-local-server
- start-service
- stop-service
- submit-run
- update-endpoint
- startapp command
- SECRET COMMAND
- SECRET VERSION COMMAND
-
ABEJA Platform CLI
- FAQ
- Appendix
(Old)Data Upload Guide
Intoroduction
This page describes how to upload a file to the data lake using the ABEJA Platform console.
Store the data
Access to the ABEJA Platform console URL: https://console.abeja.io/
Select 「Channnel」from sidemenu.

Select「Create Channel」 on the upper right of the screen.

Input Identifier and Description. Then select「Create Channnel」.

Select the Created Channel.

Select 「Upload」 on the upper right of the screen.

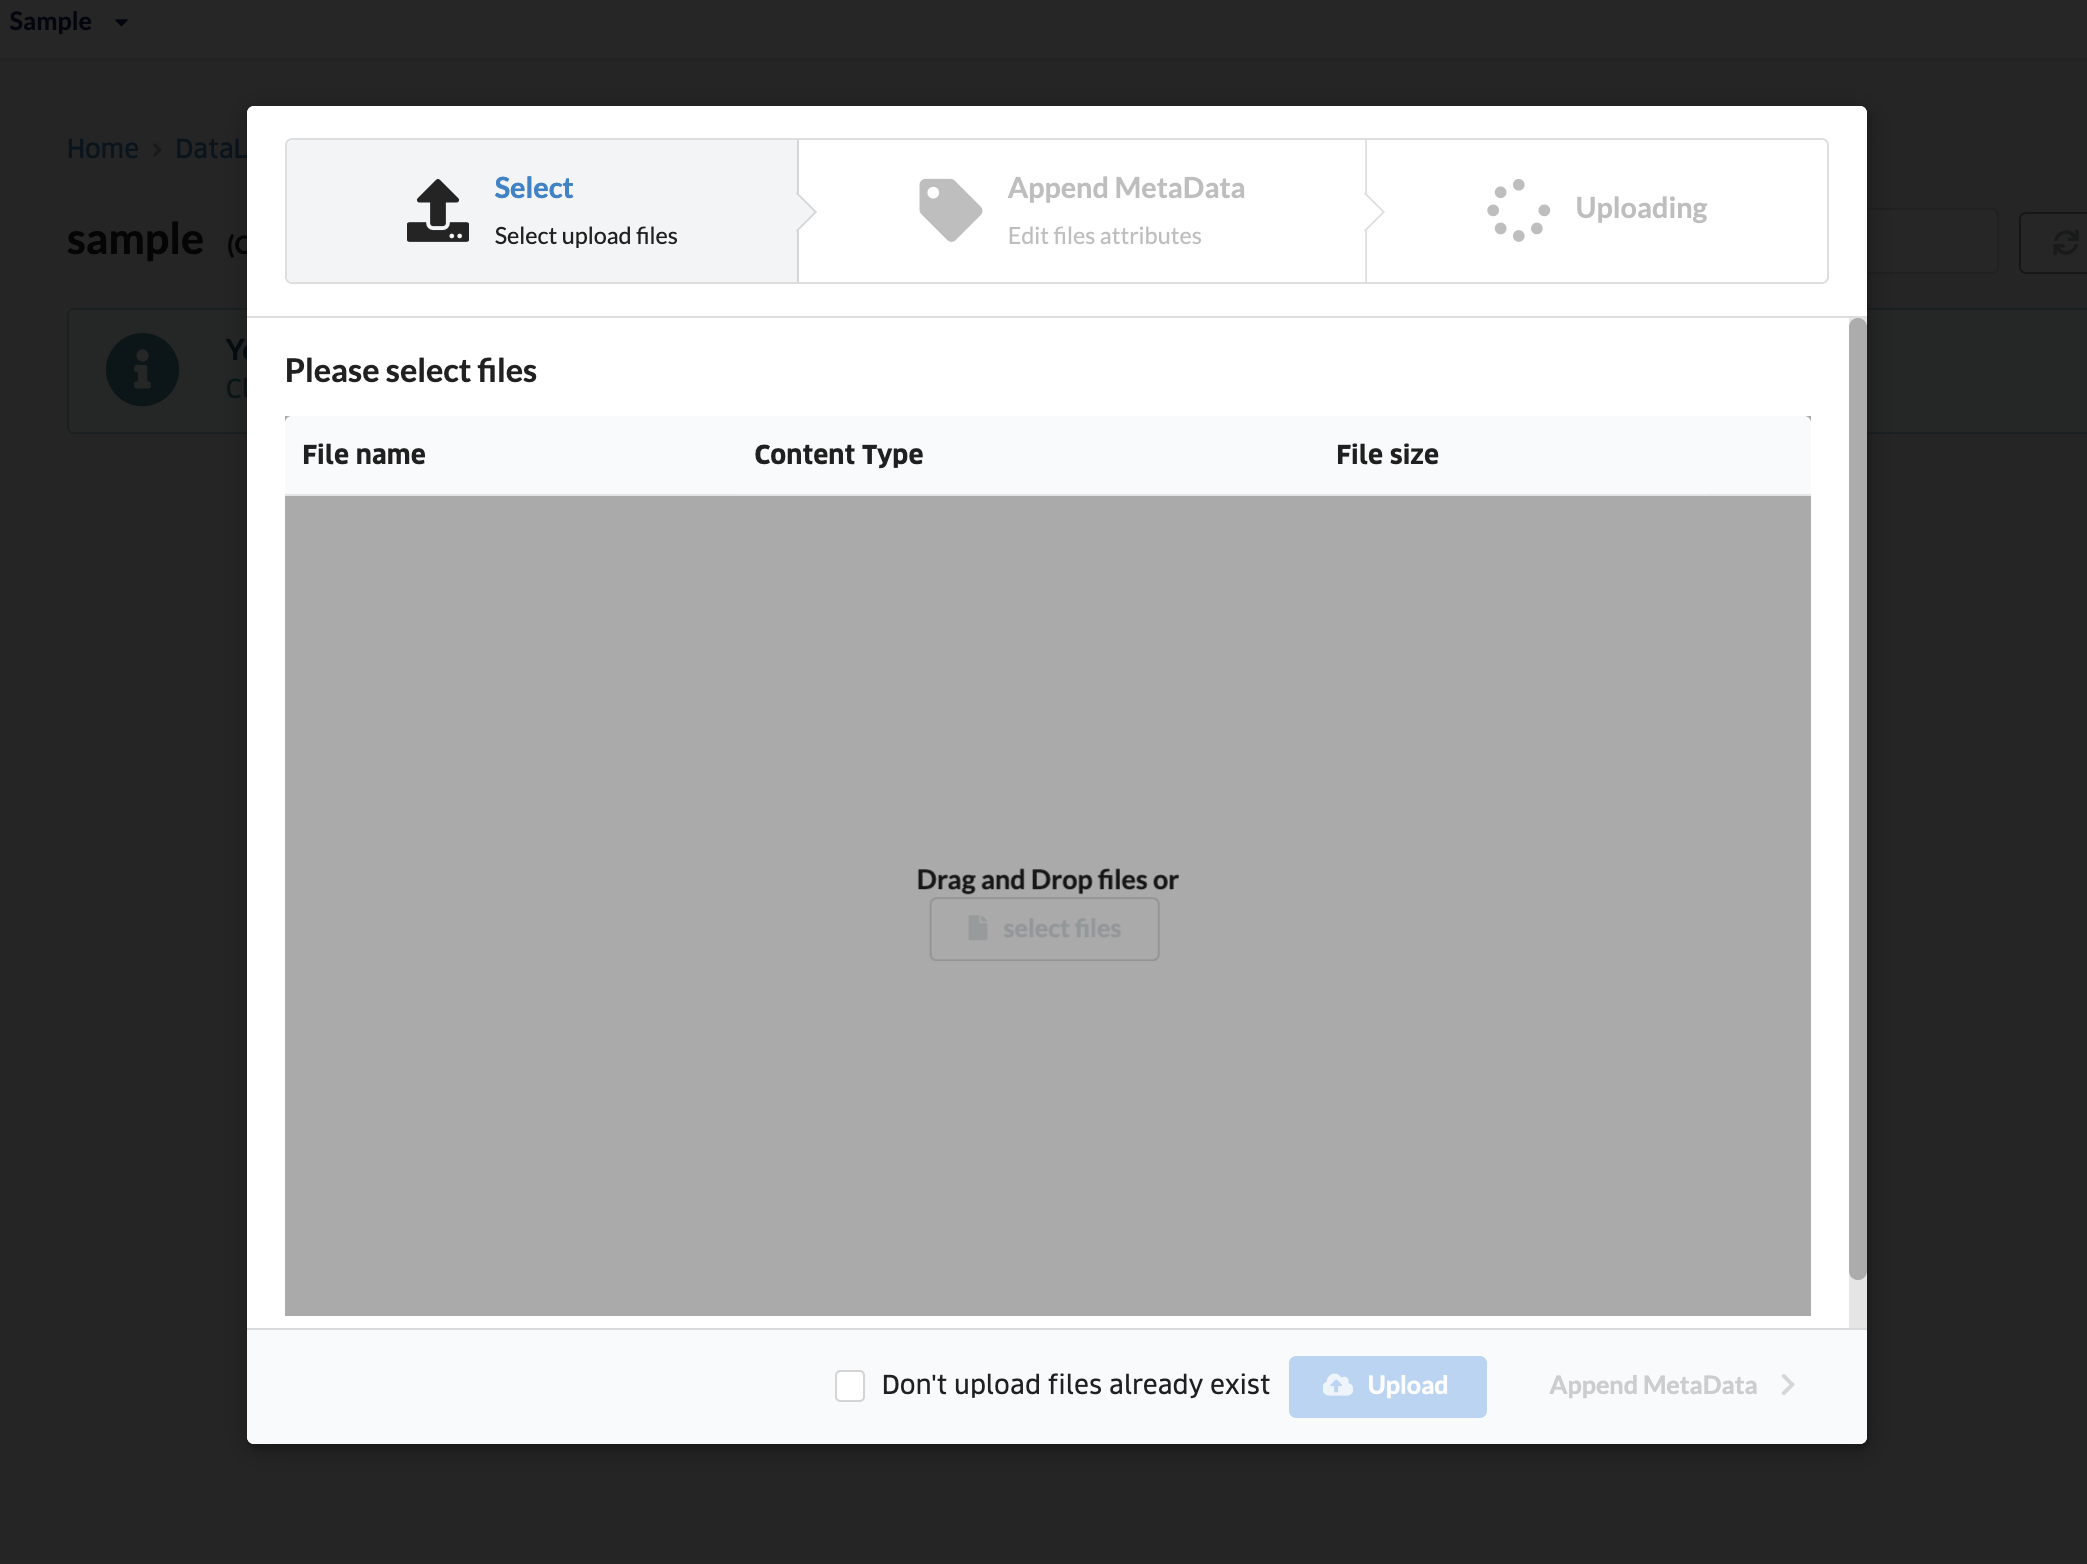
Click middle of the screen and select file from Finder(Explorer) what you want to upload. (Drug & Drop is available) Select 「Append MetaData」on the bottom right of the screen if threre is addtional MetaData information. Or just select 「upload」 if there is no addtional MetaData.
Put a check「Don’t upload files already exist」to prevent upload same file twice.

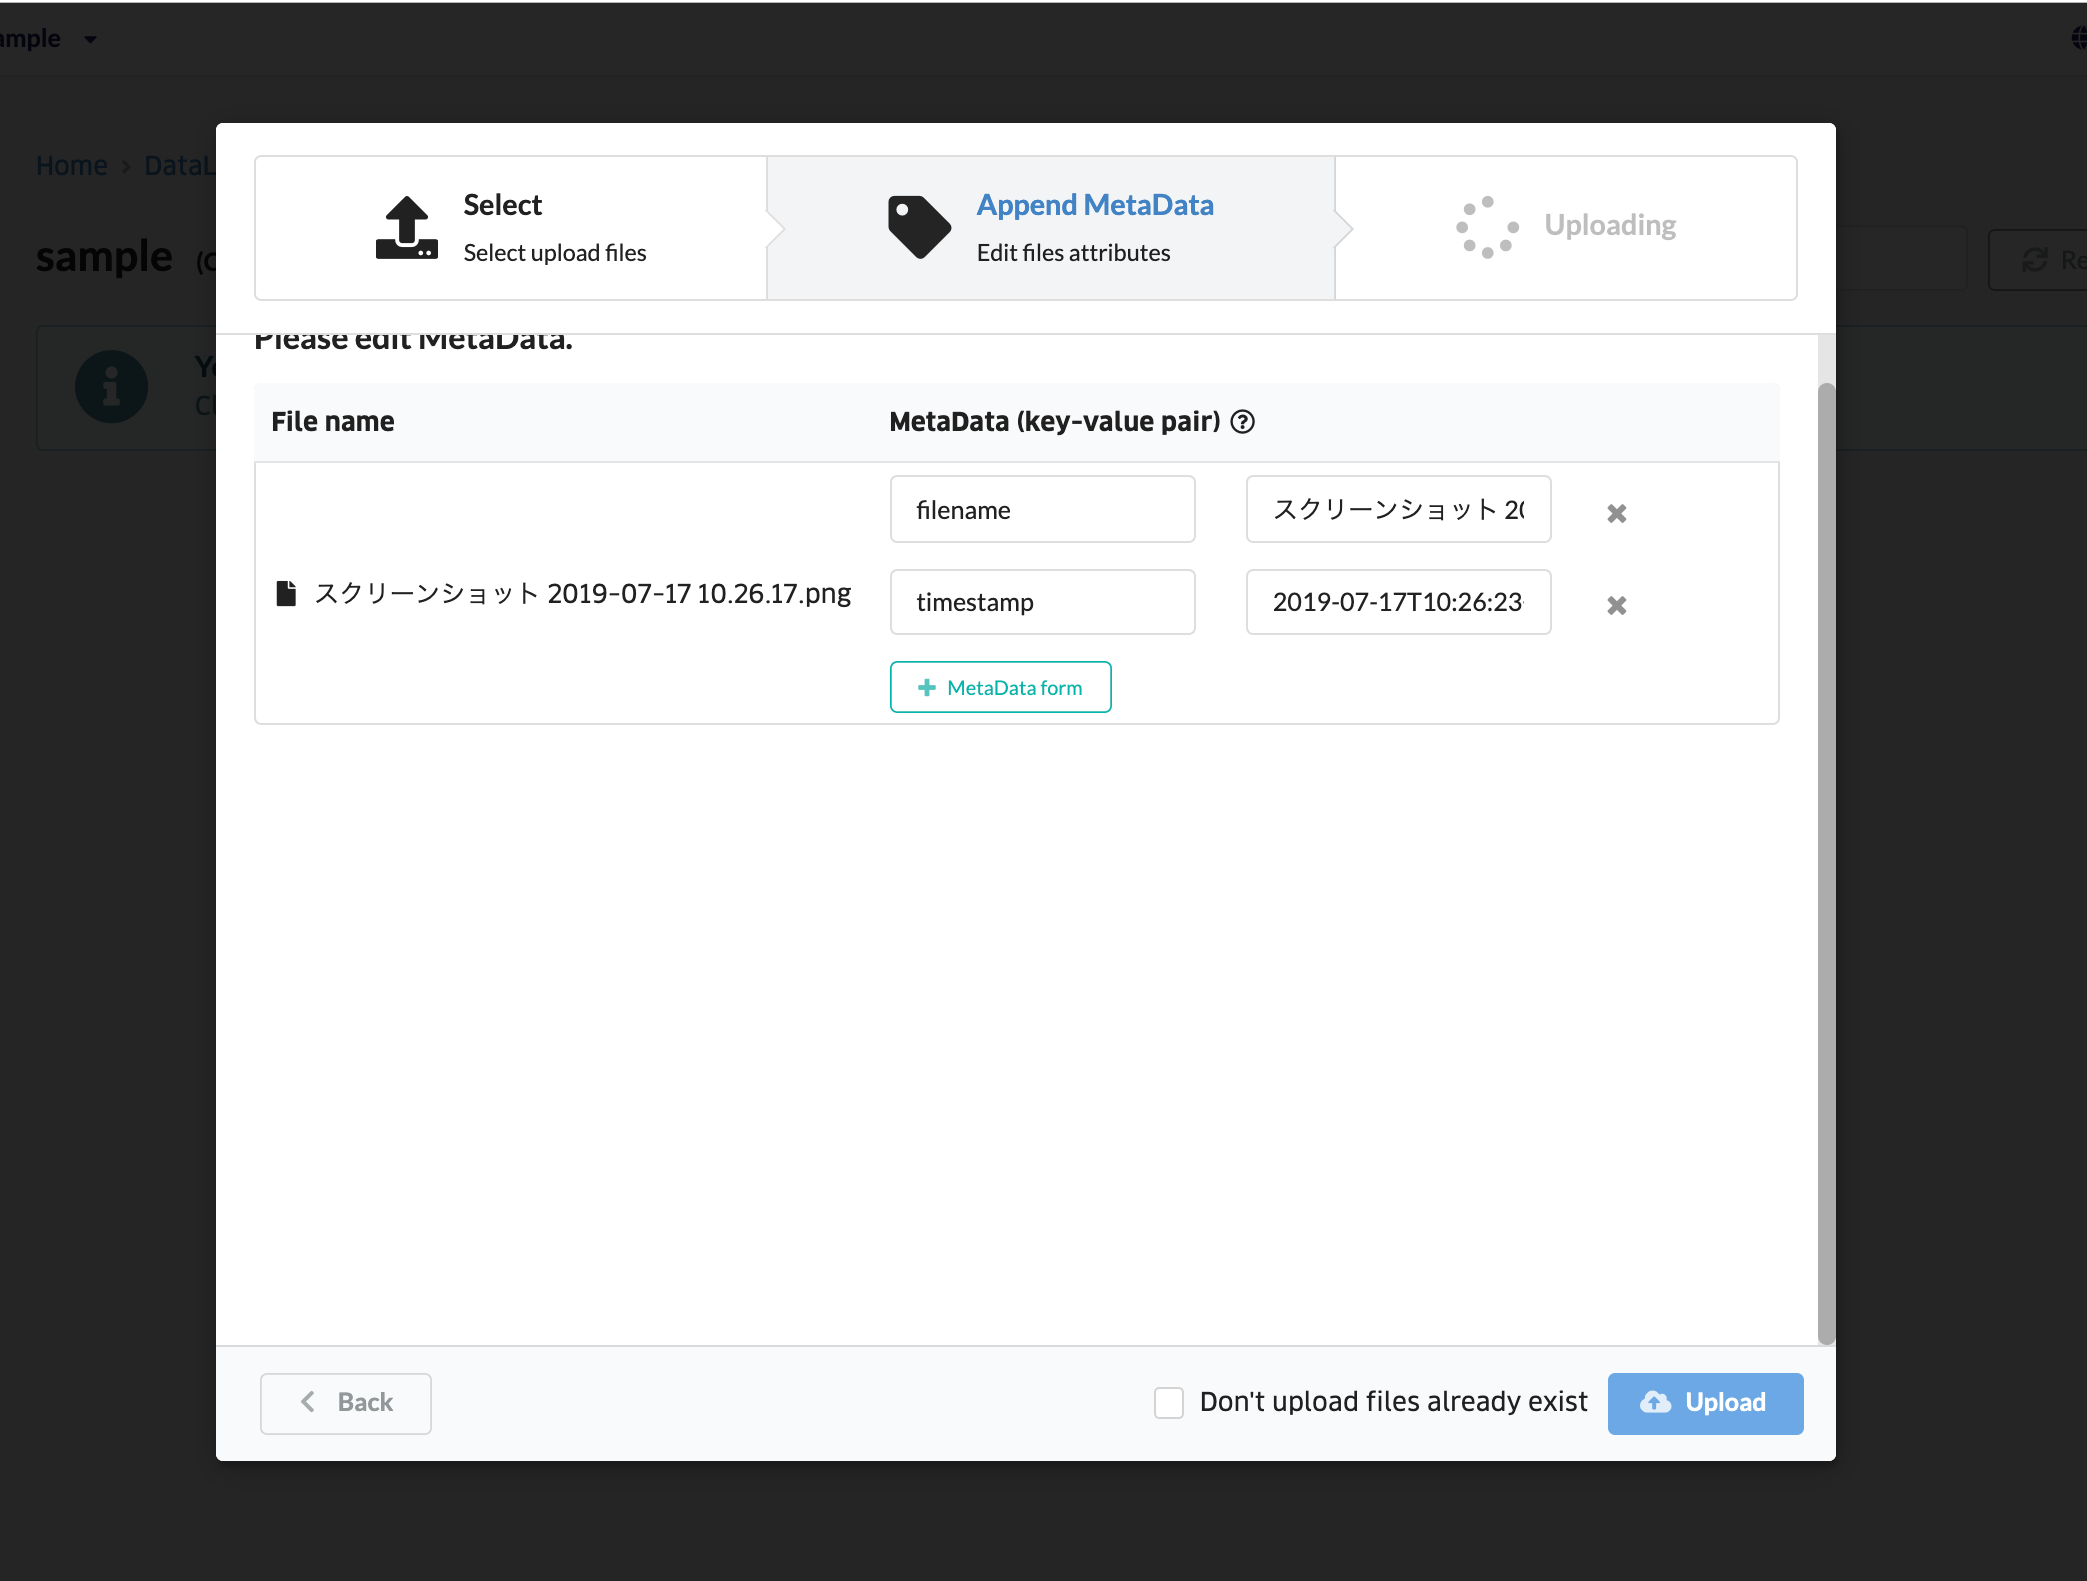
To add MataData, Select「MetaData Form」and input addtional information before select 「Upload」.
Put a check「Don’t upload files already exist」to prevent upload same file twice.

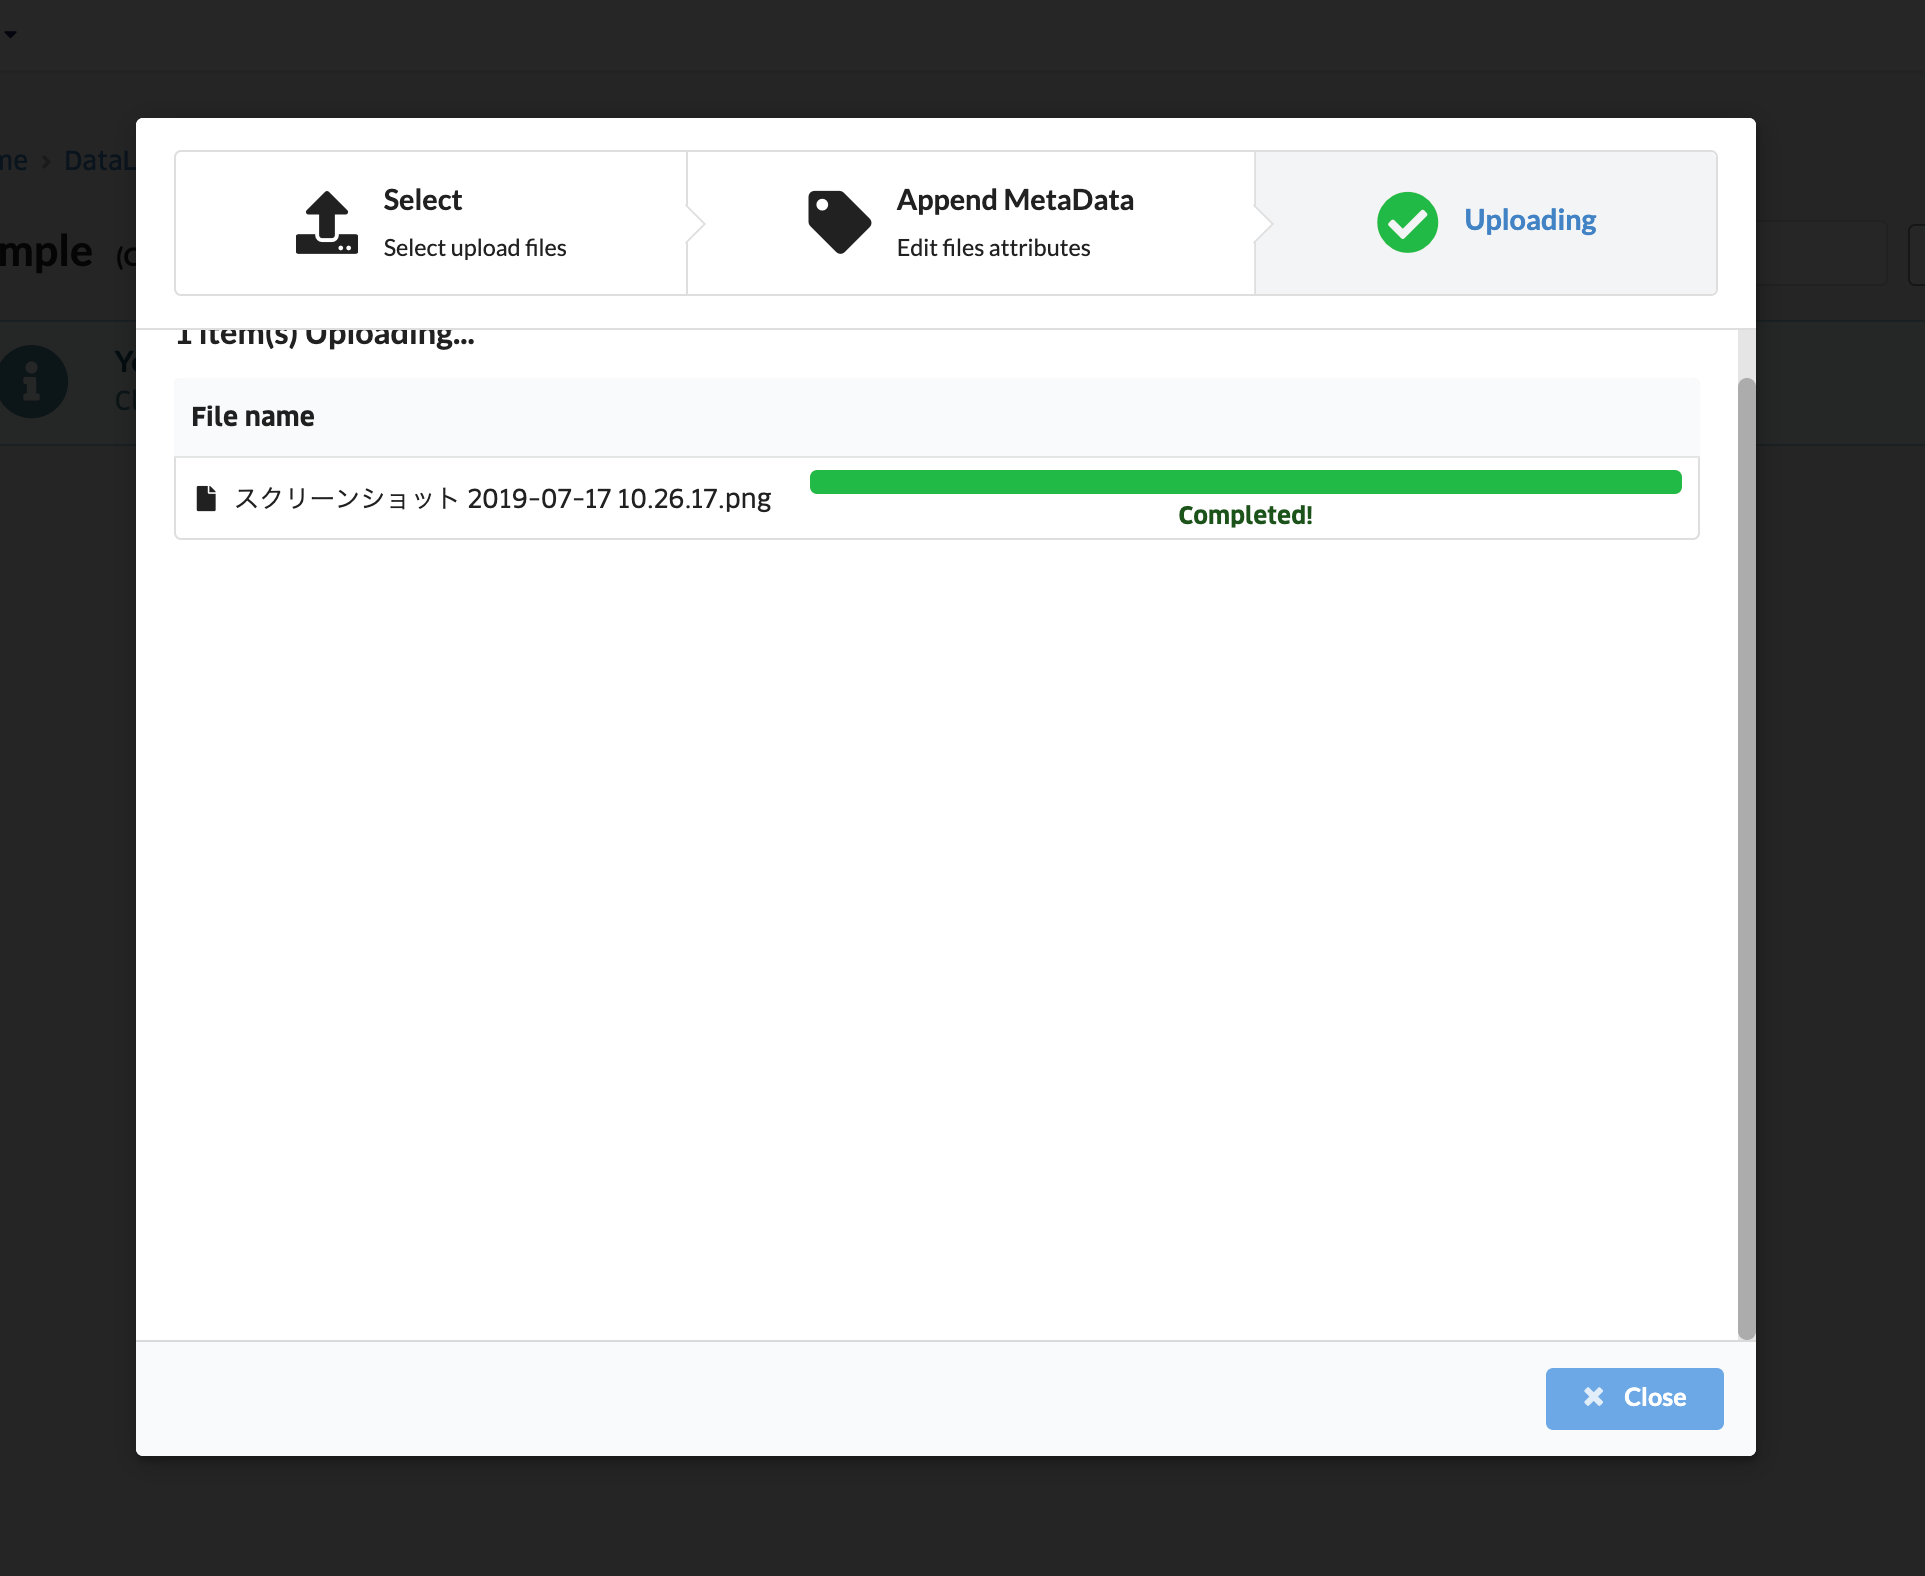
Data hase been successfully uploaded when progress bar is「Completed!」.
Select 「Close」 to return the Channnel list.

To see a Uploaded files, select the crealted file name at the Channel list.

That is the way to upload Annotation data.