- Overview
- Getting Started Guide
- UserGuide
-
References
-
ABEJA Platform CLI
- CONFIG COMMAND
- DATALAKE COMMAND
- DATASET COMMAND
- TRAINING COMMAND
-
MODEL COMMAND
- check-endpoint-image
- check-endpoint-json
- create-deployment
- create-endpoint
- create-model
- create-service
- create-trigger
- create-version
- delete-deployment
- delete-endpoint
- delete-model
- delete-service
- delete-version
- describe-deployments
- describe-endpoints
- describe-models
- describe-service-logs
- describe-services
- describe-versions
- download-versions
- run-local
- run-local-server
- start-service
- stop-service
- submit-run
- update-endpoint
- startapp command
- SECRET COMMAND
- SECRET VERSION COMMAND
-
ABEJA Platform CLI
- FAQ
- Appendix
Authentication
Introduction
This page explains how to get credential information in the management console. ABEJA Platform uses authentication information and can operate with API and CLI.
Organization ID / Name / User ID
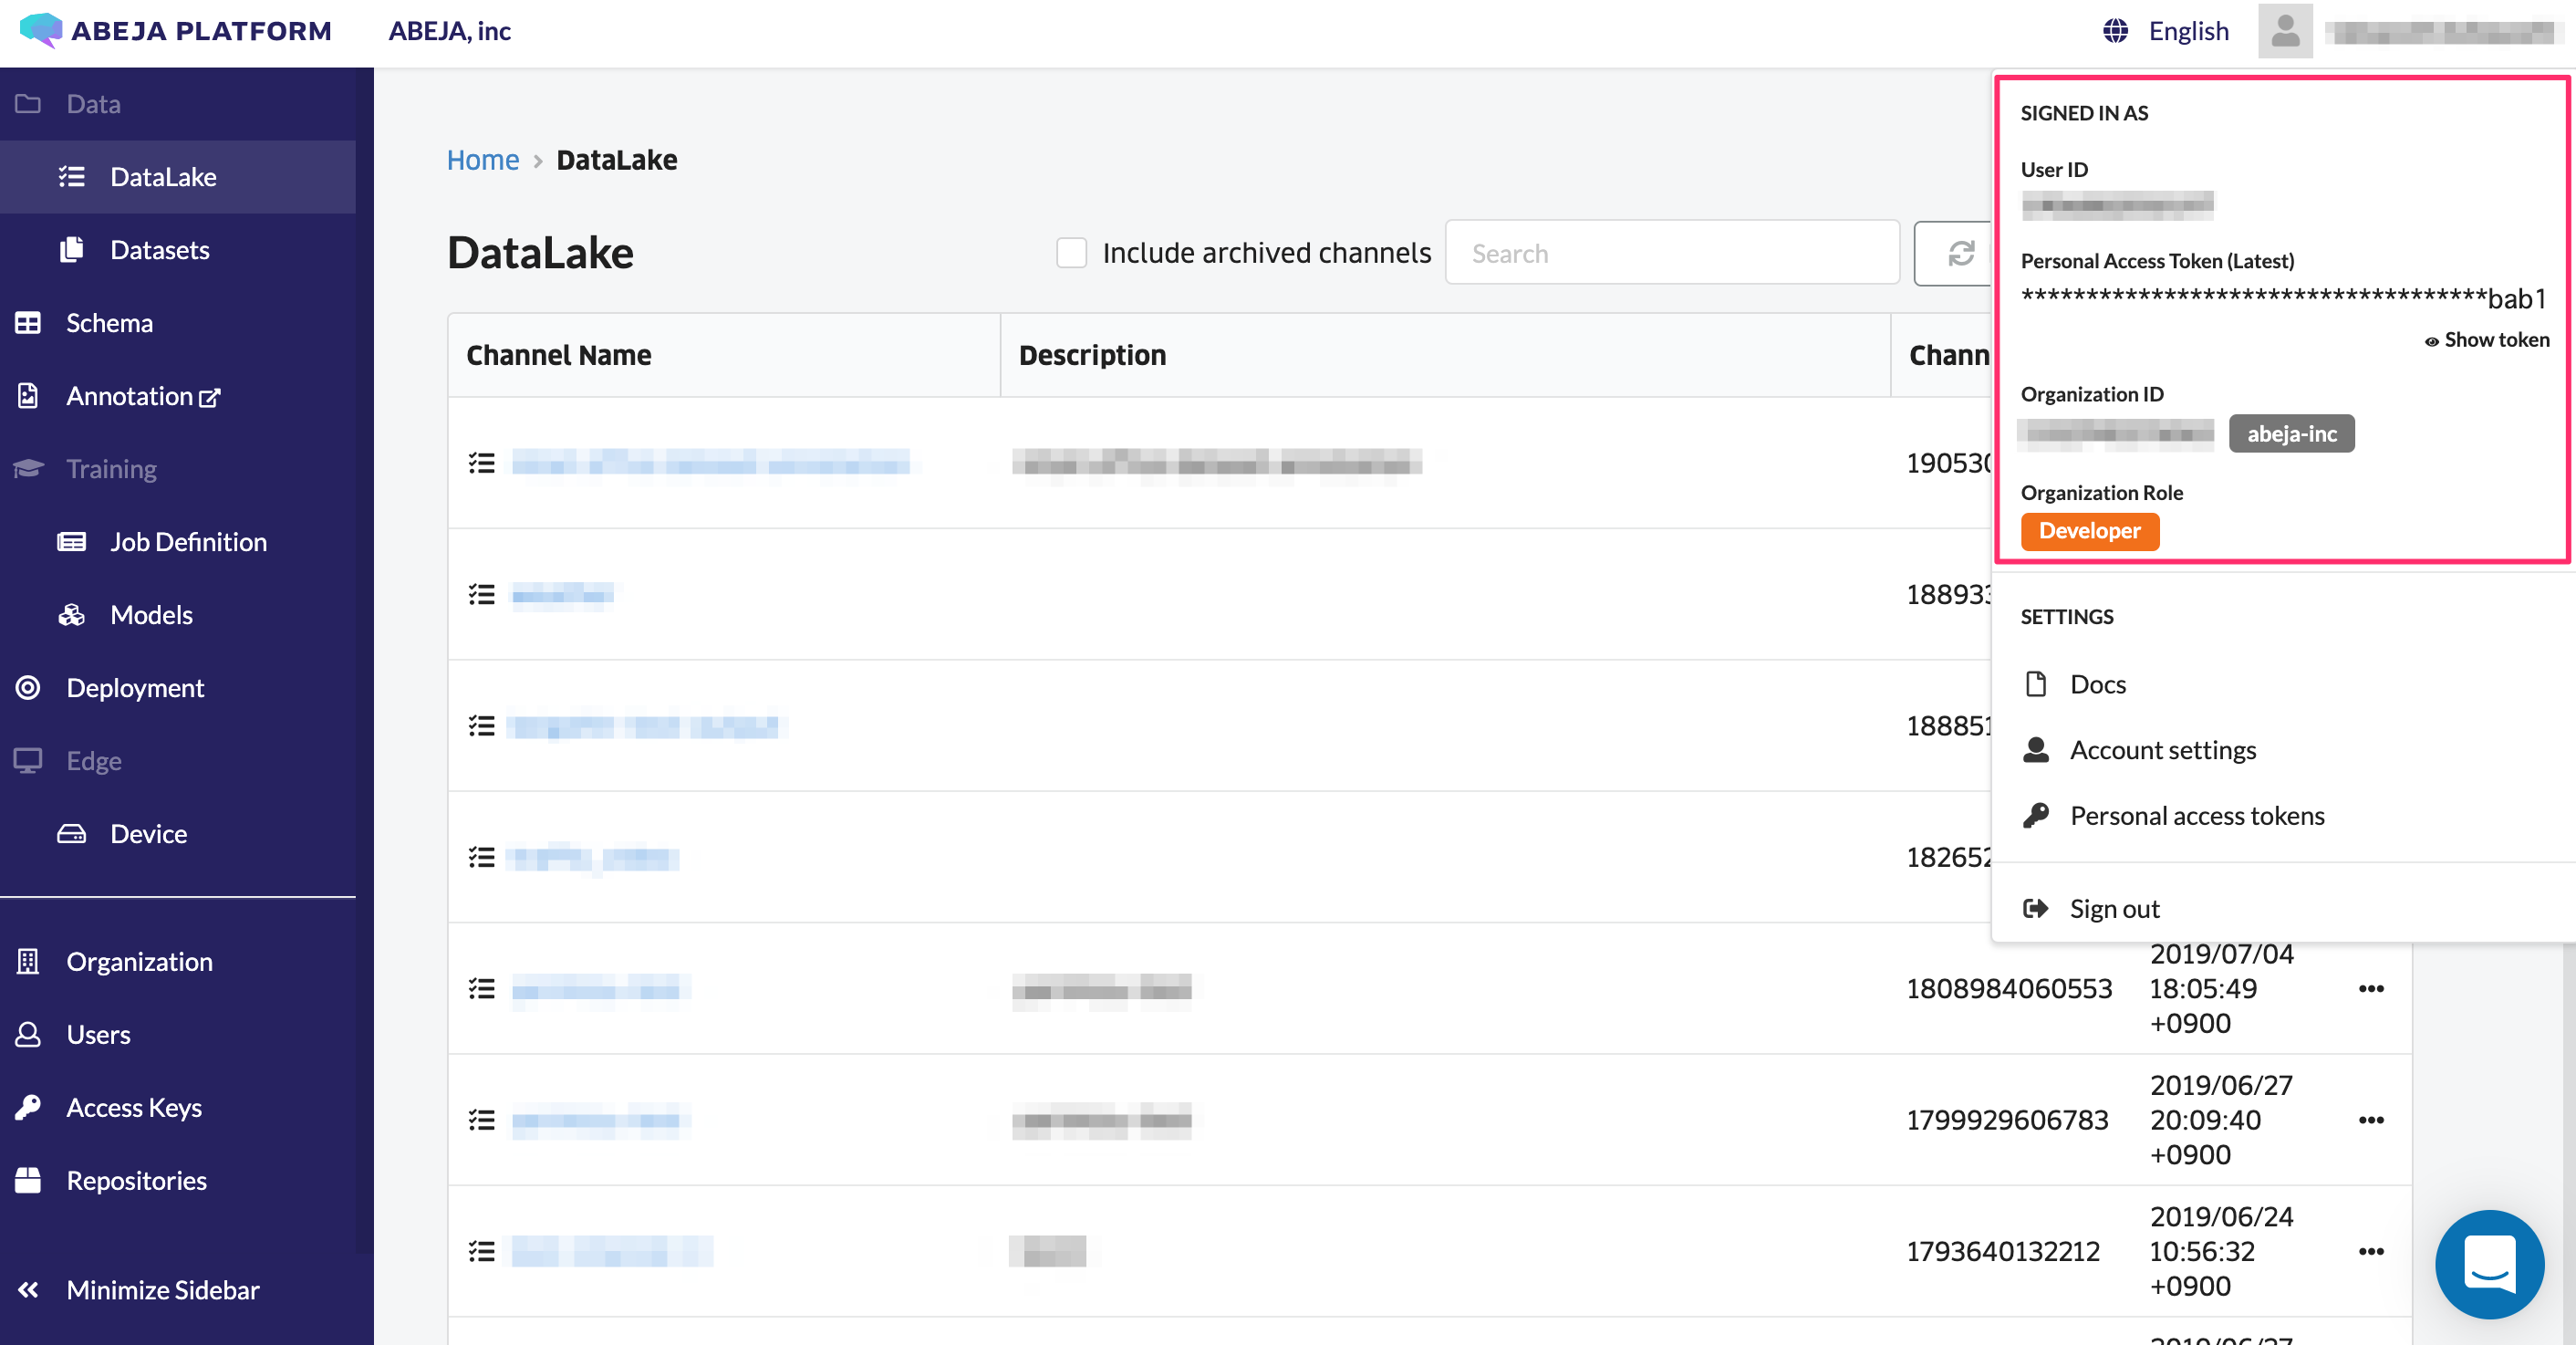
By clicking the registrant name in the upper right of the screen, you can find organization id, name and User ID.
| Item | Description |
|---|---|
| User ID | ABEJA Platform User ID |
| Personal Access Token | Authentication token for users |
| Organization ID/Organization Name | Organization ID and Name |
| Organization Role | User Authority “Admin・Developer・Regular” |

Organization
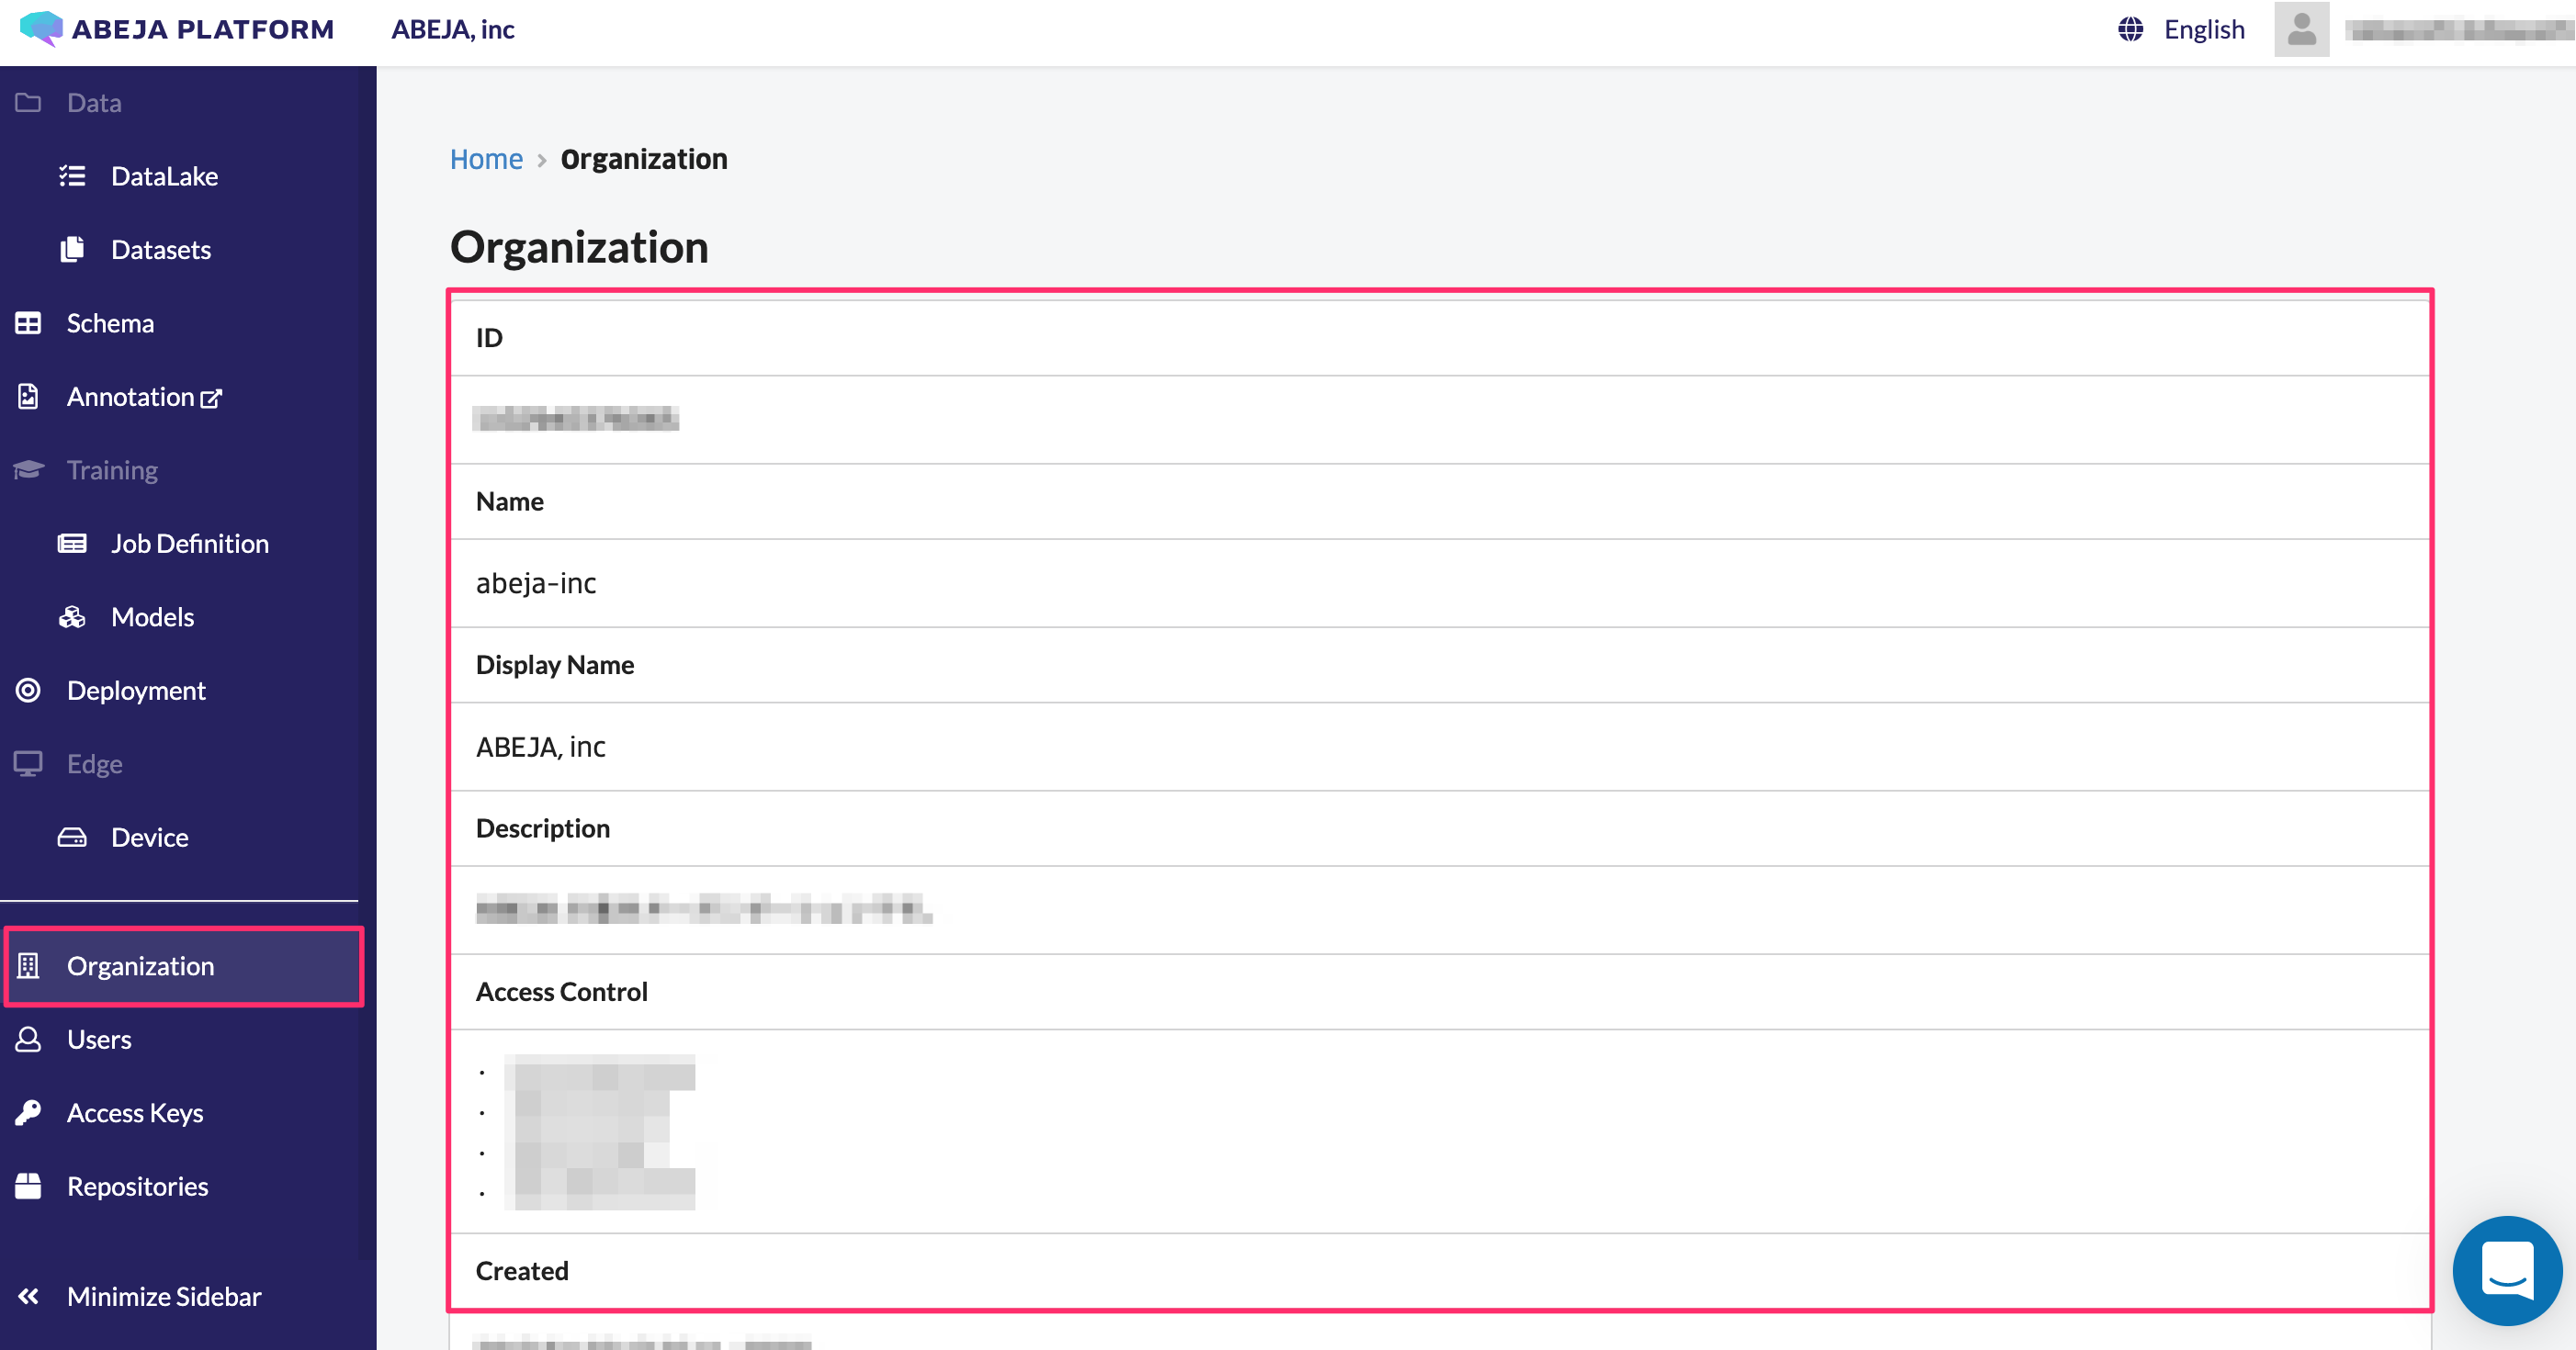
By clicking Organization in the side menu, you also can find organization ID and name.

Personal Access Token
Creating a personal access token needs to be done in the initial setup process. If you need additional authentication tokens, you can create additional ones according to the following procedure.
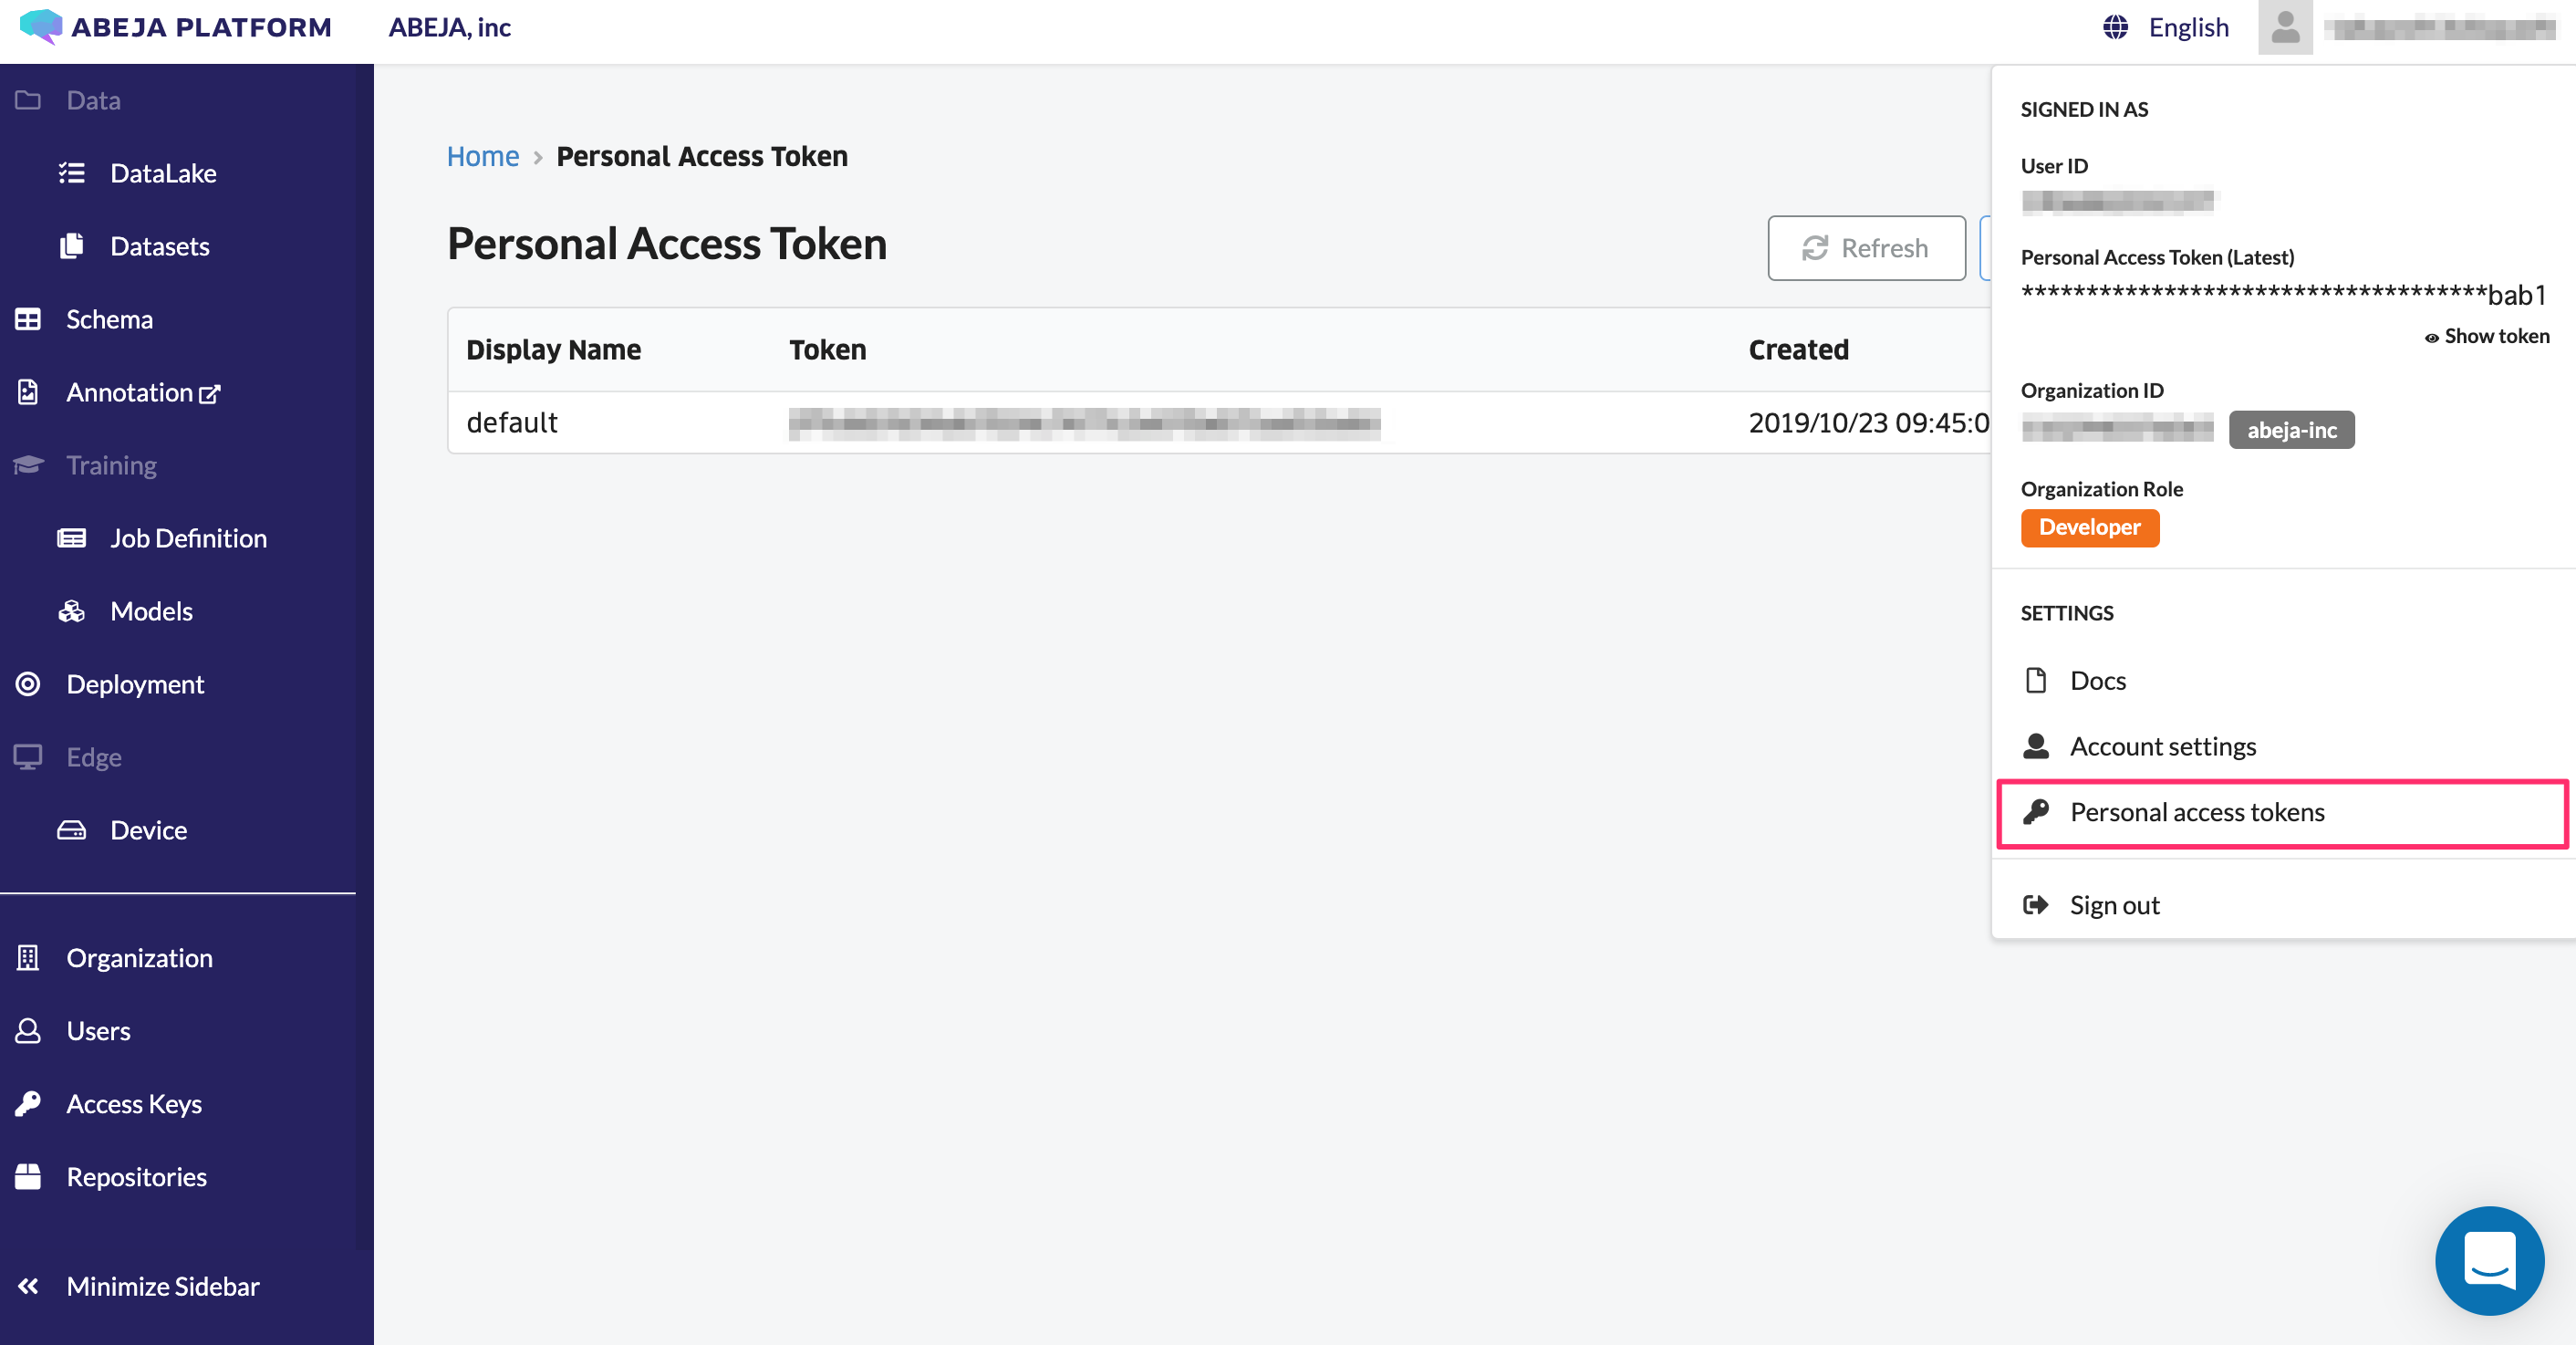
You can click the registrant name in the upper right corner of the screen and select Personal access tokens.

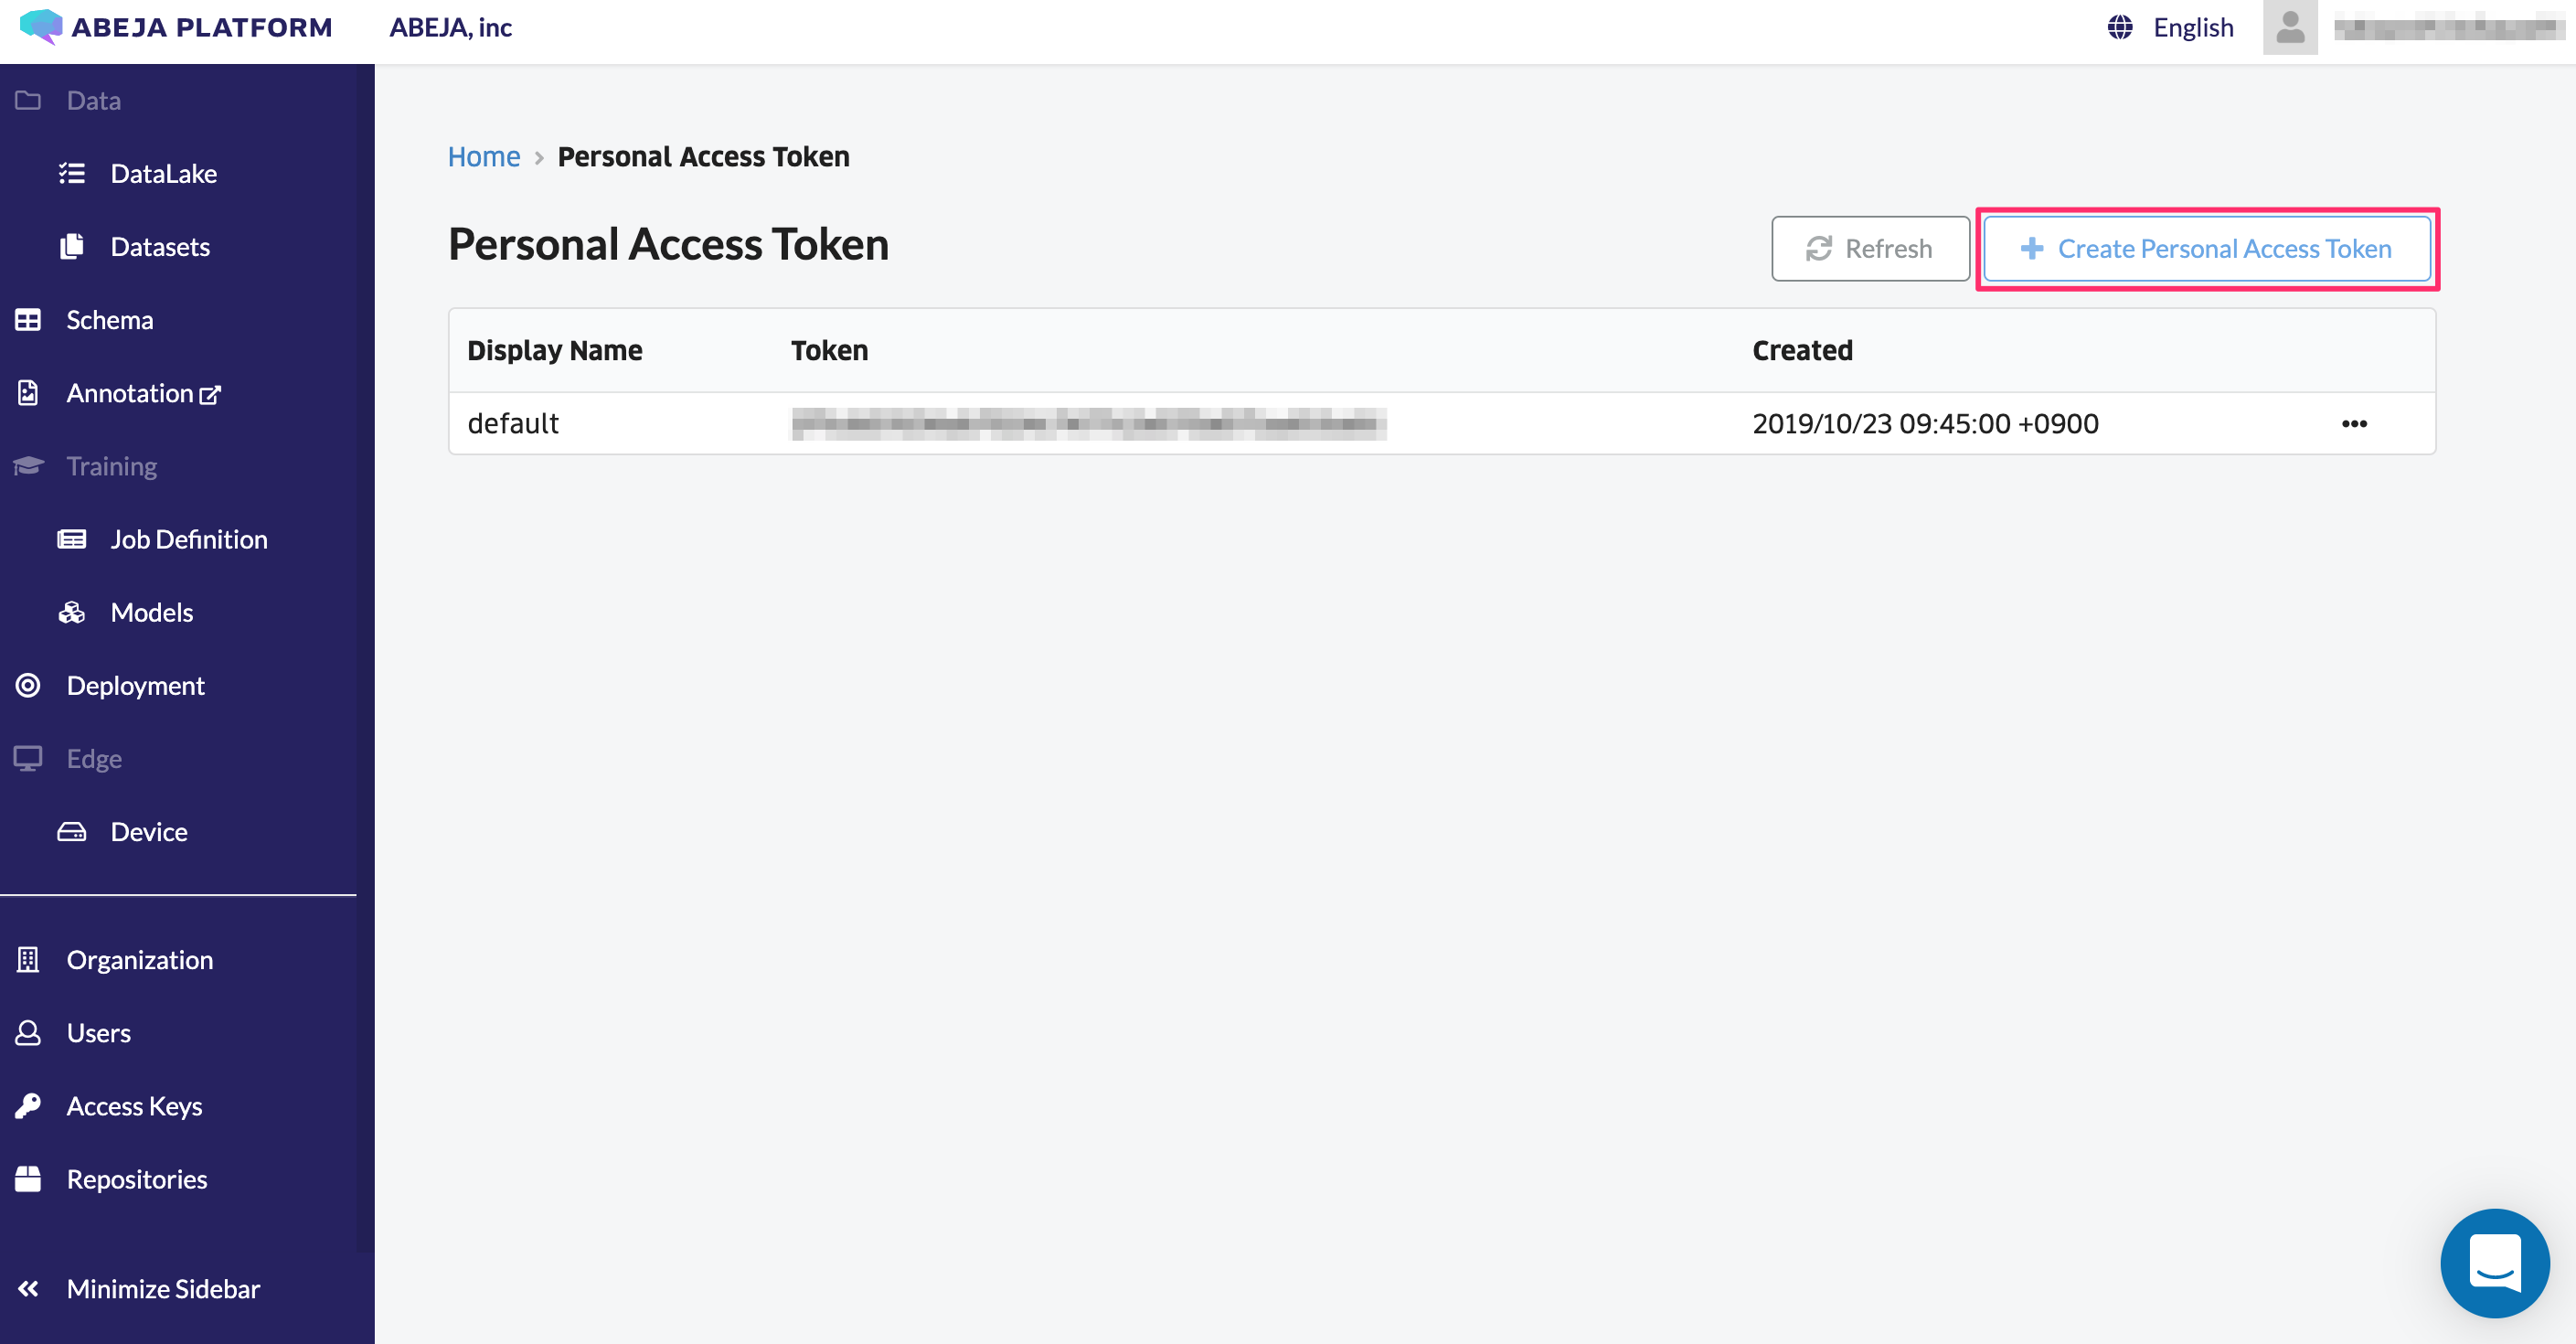
Click on Create Personal Access Token to create a new access token.
After inputting an arbitrary name in Token name field, a personal access token is created by clicking the Create button in the lower right corner of the screen.

You can find the token you have created on the personal access tokens page.