- 概要
- スタートアップガイド
- ユーザガイド
-
リファレンス
-
ABEJA Platform CLI
- CONFIG COMMAND
- DATALAKE COMMAND
- DATASET COMMAND
- TRAINING COMMAND
-
MODEL COMMAND
- check-endpoint-image
- check-endpoint-json
- create-deployment
- create-endpoint
- create-model
- create-service
- create-trigger
- create-version
- delete-deployment
- delete-endpoint
- delete-model
- delete-service
- delete-version
- describe-deployments
- describe-endpoints
- describe-models
- describe-service-logs
- describe-services
- describe-versions
- download-versions
- run-local
- run-local-server
- start-service
- stop-service
- submit-run
- update-endpoint
- startapp command
- SECRET COMMAND
- SECRET VERSION COMMAND
-
ABEJA Platform CLI
- FAQ
- Appendix
カスタムイメージの利用
カスタムイメージの利用
カスタムイメージは現段階では以下の機能でのみ利用可能です。
- ノートブック (Jupyter Notebook)
- 学習ジョブ
- モデル作成
※ エッジ / バッチ / トリガーなどの機能では現状未対応となっております
Jupyter Notebook
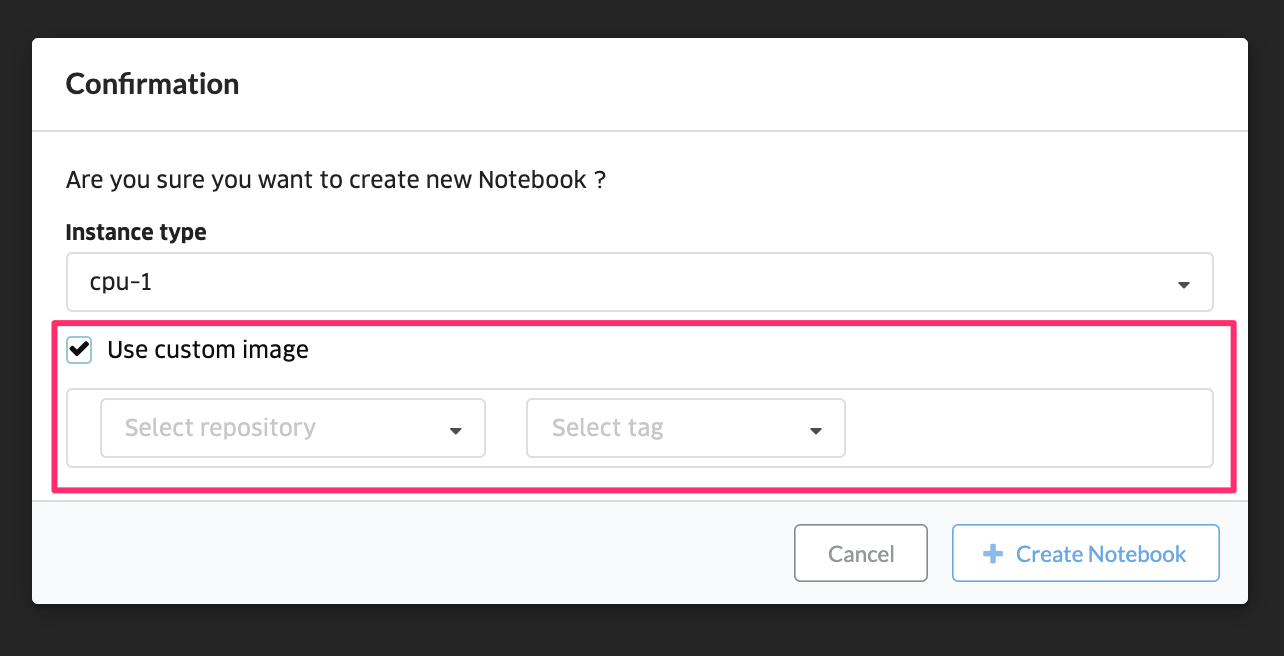
Notebook 起動時に Custom image 利用を選択。 リポジトリとタグを入力し、カスタムイメージを指定します。

学習ジョブ
学習ジョブ定義作成 ( CREATE-JOB-DEFINITION ) 時に利用する”training.yamlの” image に “custom/{organization_id}/{repository_name}:{tag_name}” 形式でカスタムイメージを指定します。
サンプル:training.yaml
name: training1
handler: train:handler
image: custom/{organization_id}/{repository_name}:{tag_name}
datasets:
  "mnist": "1111111111111"
モデル作成
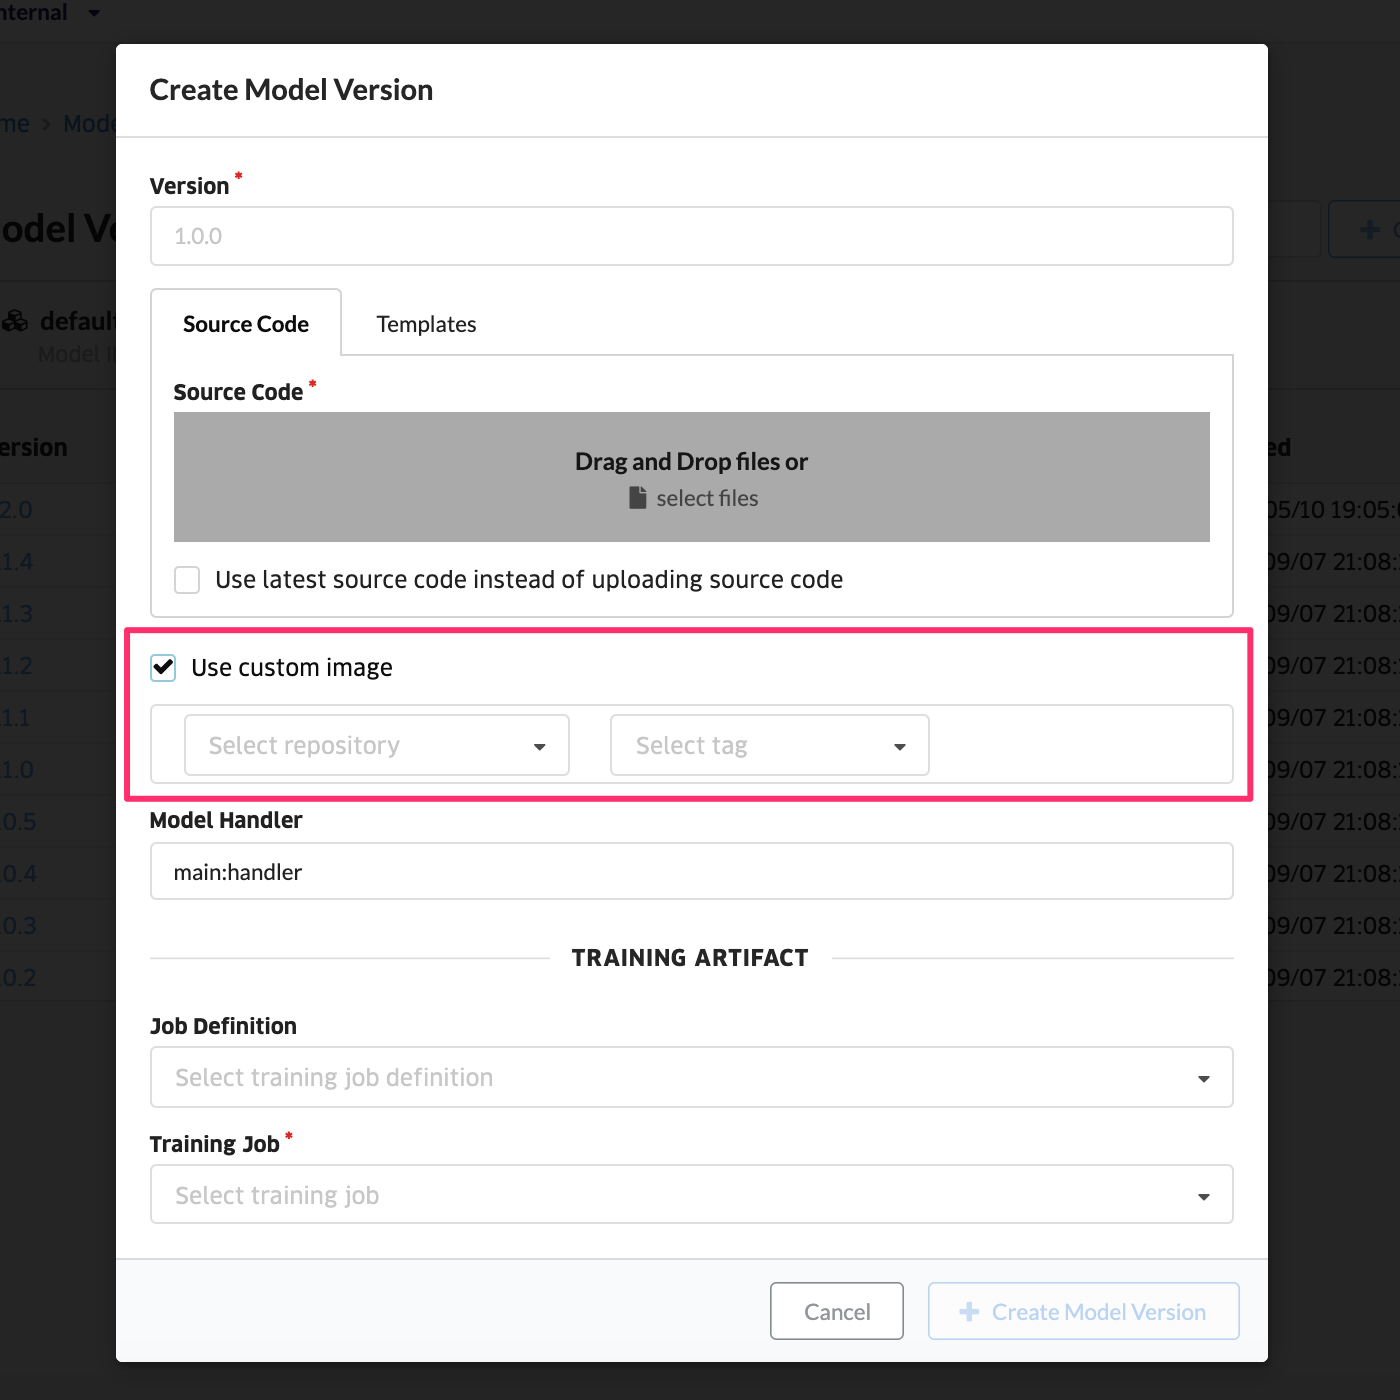
管理画面からの場合、Model 作成時にCustom image 利用を選択。リポジトリとタグを入力し、カスタムイメージを指定します。

CLIの場合、利用する引数 image に custom/{organization_id}/{repository_name}:{tag_name} 形式でカスタムイメージを指定します。
CLIコマンド例
$ abeja model create-version --model_id 1234567890123 --version "0.1" --image "custom/{organization_id}/{repository_name}:{tag_name}" --handler "main:handler"